Which Debris Loader is Right for You?

Billy Goat debris loaders vacuum up lawn debris, chop them up, and drop them into your truck bed or trailer. This saves time on cleanup jobs, and the compacted debris cost less to dispose of. Which debris loader model will deliver the best return on your investment?
 
 
How Much Power do These Loaders Have?
 
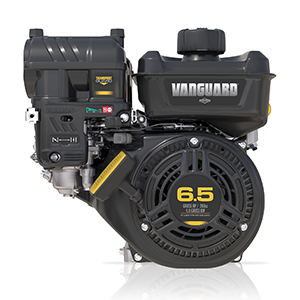
The DL13 is powered by a single cylinder Honda GX-Series engine, while the DL14 and DL29 use Vanguard V-Twins. Glancing at the horsepower ratings, you would think that the DL13 and DL14 are evenly matched, while the DL29 should have twice the performance. However, the vacuum ratings tells a different story.
 
DL1302H: 2,100 CFM
DL1402VE: 3,700 CFM
DL2901VE: 4,400 CFM
 
Why is the DL14 so much closer to the DL29 than the DL13? The DL13 uses a smaller impeller that can pump loads of air, but doesn’t chop heavy debris as well as the other models. The DL29 has a massive impeller with 12 blades, four more than the DL14. This reduces air flow, but it helps the loader chew through large quantities of debris. All three models have Piranha blades, which have edges that slice through grass and leaves, compacting them up to 12:1.
 
Which model has enough power for your needs? The DL13 is great for small crews, while the DL14 is aimed at contractors and regular municipal use. The DL29 is targeted at municipalities that need to clean massive areas, like parks and campuses.
 
 
What are My Options for Mounting?
 
While most debris loaders on the market require some custom fabrication for mounting, Billy Goat’s CustomFit system gives you some options:
 
– Use the holes in the skid to bolt the loader to a trailer
– Bolt the loader to a CustomFit trailer
– Hang the loader on a truck or trailer tailgate using a CustomFit hanger kit,
– Attach a CustomFit Swing Away hitch and slide the loader into your truck or trailer’s hitch receiver.
– Attach a CustomFit Stake Body Swing Away hitch and slide it into one of the stake supports on your flatbed truck or trailer.
 
Every debris loader is mounted to a skid with fork pockets. You can use a fork lift to position the loader, or transfer it between vehicles if you use a hanger or swing away hitch. The DL2901 is too big for a hanger kit or swing away hitch, but it can be mounted to a trailer.
 
Here’s what these machines weigh without adding accessories:
 
DL1302H – 230 lbs.
DL1402VE – 280 lbs.
DL2901VE – 490 lbs.
 
Both the DL1302 and 1402 are 32.25 inches tall from the factory, and you can add extensions to the chute for more reach. The DL2901 is almost 75 inches tall before adding extensions.
 
Billy Goat makes horizontal and vertical extensions, as well as swiveling mounts that let you turn the entire chute. You can add up to 5 feet of horizontal reach with an extension hose, or use a deflector to aim the flow of debris into your truck or trailer. The vertical extension adds 15 5/8 inches of height. You cannot use this extension with the rotational chute kit.
 
 
Get the Parts and Accessories You Need for Your Billy Goat
 
When you need something for your Billy Goat, go to Billy Goat Parts.  We carry the full line of OEM parts and accessories for your equipment, including extensions, mounting kits and replacement hoses for all of the company’s debris loaders.Check out or commonly ordered parts pages for fast ordering. We also have a search engine that can show you diagrams and parts information specific to your model. Visit us at www.billygoatparts.com. We ship across the United States and Canada.

Posted in Uncategorized | Leave a comment

Mounting a Billy Goat Debris Loader

Do you need to get your Billy Goat debris loader to work with your trailer or truck? Here’s everything you need to know about installing and using CustomFit mounts and discharge chute accessories.
 
 
Truck Hanging Kit
 
This kit lets you hang your loader on the side of your truck or trailer’s tailgate. Keep in mind that you need a strong gate to use this mount. While a truck or dump bed should be strong enough, a ramp gate will bend under the weight.
 
1. Slide the arms into the fork pockets on the loader’s skid. Bolt the arms to the skid using the included hardware. The small carriage bolts goes through the top, while the washer and nut go on the bottom.
 
2. Screw the large carriage bolts into the tops of the arms and through the included clamps.
 
3. Hang the loader off of the tailgate of your truck or trailer, and screw in the carriage bolts to clamp onto the surface. After an hour of use, check the tightness of the clamps.
 
 
Swing Away Hitch
 
Billy Goat offers both stake bed and trailer hitch versions of this CustomFit mount. The trailer hitch attachment requires a Class III or stronger hitch receiver.
 
1. Insert the pivot pins into the holes on the sides of the hitch/stake mount.
 
2. Bolt the hitch to the center holes in the fork pockets using the included hardware. The carriage bolts should sit flush with the top of the hole.
 
3. If you’re using the hitch mount, attach it to your truck’s receiver using the safety chains, arm pin and cotter pin, like you would when connecting a ball hitch and trailer. If you’re using a stake bed mount, slide the end of the mount into one of your bed’s stake supports.
 
To swing the loader out of the way of the tailgate, remove one of the pivot pins. Never remove both pins. When the loader is 90 degrees out, you can lock it in place using the uncovered hole in the swivel mount.
 
 
CustomFit Trailer
 
This trailer only fits DL25 and DL35 loaders. It comes fully assembled, complete with highway lights. Use the included hardware to bolt your loader to the trailer, being sure to line up the carriage bolts with the square holes in the loader’s skid.
 
 
Getting the Outlet to Reach Your Bed or Trailer
 
Billy Goat offers several accessories to get the right position for your loader’s discharge chute.
360 Rotational Kit – This adds a swiveling joint between the loader and the vertical chute. Once installed, the chute can be rotated by hand. This lets you adjust the position when moving the loader from vehicle to vehicle.
 
Extension kit – This kit adds a two foot long extension to the vertical chute, letting you reach over tall tailgates on trailers. The extension cannot be used with the rotational kit.
 
Length extension and exhaust deflector – These attachments give you two ways to extend the horizontal reach of your loader’s outlet. The length extension is a 5-foot long reinforced hose that can be draped over bed walls. The deflector bounces debris off an adjustable metal shield, letting you change the angle debris exit the discharge chute.
 
 
If It’s Billy Goat, We Carry It
 
Billy Goat Parts is an OEM dealer for Billy Goat as well as Honda and Briggs & Stratton. That means you can get parts for your debris loader as well as the Honda or Vanguard engine that powers it. We have sections for commonly ordered parts, like impeller bolts and air filters. You can also use our parts lookup system to see factory diagrams and descriptions for parts used on your model of equipment. Visit us online at www.billygoatparts.com. We ship across the U.S. and Canada.

Posted in Uncategorized | Leave a comment

Tips for Using an Outdoor Vacuum

Is it fall already? Now that the leaves are falling from the trees, it’s time to break out your lawn vacuum. There’s more to using one of these machines that just rolling it over your lawn. If you don’t know the right vacuuming and maintenance techniques, a simple job can quickly become a frustrating one. These tips will help you get better performance from your Billy Goat lawn vacuum.

How Does a Lawn Vacuum Work?

A lawn vacuum works a lot like a bagged household vacuum. The engine drives an impeller. This creates a vacuum at the front of the impeller chamber, which connects to the nozzle. The air drawn into the chamber is forced out of the back into the bag. The bag is made from a fine fabric that lets air escape, while captures dirt and debris.

The main difference between outdoor and indoor vacuums is the impeller. While your home vacuum has a simple plastic impeller, a Billy Goat vacuum’s impeller is made from thick sheet steel with serrated edges. These edges chop debris as they pass through the chamber. The fine pieces that reach the bag take up less space, reducing disposal costs. They’re also perfect for composting.

When Should I Use My Lawn Vacuum?

There are three times when a lawn vacuum is your best solution for dealing with debris:

– Your lawn has a heavy coating of leaves or pine needles.
– There are too many grass clippings.
– Weeds are germinating, and you want to remove their seeds from your lawn before they take root.

When it comes to leaves and clippings, vacuuming shouldn’t be your first choice. When mulched, this organic material can feed your lawn. It also encourages the growth of microorganisms, which will help digest thatch before it becomes too thick. Once you can no longer see the tips of the grass after mowing, it’s time to pick up lawn debris with your vacuum.

What Conditions are Best for Picking Up Lawn Debris?

Clean up your lawn when it’s moist. If the lawn is too dry, you’ll pick up dust, which will blow straight out of the bag and onto you. If the lawn is wet, your vacuum will have a harder time picking up soggy leaves and debris.

How Do I Get Good Suction?

For the best performance, your vacuum’s nozzle should be about an inch above the debris it’s picking up. This lets the debris slide under the nozzle, while still being close enough to be picked up.

If you need to pick up a pile of leaves, or you need to clean out bushes, use the hose attachment. If your vacuum doesn’t have a hose, you can add one using a hose kit. Like the front nozzle of your vacuum, your vacuum hose works best with an inch between the end of the nozzle and the debris.

Most performance problems can be traced to the pores in the bag. If they’re covered or dirty, air can’t flow freely, reducing suction. For the best performance, always empty your vacuum’s bag when it’s 50% full. Rinse the bag with water after using your vacuum, or after each work day, to remove dirt from the pores.

If you’re working in less than ideal conditions, you need to take some extra steps to take care of your bag. Wet leaves weigh up to 40% more than dry leaves. Emptying the bag when it’s 1/3 full will keep wet debris from stretching the bag. Your bag will need more frequent cleaning when used in dusty conditions. Likewise, felt bags need to be cleaned often, because their fine pores clog easily.

When water isn’t enough to clean your vacuum bag, wash with water and mild detergent, then let it air dry. It’s a good idea to have a spare bag on hand, so one bag can be in use while the other one is drying.

When you buy a new bag, the fabric will be too tight for air to pass through without hampering performance. Run your vacuum at half throttle for 30 minutes to gently break in the fabric.

We Have What You Need for Your Vacuum

Whether you have a KV, MV, LB, QV or TKV vacuum, you can get the parts and accessories you need for your Billy Goat vacuum at Billy Goat Parts. We’re an authorized dealer for Billy Goat, Honda and Briggs & Stratton, so we carry everything you need to fix your equipment. Looking for vacuum bags? We have a section for them on our homepage. Looking for specific parts? Our search engine can find you matches that work with your model. We even have built-in factory descriptions and diagrams, so you can see exactly what you’re ordering. Best of all, we can ship your order to any address in the U.S. or Canada. Visit us at www.billygoatparts.com.

Posted in Uncategorized | Leave a comment

Managing Fall Leaves: Collection, Decomposition and Disposal

Tips for Fall Lawn CareFall is coming, and that means lots and lots of leaves. If they’re left on the ground, they can damage your turf, choking grass and possibly acidifying the soil. These tips will help you get the most out of your Billy Goat truck loader and vacuum, save on disposal costs, and keep your lawn healthy.

Should I Mulch or Bag the Leaves from My Lawn?

In some cases, you may be able to let leaves decompose naturally, instead of removing them. While the breakdown is slow for whole leaves, it can be accelerated by using a mulching mower to chop them into small pieces.

Leaves are acidic. Sandy soils rapidly absorb leaf mulch, decreasing pH. Other soils take longer to absorb organic matter, so this mulch usually breaks down before absorption. As a result, it has little effect on soil acidity.  In fact, this mulch layer can act as a buffer, reducing acidification from other sources. This is true for all types of leaves, including oak and maple, which are the most acidic. Mulching leaves return their nutrients to the soil, reducing the need for fertilizer. It also boosts the activity of microorganisms, which helps them break down thatch.

You should always remove leaves from black walnut trees. They contain juglone, a natural herbicide that affects a wide range of plants. Mulching won’t break down the poison fast enough to prevent it from having an effect. However, the poison will break down if the leaves are composted. It takes about a month for the juglone to fully decompose, making the compost safe to use.

Your leaf mulch layer should be thin enough that you can see the grass poking through. During the peak of leaf-fall, you may need to mow the leaves two or three times per week. If the mulch completely covers the grass, you need to start bagging leaves.

Collecting Leaves

Billy Goat lawn vacuums and truck loaders have impellers with serrated edges that chop leaves as they pass through. Since lawn waste services usually charge by the bag, the resulting compaction greatly reduces disposal costs. The fine organic matter coming out of your Billy Goat is also great for composting. This lets you return nutrients to the soil and cut out disposal costs entirely. If you already mulched the leaves with your mower, your vacuum equipment will have no trouble picking them up. However, there’s no benefit to mulching leaves before collection.

You can use a truck loader or vacuum to pick up leaves at any time, but you’ll get the best results if the leaves are moist. When using a lawn vacuum, adjust the nozzle so that it’s kept just above the ground without scraping against it. Remember that your bag doesn’t just have a size limit, it also has a weight limit. If you’re picking up wet leaves, empty the bag when it’s half full to reduce the strain on the bag fabric. When picking up dry leaves, you will need to wash the bag more frequently. This keeps the pores in the fabric open, so air from the vacuum can pass through freely.

When using a hose on a vacuum or truck loader, keep the end of the nozzle about a half-inch above the debris you’re picking up. This lets you maximize vacuum pressure around the leaves as you work through tall piles.

Composting

Composting’s bad reputation can mostly be traced to household waste. Yard waste compost doesn’t have the same smell as home compost, and it’s much easier to manage. Recycling your leaf mulch saves money and produces humus, which can fertilize your soil. This organic material also makes great top dressing for trees and gardens.

Since winter is coming soon, you will need to make some adjustments to how you care for your pile. The microorganisms in compost generate their own heat. If you live in a place with severe winter temperatures, you can keep this heat in by surrounding the pile with hay bales or bags of grass and leaf clippings. Turning the pile releases heat, so you should do this less often. It will take longer for the mulch to decompose, but you should have humus ready to use by spring.

Be Ready for Fall Yard Cleanup

Do you need to get your Billy Goat equipment in order, so you’re ready for leaf collection? If you need parts or accessories for your Billy Goat, visit Billy Goat Parts. We’re an authorized dealer for Billy Goat and their partners, including Honda, Vanguard, and Briggs & Stratton. We make shopping easy with pages with commonly needed parts, like collection bags and air filters. Our site also has a search engine that can show you factory diagrams specific to your machine, so you know exactly what you’re ordering. Visit us at www.billygoatparts.com. We ship across the U.S. and Canada.

Posted in Uncategorized | Tagged , , | Leave a comment

Vanguard 200 Maintenance

Vanguard 200 MaintenanceThis year, Billy Goat started offering the Vanguard 200 engine to their lineup, fitting the engine to the OS552 overseeder, PL1801 PLUGR aerator, and F601V walk-behind blower. Even if you’re familiar with working on small engines, this new single-cylinder has some design quirks that may surprise you. Here’s everything you need to know to keep this engine running.

Maintenance schedule

Before use: Check the oil level. Remove dirt and debris from the muffler, controls, and intake grille.

First 5 hours of operation: Change the oil.

Every year: Replace the spark plug. Clean the fuel and cooling systems. If the engine is performing poorly, have the valve clearance checked.

Every 100 hours or every year: Change the gear reduction oil, if equipped. Clean the exhaust.

Every 200 hours or every year: Change the engine oil and clean the air filter.

Every 600 hours or three years: Replace the air filter.

Oil

Vanguard recommends using oil that has an SAE service grade of SF or higher, while they prefer owners to use oils officially backed by the company. Several oil viscosities can be used with this engine. Vanguard’s own 15W-50 synthetic oil can be used at temperatures above 20°F, while synthetic 5W-30 oil can be used below 100°F. Conventional 10W-30 can be used between 20 and 100°F. Be aware that oil consumption will increase at high temperatures, especially if you’re using conventional oil. It’s a good idea to periodically check the oil level when working on hot days.

This engine has a dipstick to check the oil. Make sure the engine is sitting level, then wipe the dipstick clean and fully insert it into the engine to get an accurate reading.

This engine has two fill ports and two drain ports at the base of the engine. There’s nothing separating these holes, so you can use the most convenient ports to drain and add oil. Removing the dipstick lets air enter and exit the crankcase, making draining and filling it easier. The manufacturer recommends waiting for a minute before checking the oil level after adding oil. This gives the oil time to settle in the crankcase.

Currently, Billy Goat doesn’t use an engine with a gear reduction. However, if you buy a future model that has one, here’s how you change the oil:

1. Remove the fill plug at the top of the gear reduction case, the level plug on the side of the case, and the drain plug on the bottom of the case.

2. Once the case is empty, install the drain plug. Slowly add 80W-90 gear oil to the fill hole until it drips out of the level hole. Install the remaining plugs.

Fuel

Vanguard recommends 87 octane gasoline or 85 octane at elevations over 5,000 feet. This fuel can contain up to 10% ethanol.

Fuel can be left in the tank during storage, as long as the fuel tank is full, and the gas was treated with a stabilizer. Before storage, let the engine run for two minutes to draw the stabilized fuel through the carburetor.

When it’s time to service the fuel system, look at the fuel lines and carburetor for signs of cracking. Remove the strainer (if equipped) from the fuel filler neck and clean it as needed.

Air Filter

Both standard and low profile air filter boxes are used on the Vanguard 200. With either version, twisting the two thumbscrews unlocks the cover. Remove the air filter, and tap it against a hard surface to remove surface dirt. Wipe out any dust inside the air box, then reinstall the filter.

Muffler and Coolant System Servicing

These parts should be cleaned with a dry rag or brush to remove surface dirt. This lets the cooling fins transfer heat, and prevents heat from the muffler from igniting debris. Never use water to clean the engine. This can get inside the crankcase and dilute the oil.

Spark Plug

The plug gap should be 0.030 inches. When installing the plug, tighten it to 180 in-lbs. Replace the plug if it’s fouled, or has damage to the electrode or insulator.

Get Everything You Need for Your Billy Goat

Billy Goat Parts is an authorized dealer for Billy Goat, as well as their manufacturing partners. That means we don’t just carry Billy Goat parts, we also have parts to repair Vanguard engines. For fast ordering, our site has a section for common replacement parts, including spark plugs and air filters. We also have a search engine that can find parts for your specific model and serial number, so you can be sure you’re ordering exactly what you need for your equipment. Visit us at www.billygoatparts.com. We ship across the United States and Canada.

Posted in Uncategorized | Tagged , , | Leave a comment

Tips for Making Fence Post Holes with Your Billy Goat Auger

Billy Goat’s AGR1301H augerBilly Goat’s AGR1301H auger makes it easy to dig holes, but even the best tools will only go so far. If you want to build a fence, you need perfectly straight, perfectly positioned holes with just the right depth to keep the posts in place over time. These tips will help you get these holes right, so you can build something you’ll be proud of.

What Size of Auger Bit Do I Need?

Each hole should be three times as large as the post. Filling the space around the post with compacted dirt provides the support needed to keep the post in place. For most steel fence posts, you’ll need a 6-inch auger to dig the right size hole, while 4×4 posts need holes dug by an 8-inch auger. If you’re installing a lightweight fence for snow or sand, a three-inch bit is usually large enough to get the job done.

As a general rule of thumb, support posts should have 1/3 of their length buried in the ground. This gives the surrounding dirt enough grip to keep the post from moving. Gate posts should have ½ of their length buried, so they have added support to resist the twisting forces exerted by opening and closing the gate.

Holes need to reach deeper than the maximum frost level where you live. Dig too shallow of a hole, and frost heaving will push your posts out of the ground. In most of the country, a three-foot hole is more than deep enough to support a fence post. However, if you live in a particularly cold area, like Wisconsin or Maine, you may need to go four feet or more to get past the frost layer. If the hole is too shallow, frost heaves will push your fence posts out of the ground. You can always use an extension with your auger bit to get more depth when you dig.

What Pilot Bits and Teeth Do I Need on My Auger Bit?

Billy Goat offers three materials for pilot bits and teeth: carbide, dirt, and hardface. Carbide is the best at chipping rocks, but it wears out the fastest. Dirt only works well on soft ground, but it lasts the longest. Hardface bits are between these two extremes in hardness and wear.

Digging Pilot Holes

Once you start digging with your auger, there’s no going back. This makes it critical to get each hole in the right position. Measure out the center point for each hole. Dig a shallow hole that’s as wide as the flutes of the auger. This hole should be just deep enough to remove the turf and root system. This keeps the auger from wandering when it starts digging the hole.

Digging Post Holes

The AGR1301H is a whole lot easier to use than standard post hole augers. You don’t need to wrestle with the engine on a post hole auger, and you don’t have to guess at the angle like most wheeled augers. Just line up the auger with the spot you want to dig and drop it onto the soil. Lift the bit out for each foot you dig. This gives the flutes a chance to pull the dirt out of the hole.

Finishing Post Holes

Your auger will do most of the work, but your holes will need some finishing before you can drop in posts and fill them in with dirt. There are three tools that make quick work out of completing a post hole:

– A digging bar chips away rocks that protrude into the hole.
– A drain tile shovel has a narrow, curved head that’s perfect for shaping holes and removing dirt at the bottom of the hole.
-A clamshell post hole digger can cut out roots, pick up dirt at the bottom of the hole, and extend holes that need to be deeper than your auger can reach.

Always cover holes with a sheet of plywood after digging. This keeps people and animals from stepping in them.

Everything You Need for Your Billy Goat from One Place

Billy Goat Parts is an authorized dealer for Billy Goat and Honda Engines, so we carry everything you need for your auger. Looking for a different bit, or need to swap out teeth on your current bit? We have what you need. Need to fix the engine or replace a tire? We have those parts, too. We make ordering easy with our sections for common parts. If you need something else, our search engine can narrow down options to the model and serial number of your machine. We even have factory parts diagrams, so you can see exactly what you’re ordering. Visit us at www.billygoatparts.com. We can ship your order to any address in the U.S. or Canada.

Posted in Uncategorized | Tagged , | Leave a comment

Sod Cutting Tips

Sod Cutting TipsIs it time to rebuild your turf? Do you want to transplant some of the grass on your lawn? Either way, you’ll need to cut away the sod. These tips will help you prepare your lawn, get a good cut from your Billy Goat sod cutter, and keep your sod alive until you’re ready to plant it.

Watering for a Better Cut

Like regular lawn watering, you should water soil before cutting so that it is moist, not muddy or dry. This helps the sod cutter blade slice through the soil, and helps the grass survive transplanting.

Apply 1-1.5 inches of water over the week before sod cutting. By the time you’re ready to cut the sod, the top two inches of soil should be moist. This is ideal for a good cut. Stop watering the day before cutting to let the soil fully absorb the water.

Mowing

Mow your lawn the day before you cut the soil. Cut the lawn to the lowest height that is safe for your lawn’s grass varieties. This makes it easier to see where you’re cutting and helps keep the weight of the sod sections down.

Marking Your Cut

Are you only taking out part of your lawn? Do you have a sprinkler system or other obstacles that you don’t want to hit with your sod cutter? Mark these area with spray chalk or grass striping paint. Chalk is easier to wash off than paint. This is good for dry climates, but a short storm or a dewy morning can fade or wash away the lines.

Preparing Your Sod Cutter

Sharpen the blade. Like a mower blade, your sod cutter blade should be as sharp as a butter knife. If the blade is cracked, bent or worn down, replace it. The bolts holding the blade to the machine are wear items, so they need to be replaced as well. Billy Goat includes this hardware with their replacement blades.

Check the tire pressure. If the pressure between the left and right tires is uneven, your sod cutter will want to pull in one direction. The correct pressure is printed on the sidewall of the tire.

Check the cables and belts. These parts stretch over time, especially during the initial break-in period. The drive system and blade clutch should engage and disengage easily.

Getting a Good Cut

The blade needs to be low enough to cut a 1/4-3/8 inch layer of soil underneath the ends of the roots. This protects the root system, while keeping the weight of each sod strip to a minimum. You will probably need to make a few short runs to find the right height. Never adjust the blade height while the cutter is in motion.

Overlap with each pass to avoid leaving narrow strips of uncut sod. The shorter these strips are, the easier they will be to move around. A standard 80 x 18 inch roll weighs between 35 and 45 lbs, depending on its moisture content.

To get a clean cut at the end of each strip, release the clutch and speed control levers and let the sod cutter come to a stop. Raise the blade to its maximum height, then engage both the clutch and speed control levers. This pulls the blade up through the soil, slicing off the end of the strip.

If you strike an object, stop the sod cutter immediately. Lift the blade to its maximum height and inspect it. Sod cutter blades are made of a brittle alloy to maintain their edge. This makes them more susceptible to cracking than mower blades.

Preserving Cut Sod

Lay your sod on a base of dampened burlap. As you lay down each section or roll, lightly water the surface. Stacking sod helps it retain moisture. Make sure you’re able to move your sod stack, or build it in an area where it can be stored until use. To give you an idea of just how heavy a sod pile can be, a standard 60 roll pallet weighs between 2,000-3,000 lbs. depending on moisture content. These rolls are usually stacked in 6 layers of 10.

Sod will store for anywhere between 12 hours and 5 days depending on the weather. At temperatures above 80 degrees F, the grass will try to grow. This leads to heat buildup in the pile that destroys the sod after a few hours. At lower temperatures in the spring and fall, the grass will remain dormant.

Everything You Need for Your Billy Goat

Whether you have a Hydro-Drive or a SC121H sod cutter, you can get the parts you need for it at Billy Goat Parts. We’re an authorized dealer for Billy Goat, Honda and Tuff-Torq, so we carry everything you need to repair your equipment. We make ordering parts easy by grouping together common replacement parts and by offering a search engine that can narrow results down to your model and serial number. Visit us at www.billygoatparts.com. We can ship your order to any address in the United States or Canada.

Posted in Uncategorized | Tagged , , | Leave a comment

Lawn Waste Management: Save the Environment and Your Wallet

Lawn Waste Management: Save the Environment and Your WalletYard waste is one of the most annoying things to deal with when it comes to lawn care. It costs a lot to dispose of, it takes nutrients from the soil, and it can be an environmental hazard. However, with good management practices, you can address all three of these issues, saving time and money.

Why is Yard Waste an Environmental Hazard?

Why is your local government on to homeowners to manage their lawn waste? It goes far beyond being neat and tidy. Unless the yard you’re working on is in the country, leaves and grass clippings that come off of a lawn will eventually make their way into drainage systems. From there, they enter waterways, adding organic material from dead plants and nutrients from fertilizer. Algae thrive on this material, causing blooms that block light and reduce the oxygen content in the water. This can kill fish and make water so toxic that recreational areas have to be closed off to protect people from being poisoned.

That waste is taking valuable nutrients with it, which means you need to do more work and use more fertilizer to compensate. Good management practices don’t just protect the environment, they make it easier to maintain your lawn.

Getting Waste Back Into the Soil

The simplest way to keep nutrients in the soil is through mulching. By chopping up leaves and grass clippings, it’s easier for microorganisms to digest them. Better still, this boosts microorganism activity, which speeds up the breakdown of woody plant debris that makes up mulch.

Mulching alone isn’t always the solution for yard waste. If grass height or leaf buildup results in piles of debris laying on top of the lawn after mowing, it’s time to choose alternate disposal methods. That’s when it’s time to use a lawn vacuum. Clippings are cut down by the vacuum’s impeller and bagged automatically. Since yard waste is priced by the bag, this compaction reduces the total cost of disposal. However, the collected waste doesn’t have to be thrown out. Building a compost pile can digest waste on-site, saving money and turning that waste into something that can be returned to the lawn. Even natural herbicides found in plants like black walnut trees will break down after a few weeks, making the mulch safe to use.

If you decide to dispose of your lawn debris instead, it shouldn’t go into a landfill. Most areas have seasonal debris pickup, funneling this waste to large compost facilities. Debris will break down in a landfill, but since it’s covered, this happens through anaerobic (oxygen-free) digestion. The resulting methane is a powerful greenhouse gas, and it’s extremely flammable. This makes it a hazard for waste management workers.

Composting: Not as Hard or Stinky as You Think

There’s one big difference between compost piles made of yard wastes and those made from garbage: smell. A pile made mostly of lawn debris won’t stink as it breaks down. Lawn clippings and leaves also have the advantage of containing a mix of “green” and “brown” materials. The combination of dry and moist materials is ideal for encouraging microbe growth.

The material you put in the pile needs to be in fine pieces. If you gathered lawn debris in a vacuum, or you picked them up with a truck loader, the impeller does this for you. This pile should be in the shade or covered by a tarp. Wet down the pile each time you add organic material. Stirring the pile every couple of weeks speeds up the breakdown process. Don’t be surprised if the pile is warm. When microbes are active, they can raise the center of the pile to temperatures as high as 140 degrees F.

After a couple of months, you should start to see what looks like dark soil. This is humus. This material can be used for top dressing on lawns or to boost the nutrients in your garden. It has a medium texture, so mixing it with clay soils improves drainage while mixing it with sandy soils improves structure.

Get the Most from Your Billy Goat Equipment

Billy Goat Parts is an authorized dealer for Billy Goat as well as their manufacturing partners, including Honda, Briggs & Stratton and Tuff Torq. That means we have the parts and accessories you need to keep your lawn vacuums, debris loaders, and vacuums running. Visit us at www.billygoatparts.com. We have sections for common replacement parts, and our search engine can find parts based on your model and serial number. We even have factory diagrams and descriptions built into our site, so you can be sure you’re ordering exactly what you need. We can ship your order to any address in the U.S. or Canada.

Posted in Uncategorized | Tagged , , | Leave a comment

Dethatching Tips

Billy Goat DethatcherEven if you regularly use a Billy Goat overseeder or power rake, dealing with thatch can be confusing. When do you need to use it? How do you dethatch without damaging your lawn? Why does your lawn have a thatch problem? These tips will help you with every step of thatch management, from prevention to lawn recovery.

Is Thatch Bad?

No, as long as you have the right amount. A thin layer of thatch acts as a cushion and an insulator, reducing ground compaction and the effects of extreme temperatures. However, if it’s more than a half inch thick, it can keep water, air and sunlight from reaching the soil. Thick thatch is also a breeding ground for insects and fungi.

Even if you have a normal amount of thatch, it can get in the way when overseeding and aerating. Typically, you will want to dethatch, aerate and seed in that order to get the best seed-to-soil contact when overseeding your lawn.

Why Do I Have Excessive Thatch?

Some varieties are more prone to thatch than others. Bermuda and Kentucky bluegrass are the worst offenders. Excess nitrogen from overfertilizing can boost growth to a point that your lawn can’t keep up with the increase in thatch.

Managing microorganisms and worm populations can help them break down thatch. Mulching grass helps keep microorganisms fed, so they can tackle thatch. Pesticides can damage both microorganisms and worm populations, reducing their effectiveness. Excess water can displace oxygen, making it harder to break down thatch.

How Do I Know I Have Too Much Thatch?

Mow your lawn to a normal height. If it looks brown, you’re probably seeing thatch, not grass.

If the lawn feels spongy when you walk on it, it’s probably because you’re walking on a thick thatch layer.

Cut a few plugs out of your soil. Look at the layers: the brown layer between the grass and the soil is thatch. If it’s over ½ inch thick, it needs to be removed.

When Should I Dethatch My Lawn?

Dethatching is hard on your grass, so it’s best to stick to times when it will be easiest for your lawn to recover. The best time for warm season grasses is late spring or early summer, and the best time for cool season grasses is late summer or early fall. These are also great times for overseeding, so you can tackle both tasks at the same time.

How Do I Prepare My Lawn for Dethatching?

Avoid fertilizing your lawn for at least 6 weeks before dethatching. Apply pre-emergent herbicides after dethatching. Otherwise, you’ll end up removing most of the lawn chemicals with the thatch.

Dethatch when the lawn is damp, but not wet. If the soil is muddy, your power rake will pull up grass and roots along with the thatch.

Before dethatching, mow to the shortest height that is healthy for your lawn’s grass varieties. Bag the clippings to keep the grass out of the way of the power rake’s tines. You should never cut off more than 1/3 of the grass’s height at a time, so you may need to mow a few times beforehand. Space these mows out at least a couple days from each other to let the grass recover.
Mark sprinklers, surface wires and other hazards on your lawn, so you won’t hit them with your power rake’s tines.

How Do I Get the Best Results When I Remove Thatch from My Lawn?

Use the maximum height for your power rake until you’re comfortable with how it works. Even with the perfect height, you may need to go over some areas several times to remove all of the thatch. Billy Goat overseeders can dethatch with their blades, but you shouldn’t try to seed and thatch at the same time.

Use your mower to cut up the thatch. If you’re worried about weeds, bag the clippings to keep the seeds off of your lawn.

Your lawn is going to look terrible afterward. This is normal. Continue with your overseeding plan, or let the grass recover for a few days before you start mowing again.

Water and fertilize your lawn to help it recover. Avoid weed-n-feed fertilizers that can hamper grass growth.

Is Your Power Rake Ready for Fall Lawn Care?

Billy Goat Parts is an authorized dealer for Billy Goat, which means we have the OEM parts and accessories you need for your power rake or overseeder.  We have sections for commonly ordered parts, like engine maintenance items. You can also use our search engine to find replacements for everything on your equipment. It can narrow down search results down to your model and serial number, and show you factory diagrams and descriptions. That way you can be sure you’re ordering exactly what you need. Best of all, we can ship your order to any address in the United States or Canada. Visit us at www.billygoatparts.com.

Posted in Uncategorized | Tagged , , | Leave a comment

Brushcutting Tips

Billy Goat BrushcutterIs it time to clear out the back 40? Do you need to get an unkempt lawn back to a reasonable height? Billy Goat’s Outback brushcutters have the power to slice through saplings and brush, making overgrown plots usable again. Like any piece of equipment, a little know-how goes a long way toward using it effectively and safely. These tips will help you get the most from your brushcutter.

What’s the Difference Between a Pivoting or Fixed Deck?

A pivoting deck works better on uneven ground. The rails on the side of the machine rub against the soil, pushing the deck left and right to keep the blade parallel with the ground. This delivers a more even cut. Both the BC26 and BC2601HHC have decks that can pivot up to 12 degrees in either direction, and return to neutral automatically.

The BC26 Fixed Deck has a rigid-mounted deck that doesn’t swivel. This keeps it from snagging on holes and hill edges when cutting thick vegetation. The finish will be less even than a pivoting deck cutter, but it works better on difficult terrain.

Protecting Yourself and Those Around Yourself

An Outback brushcutter can best be described as a lawn mower on steroids. It has more power and uses a thicker blade to cut through thick growth. That means the dangers you can expect from a standard lawn mower are amplified. Solid objects are thrown further when they strike the blade, and it’s easier for these objects to hide in tall grass.

People and pets should be well away from the area you’re working.

Billy Goat recommends wearing eye protection, non-slip shoes and thick pants when using an Outback brushcutter. OSHA requires a hard hat for professional brushcutters, and it’s not a bad idea for residential users.

Don’t cut on muddy ground. Between steep slopes and the high effort required to move your cutter, you’re setting yourself up for an accident. Wait until the soil is dry.

Check the area for rocks, toys, bottles and anything else that could be launched by the cutting blade. You should also look out for fence wire and cables that can wrap around the blade spindle. See a hazard that you can’t remove? Mark it with a flag or some fluorescent tape.

When you need to cut on a slope, go side to side. Pointing the brushcutter straight up or down makes it more likely that it will roll away or toward you.

Have a clog? Shut off the engine and let the blade come to a complete stop. Before you reach into the deck to remove the clog, disconnect the spark plug. That way, if you push the blade, the engine won’t kick over and fire up.

Getting a Good Cut

To get the best finish, overlap your passes by half the deck’s width. This limits the amount of growth the blade has to cut, while giving it a second pass to remove any surviving brush. Unlike a mower deck, your Outback’s deck doesn’t generate vacuum to pull grass and weeds toward the blade. If you seem to be leaving a lot of uncut grass, slow down. You need to give the blade more time to cut. On models with a manual transmission, expect to spend most of your cutting time in first or second gear.

Taking Care of Your Brushcutter’s Blade

Taking care of a brushcutter blade is a lot like taking care of a mower blade. This blade needs a flat cutting edge that is as sharp as a butter knife to be effective. While you may not care about getting a good cut finish with your brushcutter, a sharp blade does a better job of cutting vegetation.

Always balance the blade before putting it back on your machine. You can use a regular mower blade balancer, or just hang the blade from a nail. You know the blade is balanced if it sits parallel to the ground. If it doesn’t, file a little off of the side pointing to the ground.

Major impacts can crack or dent the blade, making it unusable. If you want to keep working, have a spare blade on hand that you can swap out if this happens.

Get Everything You Need for Your Outback Brushcutter

Billy Goat Parts is an authorized dealer for Billy Goat, as well as Honda, Briggs & Stratton and Tuff-Torq. That means we carry everything you need to keep your Outback working, from replacement blades to major components. Our site lets you browse commonly ordered items, or find specific parts using our advanced search engine. We even have built-in factory parts diagrams, so you can see exactly what you’re ordering. Visit us at www.billygoatparts.com. We ship across the United States and Canada.

Posted in Uncategorized | Tagged , , | Leave a comment