TKV Self-Propelled Vacuum Maintenance

TKV650SPH
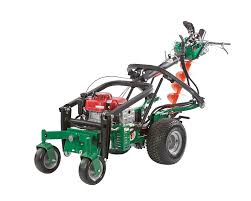
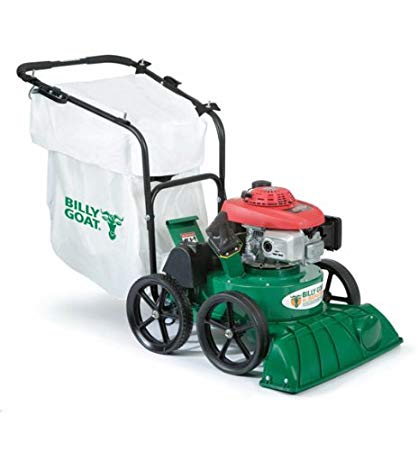
The TKV650SPH chipper/shredder vacuum may be sized for residential lawn care, but it’s built to deliver the same reliability as Billy Goat’s commercial equipment. Here’s everything you need to know to keep this vacuum running from initial assembly to blade sharpening.

Assembly

1. Place washers on the two long bolts.
2. Slide the upper handle over the lower handle, lining up the holes in each section.
3. Slide the bolts through these holes from the inner sides of the handle.
4. Slide washers onto the bolts, then install the nuts.
5. Attach the throttle lever to the right side of the upper handle. Line up the holes in the bottom of the throttle with the holes in the handle. Install one of the short screws and washers on the front hole.
6. Attach the clutch cable to the right side of the handle. Insert a second short screw through the clutch cable mount and the rear hole on the throttle. Place a washer on the screw, then screw down a nut.
7. Connect the end of the clutch cable to the bail.
8. Attach the debris bag to the quick disconnect. Wrap the bag straps around the four posts on the upper handle.
9. Add oil and gas to the engine. Connect the spark plug.

Maintenance Schedule

Clean the debris bag before each use, or each day of use. Be sure to check the bag straps before starting the engine. Check for loose and damaged parts each day before use.

Impeller Removal and Belt Replacement

Always use a new impeller bolt and lock washer when reinstalling the impeller.

1. Drain the gas and oil from the engine.
2. Remove the bag and upper handle.
3. Remove the transmission cover, idler pulley, transmission and transmission belt.
4. Unscrew the bolts holding on the transmission plate and housing plate. Remove these plates.
5. Turn the engine and top plate upside down.
6. Unscrew the impeller bolt. Remove the bolt and lock washer.
7. Lift the impeller off of the drive shaft. If the impeller is stuck, apply penetrating oil and get a 3/4-16 bolt that is at least 3 inches long. Thread the bolt in by hand until it’s against the shaft. Tighten the bolt slowly to pull the impeller off of the shaft.

At this point, you can place a new belt on the driveshaft.

8. Reassemble in reverse order, torquing the impeller bolt to 33-38 ft-lbs. If you are installing a new belt, feed it through the hole in the top plate, making sure it goes over the transmission pulley and inside the two fingers on the belt plate.

Drive Chain Alignment and Replacement

1. Disconnect the spark plug.
2. Prop up the rear of the vacuum so that the rear wheels are off of the ground.
3. Remove the transmission cover and slide the belt off of the transmission.

Replacing the chain:
1. Remove the bolts on the side of the transmission that holds down the flange bearings. This will give the chain enough slack that it can slide off.
2. Remove the old chain and fit a new one in its place. Tighten down the flange bearing screws, then check the tension.

Adjusting chain tension:
1. Turn the wheels. They should move freely. If they don’t, loosen the bearings and push them until the chain runs in a straight line.
2. Tighten the flange screws and recheck the tension.

Reassemble in reverse order.

Belt Tension Adjustment

1. Disconnect the spark plug.
2. Remove the transmission cover.
3. Using a pair of ½ inch wrenches, loosen the two nuts connecting the clutch cable to the idler arm.
4. Turn the nuts to adjust the spring tension. The spring should be 1.5 inches long with the bail open, and 1.75 inches with the bail closed.
5. Tighten the nuts against each other and reinstall the transmission cover.
6. Operate the vacuum. The clutch should start to engage when the bail is 2 ½ inches from the handle. If it doesn’t engage correctly, recheck the spring tension.

Chipper Blade Sharpening and Replacement

1. Gain access to the impeller. See “Impeller Removal and Belt Replacement” above. You do not need to remove the impeller from the drive shaft.
2. Use a 3/16 inch hex wrench and a ½ inch open end wrench to remove the chipper blades.
3. Grind the cutting edge at 40 degrees to sharpen. Go slow to prevent overheating that can ruin the heat treating. Replace the blade if it no longer overhangs the chip relief hole, or if a damaged blade is causing vibrations.

Need Parts for Your Billy Goat Vacuum?

As an authorized dealer for Billy Goat and Honda Engines, www.billygoatparts.com is able to offer OEM replacements for everything on your TKV vacuum. Just select your model and serial number, and our site will show you factory parts information and diagrams specific to your machine. We can ship your order to any address in the U.S. or Canada.

Posted in Uncategorized | Tagged , , | Leave a comment

The New AGR1300H Landscape Auger

AGR1300H Landscape AugerChoosing a post hole auger usually requires some compromises. One and two-man augers are heavy, awkward and limited in power. Large augers require a tractor for transport and power. Self-propelled and trailer-mounted augers aren’t much smaller than a tractor. They’re also hard to lower into position accurately. However, Billy Goat’s new AGR1300H manages to deliver the features you want without the compromises. This self-propelled post hole auger uses an innovative design that is compact and easy to use. It has plenty of power, an easy system for dropping, and it fits in the bed of a small truck.

Z-Link: Making Self-Propelled Augers Practical

Positioning a portable or attachment auger isn’t too difficult: either you drop the bit onto the right spot, or you drive your tractor into position. However, most self-propelled augers are little more than a trailer with a boom. The bit moves in an arc as it’s lowered, requiring the use of a spotter or a lot of back and forth to get into position.

The AGR1300H solves this problem with its patent-pending Z-Link mount. The auger is attached to scissoring arms that allow the auger to be lowered straight down from the controls. This makes it easy to line up the bit exactly where it needs to be. Spring lift struts support the load, taking the strain off of the operator without needing a long boom.

Simple Controls

This landscape auger uses the same hydraulic drive controls as other Billy Goat equipment, making it easy to learn. Just move the right lever to roll forward, and move the left handle to roll backward. Once in place, pushing a single lever drops the bit onto the ground. From there, just move the clearly-labeled handle to spin the auger forward to drill or reverse to help lift it out of the dirt. A spring-loaded parking brake locks down the rear wheels to keep the auger drilling straight, even on slopes.

Pulling the transport lever swings the bit forward to keep it from scraping the ground. For smooth transport, the auger is mounted on high floatation rear tires and a pivoting front wheel caster. This is the same setup used by many mid-deck ZTR mowers to get an even cut.

Power

Instead of a heavy driveshaft and gearbox, this auger uses the same hydraulic system used to power the drive motor. A 13 HP Honda GXV390 operates a 10 GPM pump, producing 350 ft-lbs. of bit torque. That puts it well ahead of most self-propelled and towable post hole diggers on the market. As equipped, the AGR1300H can handle bits with widths from 2-18 inches.

Compact For Easy Transport

The AGR1300H is just 103 inches long and has a height of 60 inches while in operation or 52.5 inches in transport mode. That means it can fit in a 6-foot truck bed with the tailgate up. Climbing up and down ramps is no problem thanks to the hydrostatic drive, making it perfect for freeing up space on your trailer or renting it out to weekend DIYers.

Bit Compatibility

The AGR1300H comes standard with a 7/8 inch bit, and adapters are available for 1 ¼ and 1 3/8 inch bits so you can use auger bits you already own. Billy Goat offers their own 8×36 inch and 12×42 inch bits. These are compatible with pilot bits and wisdom teeth in hard face, carbide, and dirt versions to cut a variety of soils.

Get the Parts Support You Need for Your Billy Goat Equipment

Billygoatparts.com is more than an online retailer. We’re an authorized dealer for Billy Goat and Honda Engines, which means we offer everything you need for this auger. That includes pump parts, engine parts, adapters, teeth, and bits. Finding parts is easy, too: just select your model and serial number, and our site will show you factory diagrams and descriptions for your model. We ship across the U.S. and Canada.

Posted in Uncategorized | Tagged , , | Leave a comment

Keeping Your Classic PLUGR Aerator Alive

PLUGR AeratorBilly Goat’s NextGen PLUGR aerators have impressive performance, but their older PLUGR models are still just as good at breaking up compacted soil and aiding the delivery of fertilizer and seed to lawns. Here’s everything you need to know to keep your PL2500H running.

Maintenance Schedule

Before each use or each day of use: Check the oil level and clean off any debris on the machine and its tires.
First month or 20 hours of operation: Change the reduction gear case oil.
Every 10 hours of operation: Grease the cam bearings and inspect the machine for loose, damaged or worn out parts.
Every 50 hours: Check the belts for wear.
Every 100 hours: Replace the tine bushings and grease the shaft and wheel bearings.
Every 100 hours or 6 months: Change the gear reduction oil.

Tine and Bushing Replacement

Tines should be replaced when they are bent or worn. Billy Goat recommends replacing all worn tines at the same time.

To replace a tine, loosen the jam nut, then unscrew the tine. Screw in the new tine, threading it on as much as possible. Tighten the jam nut.

To replace a bushing, remove the nuts and bolts on the top of the tine rod, then remove the tine rod cap. Slide out the old bushings and insert the new ones, lining up the split end with the top surface of the tine rod. Reinstall the cap, then grease the bearing.

Cam Bearing Lubrication

Billy Goat recommends lubricating the cam bearing with Almagard #3752 or a high-performance NLGI #2 equivalent designed for high-pressure applications.

Clutch Cable and Belt Tension

If you’re having trouble getting the drive belt to engage, start by checking the clutch cable. To adjust the cable tension, turn the adjuster next to the bail. The more threads are exposed, the tighter the cable will be. The cable only needs to be tight enough to prevent the belt from slipping when engaged; if the cable is tighter, it will cause premature belt wear.

To adjust belt tension, unbolt the engine, slide it forward or rearward on the base of the aerator, and tighten down the bolts. Replace the belt if it still won’t engage with the engine pushed all the way forward.

Drive Belt Replacement

The tine shaft is very heavy to help push the tines into the soil. To move the shaft, you’ll need to set up a hoist or crane directly above the aerator.

1. Disconnect the spark plug.
2. Remove the tensioner brackets on both sides of the drive pulley.
3. Walk the belt off of the drive pulley.
4. Attach the hoist to the tine shaft, then remove the four nuts, washers and bolts that connect the camshaft to the frame.
5. Lift the tine shaft out of the frame and remove the old belts.
6. Install new belts following the previous directions in reverse order.

Reduction Gear Oil

The GX160 that powers the PL25H has a built-in gear reduction case. When adding oil, use the same oil you use in the engine, typically 5W30 or 10W30 motor oil.

To check the oil level, remove the check bolt from the side of the case. The oil should come up to the top of the bolt hole. If the oil level is low, remove the fill bolt from the top of the case. Stop filling the case when oil comes out of the check hole, then reinstall both bolts.

To change the oil, let the engine warm up, then shut it off. Remove the oil level and filler bolts, then tilt the aerator back, letting the oil flow into a container for recycling. Set the machine back on the ground and add oil as you would when checking the oil level.

Looking for Parts?

Billygoatparts.com is an authorized dealer for Billy Goat and their partners, including Honda Engines so you can get everything for your equipment new or old from one place. Finding parts is easy: when you select your model and serial number, our site will show you factory parts diagrams and descriptions broken down into different systems on your equipment. This lets you see exactly what you’re ordering and where it fits on your machine. We can ship your order to any address in the United States or Canada.

Posted in Uncategorized | Tagged , , | Leave a comment

Servicing the 205cc 6.5hp Vanguard Engine

205cc 6.5hp Vanguard EngineWith Subaru ending production of small engines, Billy Goat is switching over to single-cylinder Briggs & Stratton Vanguard engines for their smaller equipment. The new OS552 overseeder, PL1801 PLUGR aerator or F601V walk-behind blower all use a 205cc, 6.5 HP Vanguard engine. Here’s what you need to know to keep this engine in top shape to power your equipment.

Before You Begin

Before servicing your engine, disconnect the spark plug to prevent an accidental start. If the engine needs to be tilted, drain the fuel tank to keep the carburetor from being flooded and keep gasoline from coming in contact with hot engine components.

Maintenance Schedule

First 5 hours of operation: Change the oil.
Every 8 hours or daily: Check the oil level and clean the muffler, controls, and intake.
Every 25 hours or annually: Clean the air filter and pre-cleaner (if equipped.)
Every 50 hours or annually: Change the oil and clean the exhaust.
Annually: Change the spark plug, air filter, and pre-cleaner. Clean the fuel system. If you operate in dusty conditions, clean the cooling fins.

Briggs & Stratton recommends having a dealer check the valve clearance each year.

Oil

Some versions of this engine come with a low oil protection system. If the engine won’t start or stops suddenly, make sure it has enough oil.

To check the oil level, set the equipment on a flat surface. Remove the dipstick, wipe off any oil, and insert it into the engine without screwing it in. The oil should come up to the full mark on the dipstick. When adding oil, it should reach the edge of the oil fill port.

Briggs & Stratton recommends using motor oil with an SAE rating of SF or higher. 10W30 can be used at temperatures ranging from 0-100°F, synthetic 5W30 below 100°F, and Vanguard synthetic 15W50 above 20°F. Oil capacity for the Model 130000 engine is 20-22 oz, while the Model 190000 holds 26-28 oz.

To change the oil, remove the dipstick and drain plug. Once the oil has drained from the crankcase, install the plug and add oil through the fill port. Check the oil level and top up the engine as needed.

Fuel

This engine is designed to run on unleaded gas with an octane rating of 87 or higher and up to 10% ethanol. 85 octane fuel can be used at altitudes above 5,000 feet.

When adding fuel, don’t fill the tank above the bottom of the filler neck. This space is needed for fuel expansion as the engine warms up. Briggs & Stratton recommends using a fuel stabilizer when adding fuel to the tank. If the fuel is not treated, it should be used within 30 days of purchase.

Check the fuel lines for signs of cracking and replace as needed. Some models have an in-line fuel filter that needs to be replaced periodically. Before replacing the lines or filter, drain the fuel tank and shut off the fuel valve. Some versions also have a filter screen inside the tank filler neck that should be cleaned periodically.

Spark Plug

The electrode gap should be 0.030 inches. When installing the plug, torque it to 180 in-lbs.

Exhaust System

Give the engine time to cool off before working on the exhaust: it can stay hot up to a half hour after the engine was shut off. Clean off any debris, then remove the deflector or spark arrester. If either part has heavy carbon build-up, replace it.

Air Filter

There are three air box designs used with this engine. If there is a large airbox with a thumb screw next to the fuel tank, remove the screw and pull off the cover. Underneath, you’ll find either a circular foam filter surrounding a support cup or an oblong paper filter with a foam pre-cleaner. Remove the wing nut, then slide the filter out of the air box. If there is a plastic side panel on the carburetor, unscrew the panel, then pull the paper air filter and foam pre-cleaner out of the air box.

Foam filters cleaners should be cleaned with soapy water and allowed to dry before reinstalling. These should not be oiled. Foam filters also need to be washed and dried. After drying, soak the filter in clean engine oil, then squeeze out the excess using a clean towel. Clean paper filter elements by tapping them against a hard surface to knock off loose dirt.

Need Parts for Your Billy Goat’s Engine?

Billygoatparts.com isn’t just an authorized Billy Goat dealer, we’re also a dealer for all of their manufacturing partners including Briggs & Stratton Vanguard. That means you can get everything you need for your equipment from one location. To find the parts for your engine, just select your model and serial number, and our site will show you compatible parts with factory diagrams and descriptions. We ship across the United States and Canada.

Posted in Uncategorized | Tagged , , | Leave a comment

Setting Up and Maintaining BC2600 Hydro Series Brushcutters

BC2600 Hydro Series BrushcuttersWith a hydrostatic drive for easy control on hills and blades that are strong enough to slice through saplings, Billy Goat’s BC2600 Hydro Series brushcutters can clean up the roughest terrain. Here’s what you need to know to set up and maintain all three versions: the BC2600ICH, BC2600HH and BC2600HEBH.

Setup

Make sure you have all of these items are in the crate before you begin assembly:

Upper handle assembly
Guard bar
Four cable ties
Four 3/8” – 16 X 2” cap screws
Four 3/8 inch washers
Four 5/16 inch washers
Four 3/8”-16 lock nuts
Four 5/16”-18 lock nuts
Two #10-24 lock nuts
Two machine screws
Four 5/16”-18 x 1 3/4” carriage bolts
Starter switch (BC2600HEBH only)

If you have an electric start model, you will need a CB18, C50, SC50 or MCB50 series battery with a minimum 17.2 Ah rating.

Assembly:

1. Attach the handle to the engine base using 3/8 inch cap screws, washers, and lock nuts.
2. Tighten the mounting hardware on the handle braces.
3. Attach the guard bar to the skid bar by installing the side bolts into the top two holes on the skids with the carriage bolts and 5/16 inch washers and lock nuts.
4. Attach the throttle to the right hand bracket using the machine screws and matching lock nuts. Make sure the cable doesn’t bind. On electric start models, attach the throttle to the bracket, then feed the wire harness into the starter switch box and attach the switch. Push the switch into the top of the box until it seats.
5. Attach the blade drive cable to the lever. Seat the insert into the bracket on the left side of the handle.
6. Use the cable ties to secure the drive and blade cables to the handle.
7. Electric start models: Put the battery on the battery plate, then wrap the battery strap around the battery, connecting the ends to the holes in the plate. Make sure the battery can’t move, then connect the terminals.
8. Connect the spark plug wire, and add oil and gas to the engine.

Maintenance Schedule

Before using: Check for worn or damaged parts and make sure the battery strap is in good condition.
Every 5 hours or each day: Check for loose parts and unusual vibrations.
Every 25 hours: Sharpen the blade. Check the condition of the belts. Lubricate the control cable and linkage with a light oil.
Every 50 hours: Check the blade clutch tension. Apply anti-seize compound to the rear axles. Check for battery corrosion.
Every 100-150 hours: Replace the belts.

Always disconnect the spark plug before working on your brushcutter to prevent accidental starts.

Blade Removal and Sharpening

1. Lift the front of the brushcutter.
2. Wedge a wood block between the blade and the deck to keep the blade from moving.
3. Remove the nut and washer from the blade.
4. Sharpen or replace the blade. Replace the lock nut if it has been removed more than once.
5. Torque the lock nut to 30-40 ft-lbs.

Drive Belt Tension

1. Remove the deck cover which is held on by four screws.
2. Check the belt for wear and replace as needed. If the idler pulley doesn’t provide enough tension, replace the spring on the idler arm.
3. Reinstall the deck cover.

Transaxle Control Tension

With the engine off and the spark plug disconnected, move the barrel adjuster next to the transaxle lever to adjust tension. The drive should not engage with the handle open.

Blade Clutch Adjustment

If the clutch squeals or slips, it can overheat and fail. Stop using the machine until this problem is corrected.

If the cable is adjusted correctly, it should take 10 lbs. of force to close the lever, and the spring should stretch ¼ to 3/8 inches. To change the tension, turn the adjustment nut on the end of the cable that goes into the base of the brushcutter.

Transaxle Belt and Blade Belt Replacement

1. Lift up the rear of the machine.
2. Disconnect the idler spring from the bracket behind the drive pulley.
3. Walk the belt off of the clutch by slowly spinning the engine.
4. Slide the belt off of the transaxle pulley.

If you are only replacing the transaxle belt, install the belt by following the previous directions in reverse order. Make sure the belt is seated and doesn’t come in contact with the fan blades on the transaxle.

5. Remove the deck belt cover which is held on by four screws.
6. Pull the idler arm away from the blade belt. Walk the belt off of the deck pulley.
7. Install the new belt following the previous directions in reverse order.

Battery Care

The engine needs to run 45 minutes to fully recharge the battery when in use. Charge the battery every 4-6 weeks when not in use. Charge up to 48 hours at 1 amp, or 24 hours at 2 amps.

Need Something for Your Brushcutter?

If you live in the U.S. or Canada, you can get the OEM parts and accessories you need from Billy Goat Parts. We’re not just a Billy Goat dealer, we’re also a certified dealer for Honda and Briggs & Stratton, which means we carry everything for your hydro-drive BC2600. To order, visit www.billygoatparts.com.

Posted in Uncategorized | Tagged , , | Leave a comment

Setting Up and Maintaining Next Gen Hydro-Drive Sod Cutters

Setting Up and Maintaining Next Gen Hydro-Drive Sod CuttersDo you need help fixing the belts and blades on your Billy Goat Next Gen Hydro-Drive Sod Cutter? Are you having trouble just getting this big machine out of the crate? Here’s what you need to know to get one of these sod cutters running and keep it running, whether it’s the standard SC181H or the version designed for golf applications.

Set Up

1. Open the back side of the crate. You should see the handles of the machine facing the opening.
2. Pull out the lever on the base of the machine directly in front of the handle. This puts the transmission in neutral. Roll the cutter out of the crate.
3. Add oil to the engine.
4. Add grease to the bearings as needed.

Avoid heavy-duty jobs for the first few hours of use to let the mechanical components break in, then adjust the belt and cable control tension.

Maintenance Schedule

Before each use: Check the oil and air filter, and make sure all parts are bolted down and in good condition.
Every 25 hours of use: Change the oil and sharpen the blades.
Every 50 hours: Clean the air filter, and check the traction belts and cables for wear. Grease the jackshaft bearings and rear caster rod.
Every 100 hours: Check the spark plug.
Every 200 hours: Replace the traction belts and grease the upper pinion bearings in the gearbox.
Every 300 hours: Replace the air filter and spark plug.

Replacing the Blade Belt

1. Disconnect the spark plug.
2. Remove the blade guards.
3. Remove the master link from the lower drive chain.
4. Loosen the nuts and bolts on the belt guides, but don’t remove them.
5. You should now have enough space to pull the belt out. Walk the old belt off of the engine pulley, then the gearbox pulley.
6. Unscrew the bolt on the belt engagement pulley, then remove the pulley.
7. Slide the belt out of the machine.
8. Install the new belt in reverse order.

Drive Belt

1. Disconnect the spark plug.
2. Remove the blade guards.
3. Loosen the nuts and bolts on the belt guides, but don’t remove them.
4. Insert a 3/8 inch drive wrench into the square hole in the idler arm. Turn the arm clockwise to release the tension on the belt. Slide the belt out of the machine.
5. Slide the new belt into place. Make sure the spring is still attached to the idler arm: once pressure is released on the arm, it will probably come loose.
6. Follow the previous steps in reverse to finish installing the belt.

Checking and Replacing Blades

The blades should be inspected before each use. Always stop the engine and check the blades after the machine strikes a stump or other hard object. Wear thick work gloves when handling the blades to prevent cuts.

To access the blades, disconnect the spark plug and raise the blades to the maximum cutting height.

Replace the blades if they are cracked, bent, worn down or broken. Blades should be a minimum of two inches wide. Likewise, both the blade and blade bolts should be replaced if the bolts are worn. Always use new bolts when replacing the blades.

When installing new blades, torque the blade bolts to 26-28 ft-lbs.

Lubrication

Billy Goat recommends using an NLGL Grade 2 lithium-based grease when lubricating the pinion bearings, jackshaft, rear caster rod and cables. For the best results, use a synthetic grease. A diagram with grease points can be found on the service label. This label is on the base of the sod cutter.

Cable Adjustment

To check cable tension, set the machine on flat ground, shut off the engine and disconnect the spark plug. The control should be fully disengaged when the lever is opened, and start engaging as the lever is closed. Twist the barrel adjuster next the handle to increase or decrease tension. Once the cable tension is correct, apply grease to the cable slots in the drive levers.

Need Something for Your Billy Goat Sod Cutter?

Billygoatparts.com have everything you need for your Billy Goat equipment. As an authorized dealer for Billy Goat and their manufacturing partners including Honda Engines, we’re able to ship the OEM parts and accessories you need to any address in the U.S. or Canada. Ordering is easy: just select your model and serial number, and our site will show you compatible parts with factory descriptions and parts diagrams. That way you can be sure you’re ordering exactly what you need.

Posted in Uncategorized | Tagged , , | Leave a comment

Using Your Overseeder to Lay Down Granular Fertilizer

OS500Did you know you can use your Billy Goat overseeder to lay down fertilizer? If you have an OS500, OS801 or a PR550 with the overseeder conversion kit, it can drop granular fertilizer the same way it drops seed. This can save you money on equipment costs and gives you more options for application. Here’s how you can put your overseeder to work spreading fertilizer.

Why Granular Fertilizer?

Using your overseeder, you can distribute fertilizer uniformly over the turf to get the best results, and you can spread the grains over a wider area than a manual drop spreader, decreasing job times. Granular fertilizer is more expensive than liquid fertilizer, but by using your overseeder for seeding and fertilizing, you can save a lot of money on equipment. Granular fertilizers also give you more options for nutrient release.

Selecting a Fertilizer

The best fertilizer is the one that best matches the needs of your lawn based on a tested soil sample. However, even if you know exactly what nutrients you need, there are some choices you need to make to get the best results.

The fertilizer bag will have “NPK” numbers printed on it. These represent the percentage of the three main components in fertilizers:
N – Nitrogen improves leaf development and makes grass look greener.
P – Phosphorous helps root growth.
K – Potassium helps root growth and disease resistance.

For example, 16-4-8 is 16% nitrogen, 4% phosphorous and 8% potassium. These numbers should match what is recommended on your soil test.

Some blends are aimed at different seasons. Winterizer fertilizer has added potassium to help grass deal with stress during the winter, while starter fertilizers have extra phosphorus to kick start the growth of new grass. “Weed and feed” fertilizers combine fertilizer with pre-emergent herbicides to stop broadleaf growth in the spring.

Quick Release or “water-soluble nitrogen” (WSN) fertilizer goes to work immediately and last up to a month depending on rainfall. This is great for giving a newly seeded lawn a boost, increasing growth to push out weeds. Slow Release or “water-insoluble nitrogen” (WIN) blends are less likely to cause fertilizer burn, and they won’t wash away as easily if it rains.

Spreader Calibration

An accurate drop rate is critical for even fertilizer coverage. Drop rates vary slightly between spreaders, even if they’re identical models, and even different applications can vary due to factors like machine speed. Measuring the actual drop rate of your machine will help you get the right setting to deposit fertilizer evenly.

To check the drop rate, you’ll need a few tools:
A tape measure.
A scale that measures in either ounces or grams. A postal scale is ideal for this purpose.
A bucket
Flags or lawn chalk
A calculator

1. Measure and mark off a 50 or 100-foot length of turf.
2. Carefully measure out 5 or 10 pounds of fertilizer and add it to the hopper.
3. Set the drop rate to the amount recommended on the packaging.
4. Move the seeder a few feet behind the marked strip. Get it moving, then close the drop lever as soon as the hopper reaches the marked strip. If you have an OS500, you can line it up at the start of the strip and use the automatic hopper system to start fertilizing immediately. Fertilize the strip.
5. Shut off the machine and empty the hopper into the bucket. Measure the weight of the remaining fertilizer. The difference between the starting and ending weight is the amount of fertilizer you used.

Multiply the length of your overseeder’s hopper by the length of fertilized ground. For example, if you have an OS500 with a seedbox that’s 26.5 inches (approximately 2.2 feet) wide on a 100-foot strip of turf, you just covered 220 square feet. Divide 43,560, the number of square feet in an acre, by the number of square feet you just covered. Multiply the resulting number, in this case, 198, by the amount of fertilizer you used, and you’ll get the drop rate per acre. You may need to go up or down one setting on the hopper to get the drop rate to match up with the recommended coverage.

Getting Even Growth

For the best results, split the job into two passes running criss-cross to each other, going left to right over the yard, then up and down. This masks any overlapped or skipped areas, giving the lawn a more even appearance and avoiding problems with burned patches. Remember that you need to drop half the recommended fertilizer for each pass.

Need Something for Your Billy Goat?

If you need something to fix your equipment, or you want to turn your PR-series power rake into an overseeder, visit www.billygoatparts.com. We’re a certified dealer for Billy Goat and Honda Engines, so we’re able to ship OEM accessories and replacement parts to any location in the United States or Canada. Finding the right part is easy: just pick your model and serial number, and our site will show you parts listings and diagrams specific to your equipment.

Posted in Uncategorized | Tagged , , | Leave a comment

Getting More Life from Your Billy Goat’s Engine

Billy Goat EngineYou probably know what it takes to keep a lawnmower engine running, but what about the engine in a sod cutter or a lawn vacuum? Even if they have identical powerplants, the unique usage conditions of your Billy Goat equipment requires different care techniques than your mower. These tips will help you avoid common pitfalls and ensure the engine in your equipment lasts a long time.

Operating in Dusty Areas

Alongside recommendations for air filter and oil maintenance, your engine manual will mention checking these two areas more often if you “operate in dusty areas.” Construction vacuums, leaf blowers, and debris loaders are either operated in dusty areas or move so much air that the engine is exposed to more dirt than normal. As a result, the oil and air filter become contaminated faster than they would when powering other devices.

As with any engine, the oil and air filter should be checked before each use, or each day of use. Keep an eye out for reduced performance, heavy dirt buildup and discoloration that indicates the need for earlier maintenance. When operating in the dustiest environments, you may need to almost halve filter cleaning and oil change intervals.

That added dust also builds up on the cooling fins, which can cause the engine to overheat. In most cases, you can simply unbolt the engine cover and use a stiff brush and a rag to remove the dirt. Never spray the engine with water, as it can penetrate the seals and contaminate the oil.

Fuel

Stale fuel is a big problem for all outdoor power equipment, and the problem only gets worse if you have specialty equipment that only gets used a few weeks each year. Unless you’re sure you’ll use it within 30 days, all gas should be treated with a stabilizer. After 90 days, treated fuel should be removed from the engine and fuel tank. The Vanguard EFI V-Twin is less sensitive to stale fuel, but Briggs & Stratton gives the same fuel recommendations for this engine as they do their carburetor-equipped models.

Some Honda and Briggs & Stratton engines have a drain plug or bowl on the carburetor that lets you drain the entire fuel system, while other engines will need their tanks drained using a siphon hose. Once the tank is dry, run the engine to let it burn off the last of the fuel.

Air Filters

Incoming air is filtered by a paper air filter, a foam air filter, or both. Keeping these filters clean will let the engine get the air it needs to run.

Honda foam filter elements need to be washed in warm, soapy water or a non-flammable solvent. Once dry, soak the foam in clean engine oil and gently squeeze out the filter medium to remove excess oil.

Briggs & Stratton foam elements can be washed with soapy water or a non-flammable solvent, but they should not be oiled.

Depending on the model, the foam element used in some Subaru models may or may not need to be oiled. Check the engine manual for instructions. Oil bath filters will need oil added to the air cleaner assembly occasionally. The oil level is marked on the side of the air filter box.

Loose dirt on paper air filters can be removed by tapping the filter against a hard surface, or using compressed air with a low pressure (under 30 psi) spray tip. Rubbing on the filter medium will force dirt into the filter medium, clogging it faster.

Oil

You may not think much about the oil you use in most equipment since it primarily sees use in the summer, but you may need to switch oils when working in the fall or early spring.

Briggs & Stratton recommends synthetic oil for their engines if they’re used in a wide range of temperatures. Honda recommends 10W30 for a wide range of temperatures, but you may need to switch to a 5W30 in extreme cold and SAE 30 or 10W40 in extreme heat. Likewise, Subaru recommends 10W30 for most operating conditions, while 5W30 should be used if temperatures dip below freezing.

Folding Handles

When folding the handle on your equipment, be sure that the control cables don’t get pinched or kinked. This can cause problems when operating handle-mounted engine controls.

Get Everything You Need for Your Billy Goat from One Place

Billygoatparts.com doesn’t just sell OEM Billy Goat parts, we’re also an authorized dealer for Honda Engines, Subaru Power, Briggs & Stratton and Vanguard. That means you can get everything for your equipment from one place. Our site can show you parts specific to your engine once you enter the model and serial number, so you can be sure you’re ordering exactly what you need. We ship across the U.S. and Canada.

Posted in Uncategorized | Tagged , , | Leave a comment

Picking The Right Sod For Your Lawn

picking the right sod for your lawnYou have your Billy Goat sod cutter ready to remove the old grass and one of their aerators on hand to break up the soil to give your new lawn. You know what it will take to get the nutrient and pH balance right for the sod to take hold, and you have an irrigation plan in place. That just leaves one question: Which sod will work on your lawn? Choosing the right grass depends a lot on your local climate and lawn needs.

Knowing Your Zone

Broadly speaking, the climate in the U.S. can be divided into zones, each with specific turf needs.

Warm Season grasses work best in these zones.
Semitropical: The Gulf Coast and most of Florida
Hot Summer Arid: Southern Arizona, Southern New Mexico and Central Texas
Hot Summer Humid: From East Central Texas to South Carolina

Cool Season grasses work best in these areas.
Cold Winter Humid: From Central Nebraska, South Dakota and North Dakota to the East Coast
Cold Winter Arid: From Central Nebraska, South Dakota and North Dakota to Central California, Oregon, and Washington
Mild Winter Humid: The West Coast down to Southern California.

The transition zone, which stretches from SoCal to North Carolina and Virginia has hot summers and cold winters, requiring grass with both cool and warm traits.

Cool Season Grasses

Kentucky Bluegrass – While new strains are more drought, shade, and insect resistant, this grass always grows best in direct sunlight. Kentucky bluegrass grows slowly, but its rhizome-based root system can spread into thinned out turf to keep out weeds. Sod-based on Kentucky bluegrass mixed with faster growing varieties is usually the best choice for turf in the cold winter humid zone.

Perennial Ryegrass – This grass is resistant to heat, insects, and disease, and it grows well in poor soil. Small blades make ryegrass easy to cut, getting a great finish when mowed. Perennial ryegrass is commonly added to other slow-growing grasses to prevent erosion as the turf is established. It also has high wear tolerance.

Fine Fescue – While there are many varieties of fine fescue, all of them share traits that make them ideal for mixing with bluegrass and ryegrass: they’re the most shade-resistant varieties, but they also grow well in the sun. They don’t require much fertilizer, and they won’t compete with slower growing grasses. When mixed with other varieties, fine fescue fills in thin spaces. To be an effective ground cover, this grass should make up 1/4-1/2 of the grass mixture.

Turf Type Tall Fescue – Normally used in the transition zone, newer varieties also work well in cool, humid climates. This grass is shade and drought tolerant, and new varieties offer better ground coverage and higher resistance to heat, insects, and disease. Most tall fescue sod blends in a little Kentucky bluegrass for better coverage.

Warm Season Grasses

Bermudagrass – This grass needs lots of sun, and grows well in the hot summer arid zone as it has the lowest fertilization and water requirements of any grass aside from buffalograss. Many varieties can only be planted using sod.

St. Augustine – This grass works well in humid coastal areas, making it a favorite in the mild winter humid zone. It has the best shade tolerance of warm-season grasses, works with most soil types, and establishes itself easily through sod. It dies easily in freezing temperatures, but newer varieties are more cold resistant. Look for sod that is resistant to St. Augustine Decline (SAD,) a viral disease that causes mottling.

Centipedegrass – This grass works well in the hot summer humid zone. Shade tolerance is between St. Augustine and Bermuda, and it has the best drought tolerance of any warm season grass. It doesn’t truly go dormant, turning brown at freezing temperatures and going back to green once growing conditions improve. In mild climates, this grass can stay green all year round.

Zoysiagrass: This variety can handle cold weather better than other warm-season grasses and grows well in hot, humid conditions, making it a good choice for the transition zone. Sod is by far the easiest way to establish this grass. Once it takes root, it has excellent wear tolerance and decent drought tolerance. Emerald varieties have finer leaf blades than Meyer varieties.

Buffalograss – It may not develop into a dense lawn, but this grass is low maintenance, able to withstand extreme drought and will only grow 4-5 inches high if uncut. This grass does poorly in humid climates and has poor shade tolerance. This grass is native to the Great Plains, so it should be no surprise that it does well in the cold winter arid zone.

Keep Your Equipment In Shape to Make Lawn Care Easier

Do you need a new blade for your Hydro-Drive sod cutter or some tines for your AE400 aerator? You can get everything you need for your Billy Goat equipment at www.billygoatparts.com. As a certified dealer, we’re able to ship OEM parts and accessories to any address in the U.S. or Canada.

Posted in Uncategorized | Tagged , , , | Leave a comment

BC2600 Brushcutters Setup and Servicing

bc2600_534x575The BC26 Outback Brushcutter is a little more complex than a garden variety walk-behind mower, but that doesn’t mean it’s hard to work on. Here’s what you need to know to get your brushcutter working out of the box and keep it running, whether you have a BC2600ICM, BC2600HM, BC2600HMF or BC26HHEU.

Initial Setup

1. Attach the handle to the base of the brushcutter. Run the cap screws and washers through the tops of the holes in the handle, then push the bolts through the holes in the two handle brackets on the sides of the base. Screw on the lock nuts.
2. Connect the throttle cable to the bracket on the right side of the handle using the lock nuts and machine screws. Once tight, make sure the cable doesn’t bind.
3. Connect the blade drive cable to the lever on the left side of the handle and push the plastic insert into the bracket below the handle.
4. Use the included ties to attach the loose cables to the handle.
5. If you have a BC26HHEU brushcutter, attach the caster bracket to the front of the base using the clevis pin. It will snap into place.
6. Connect the spark plug wire and add oil and gas to the engine.

Maintenance Schedule

Before each use: Check the machine for loose, worn or damaged parts.
Every 25 hours: Sharpen the blades, inspect the belts and lubricate the throttle cable.
Every 50 hours: Check blade clutch tension and apply anti-seize to the rear axles. If you have an electric start model, check the battery for corrosion.
Every 100 to 150 hours: Replace the blade drive and transaxle belts.

Blade Replacement

The lock nut and washer are designed for one use only. Always use a new nut and washer when reinstalling the blade.

1. Disconnect the spark plug. Lift and support the front of the BC2600 to access the blade.
2. Place a wood block between the blade and the mowing chamber to keep the blade from spinning.
3. Remove the lock nut and washer.
4. Remove the blade.
5. Reinstall in reverse order, torquing the blade nut to 40 ft-lbs.

Blade Drive Belt Tension

Do not use your brushcutter if the belt slips or makes noise: this can overheat the drive clutch. To check the belt tension, do the following:

1. Disconnect the spark plug.
2. Loosen the four screws that attach the belt cover to the deck. Remove the cover.
3. Check the belt and belt tension. The idler arm should put constant tension on the belt. Unless the belt is visibly stretched or damaged, tension issues can usually be solved by replacing the idler arm spring.
4. Install the belt cover and reconnect the spark plug.
5. Operate the brushcutter. If the drive still slips, replace the belt.

To replace the belt:
1. Follow steps 1-3 above.
2. Slide the belt off of the belt pulley. You may need to bend the idler pulley back to relieve tension. To do this, insert a ratchet into the square hole on the idler pulley bracket and turn the ratchet clockwise.
3. Feed the belt toward the base of the machine and slip it off of the clutch pulley.
4. Install the new belt in reverse order.

Blade Clutch Adjustment

The cable tension needs to be adjusted if the blade doesn’t engage or disengage cleanly.

1. Shut off the engine and disconnect the spark plug.
2. Pull the clutch lever. The lever should require 10 lbs. of force to operate, and the cable spring, located between the cable and the handle, should stretch ¼ to 3/8 inches when the handle is closed.
3. Adjust cable tension by turning the adjustment nut on the end of the cable next to the base of the machine.

Transaxle Belt Replacement

1. Disconnect the spark plug. Lift and support the rear of the machine to access the underside of the deck.
2. Disconnect the spring from the bracket that keeps tension on the drive belt.
3. Walk the belt off of the clutch by slowly turning the engine.
4. Slide the belt off of the transaxle pulley.
5. Install a new belt in reverse order. The belt should seat into the pulley grooves and clear the fan blades on the transaxle.

Transaxle Drive Adjustment

If the drive doesn’t engage smoothly when closing the handle, or the brushcutter doesn’t stop when the handle is released.

1. Shut off the engine and disconnect the spark plug.
2. Turn the barrel adjuster on the end of the drive cable next to the handle. The further the adjuster extends from the handle, the higher the cable tension will be.
3. Reconnect the spark plug and operate the machine to check the tension.

Need Parts for Your Outback Brushcutter?

Since we’re an authorized Billy Goat, Hydro-Gear, Briggs & Stratton, and Honda Engines dealer, www.billygoatparts.com is able to offer OEM replacement parts for everything on your brushcutter. We ship to any address in the U.S. or Canada.

Posted in Uncategorized | Tagged , , | Leave a comment