Maintaining Your Grazor

Maintaining Your Grazor

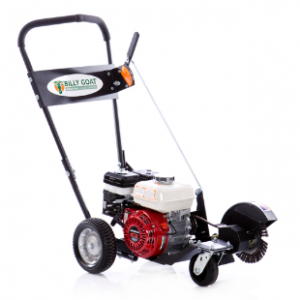
Winter is ending, and that means customers will be looking to have their driveways recoated to survive the cold and snow at the end of this year. Here’s what you need to know to keep your Grazor concrete cleaner running so you can ready driveways and sidewalks for seal coating.

Maintenance Schedule

Concrete Cleaner Maintenance
Every use: Check for excess vibration
Every 5 hours or daily: Check for loose, damaged or worn parts
Every 25 hours: Inspect belt, lubricate wheels and grease brush arm mechanism

Engine Maintenance

Before each use: Check engine oil level and air filter
First month or 20 hours: Change engine oil
Every three months or 50 hours: Clean the air filter, check the spark plug (Subaru only)
Every 6 months or 100 hours (Honda only): Clean the sediment cup, check the spark plug and, if installed, spark arrester.
Every 200 hours (Subaru only): Replace air filter, clean sediment cup and check spark plug electrodes
Every year or 300 hours: Replace spark plug and air filter

Changing the Brush

1. Disconnect the spark plug cap

2. Remove the brush guard, which is held on by two screws.

3. Using a heavy cloth, hold onto the brush. Use a ¾ inch wrench to turn the nut holding the brush to the machine counter-clockwise.

4. Inspect the washer for wear and replace as needed.

5. Install the new brush in reverse order. Be sure to use the nylon bushing that came with the new brush, even if the old one has little wear.

Changing the Drive Belt

1. Disconnect the spark plug cap

2. Using two ½ inch wrenches, unscrew the bolts and nuts on the brush guard and front pulley guard. Remove these guards.

3. Use a 3/8 inch wrench to remove the three bolts on the rear pulley guard. Remove this guard.

4. Remove the belt. On some older models, you may need to change the brush position to get the belt off. Put the brush in the “Store” position, then slide the belt off of the front pulley. Move the brush to the “3” position, and slide the belt off of the rear pulley.

5. Install the new belt in reverse order, reinstalling the guards once it’s fitted.

Changing the Pulleys

Always change the pulleys in pairs to decrease belt wear and ensure the service life of your equipment. Follow the instructions above for removing the belt. Once the belt is off, do the following:

1. Loosen the set screws on the pulleys using a 5/32 inch Allen wrench.

2. Slide the pulley off of the shafts

3. Slide the new pulleys onto the shafts. Place a long straight edge against the sides of both pulleys to make sure they’re aligned.

4. Install the set screws, torquing them to 15 ft-lbs.

5. Reinstall the belt and guards.

Engine Oil

To check the oil, remove the dipstick/filler cap and wipe it clean. Insert it back into the oil filler neck without screwing it in. Check the level on the dipstick. 10W30 is recommended for most operating conditions.

Spark Plug

The spark plug gap should be between 0.02-0.03 inches (0.6-0.7 mm) on Subaru engines and 0.028-0.031 inches (0.70-0.80 mm) on Honda engines. Replace the plug if the electrode is worn or there are signs of cracking or other damage. When installing the plug, start by threading it in by hand to prevent cross-threading. Use a spark plug wrench to seat the plug, then turn another 1/8 to ¼ turn if the plug is used or ½ turn if the plug is new to get a good seal.

Air Filter

To clean the filter on the Honda GX160, wash it in a non-flammable solvent or mild soap and water. Once dry, soak the filter in clean engine oil, then squeeze out any excess.

On Subaru engines, wash the foam element with kerosene or diesel fuel. Soak the cleaned filter in a mix of three parts kerosene to one part diesel and squeeze out any excess fluid. Tap the paper element against a hard surface to remove any surface dust.

Sediment Cup

Shut off the fuel valve, then unscrew the fuel cup, located directly below the fuel valve switch. Clean out any collected sediment, then reinstall. On Honda engines, this cup will have a small O-ring that needs to be fitted to the cup before screwing it back into the carburetor.

Getting Parts for Your Grazor

Billy Goat limits sale of this concrete cleaner to paving dealers, but you can get everything you need for your Grazor at www.billygoatparts.com. We’re not just a Billy Goat paving dealer, we’re also a certified dealer for Honda Engines and Subaru Power, letting us ship replacements for everything on this equipment. We can have your order delivered to any address in the U.S. or Canada.

Posted in Uncategorized | Tagged , , , , | Leave a comment

Reciprocating Aeration: The Clear Choice for Productivity

Reciprocating Aeration: The Clear Choice for ProductivityWhy has Billy Goat moved from drum aerators to reciprocating designs? Over years of testing, they found that reciprocating aeration delivers huge productivity benefits. Upgrading to one of these aerators doesn’t just cut job times, it delivers better results and reduces maintenance, helping your bottom line.

Drum Aerators: A Proven Design with Some Major Problems

This type of aerator uses a heavy roller with tines bolted onto the exterior or built into a mechanism to fold out when needed. The roller’s weight to push tines into the ground, limiting hole density of 4-6 holes per square foot. Walk-behind models can be rolled back and forth in the ground to cut more holes in the turf, while stand-on models have to make several passes to fully relieve ground compaction.

Using a drum aerator is awkward. Tines should be disengaged to let the roller move freely for tuning, but since this is difficult, most landscapers simply lift and spin the unit, letting the tines drag against the ground and damage the turf. Manufacturers have come up with solutions including support wheels and split drive systems to make turning easier, but this adds cost and doesn’t completely eliminate the problem.

For large spaces, there are towable aerators like Billy Goat’s AET60. By mounting the tines on swiveling assemblies and using the towing tractor’s three-point hitch to lift the unit when turning, most of the turf damage problems are eliminated. Unfortunately, there’s no way to adapt this design to a machine that is small enough to be used on suburban lawns.

No matter the design, drum aerators are very sensitive to soil moisture. If the soil is too dry, the tines will ride over compacted soil instead of punching into it. If it’s too wet, the weight of the roller can increase compaction, making drainage problems even worse

Reciprocating Aerators: Addressing Issues Head On with Modern Design

Instead of relying on weight, reciprocating aerators use mechanical force, using an engine to drive a cam that pushes the tines into the soil. This allows the tines to cut repeatedly as the aerator is rolled along, getting a hole density with one pass that would require several passes with a drum aerator. Billy Goat took this design a step further with their AE1300H. It has a Variable Aeration Density (VAD) system which controls the speed of the cam, letting it make twice to 10 times as many holes as a drum aerator. This relieves soil compaction with the minimal amount of holes, which means fewer core plugs to clean up.

All reciprocating aerators are lighter than their drum counterparts, reduces compaction. The cam drive also uses fewer tines and makes it easy to disengage, eliminating turf damage when turning.
Soil still needs to be moist, but issues with compaction or penetration are far less likely, getting good results even when the ground isn’t perfectly saturated.

The added density and control don’t just make jobs easier, they greatly decrease operating costs. On average, a reciprocating aerator can get small jobs done in half the time of a walk-behind drum aerator. For larger jobs, adding a chariot or a sulky can give a walk-behind similar performance to a small ride-on drum aerator with a lower upfront cost. Since a reciprocating design doesn’t need side wheels, the unit can be narrow enough to pass through gates without sacrificing performance.

With four or 8 tines to service instead of 30 to 40, cleanup is faster and repairs are less costly. This design also keeps the tines visible, making it easier to avoid sprinkler heads, rocks, and other objects.

Keeping Your Modern Machine Ready to Work

If you’re making the switch to a reciprocating aerator, getting replacement parts is as simple as using your browser. Billygoatparts.com is a certified dealer for Billy Goat and their manufacturing partners, letting us offer a complete line of parts for their equipment and the engines that power them. Our site has built in parts diagrams and descriptions to make it easy to find what you need, and we can ship your order to any location in the U.S. or Canada.

Posted in Uncategorized | Tagged , , | Leave a comment

Servicing the Honda GC Series

Servicing the Honda GC Series

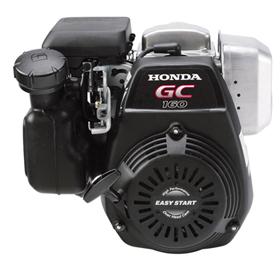
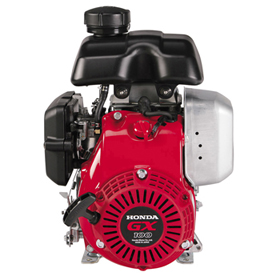
The GC 160 may be from Honda’s residential line, but this engine’s low weight and high build quality make it a perfect fit for Billy Goat’s smallest equipment including models from their power rake, blower, and lawn vacuum lines. Want to make sure this engine lasts as long as what it powers? Here’s everything you need to know about maintaining it.

Maintenance Schedule

First month or 5 hours of use: Change the engine oil.
Every three months or 25 hours: Clean the air filter.
Every 6 months or 50 hours: Change the engine oil.
Every year or 100 hours: Check the spark plug and, if equipped, clean the spark arrester.
Every two years or 250 hours: Replace the air filter and spark plug. Check the fuel line for signs of cracks.

Honda recommends having a professional mechanic check the valve clearance and idle speed every 100 hours and clean the combustion chamber every 250 hours.

Fuel

This engine is designed to run on regular unleaded with an octane rating of 86. Fuel mixtures should be no more than 10% ethanol, 5% methanol or 15% MTBE.

Fuel should be used within one month of purchase, or within three months if it has been treated with a stabilizer. Always drain the tank and carburetor before putting the engine into storage.

When filling the tank, never let the fuel level get past the base of the filler neck. Move your equipment at least 10 feet away from where you refueled the engine to prevent ignition of any remaining fumes.

Oil

For the operating conditions that your Billy Goat equipment will see, Honda recommends using 10W30 motor oil. 5W30 can also be used, as can SAE 30 above 50°F.

The dipstick is built into the cap for the oil filler neck. To get an accurate reading, the dipstick should be inserted into the neck without screwing it in. When adding oil, the oil should come up to the neck opening.

Oil can be drained by removing the plug bolt below and to the left of the filler neck. Always install a new washer on this bolt when changing the oil to ensure a tight seal. The GC 160 holds 20 oz. Of oil.

Some engines come equipped with Oil Alert. This system will shut off the ignition if the oil level is too low, keeping the engine from running or starting. If your engine fails to start, check the oil level first.

If you accidentally spray the engine in your power washer, change the oil as soon as possible. Oil and water will form a sludge-like emulsion that won’t protect the engine.

Air Filter

To access the filter, press in the tabs on the air box cover and swing it up.

To clean the air filter, tap it against a hard surface to remove any loose dirt. Wipe out the air box with a clean rag before reinstalling. Take care not to brush dirt toward the opening at the base of the box, which leads to the carburetor.

Spark Plug

The plug can be accessed by removing the spark plug cap and unscrewing the plug with a plug wrench. The spark plug gap should be between 0.028-0.030 inches (0.70-0.80 mm.) Any deposits should be removed from the plug before checking the gap. If the ceramic has been damaged or the electrode is worn or fouled, the plug needs to be replaced.

Always turn the spark plug by hand when reinstalling to ensure it isn’t cross-threading. Once finger tight, use the plug wrench to turn the spark plug until it seats. From there, turn another 1/8-1/4 of a turn if it’s a used plug or ½ turn if it’s new. This will seal the washer between the head and the plug.

Spark Arrester

Some local fire districts require spark arresters on outdoor equipment, and it’s a good idea to have one if you need to work around dry grass.

Before checking the arrester, let the engine cool for at least a half hour after running to let the exhaust cool off.

Remove the three bolts holding the muffler cover. Remove this cover, then take out the single screw on the side of the muffler tailpipe. The arrester should slide out of the end of the pipe. Use a wire brush to remove any deposits. Over time, cracks and holes can develop in the arrester’s screen. If this happens, it should be replaced.

Getting the Parts You Need for Your Billy Goat

www.billygoatparts.com isn’t just a certified Billy Goat dealer, we’re also a dealer for Honda Engines. This lets us provide you with everything you need for your equipment from air filters to impeller bolts. Our site has built-in factory diagrams and descriptions for everything we sell, making it easy to find exactly what you need. We can ship your order to any address in the United States or Canada.

Posted in Uncategorized | Tagged , , | Leave a comment

Servicing the Honda GX Series

Servicing the Honda GX Series

From pressure washer to debris loaders, if Billy Goat makes it, they offer it with a Honda GX-Series engine. Here’s what you need to know to ensure this engine delivers reliable service.

Maintenance Schedule

Before each use: Check the engine oil level and air filter.

First month or 20 hours: Change the engine oil

Every three months or 50 hours: Clean the air filter

Every 6 months or 100 hours: Change the oil, clean the sediment cup, check the spark plug and clean the spark plug arrester.

Every year or 300 hours: Replace the paper air filter and spark plug.

Every two years: Check the fuel tube.

On models with a reduction gear, the gear oil level should be checked before each use and replaced at the same time as the engine oil.

Honda recommends bringing the engine in for service every 6 months or 100 hours to clean the fuel tank and filter, and every year or 300 hours to check the idle speed and valve clearance.

Fuel

This engine is designed to run on unleaded with an octane rating of 86 or higher and up to 10% ethanol, 5% methanol or 15% MTBE. Fuel should be used within one month of purchase or three months if treated with a stabilizer. The tank should never be filled past the top of the strainer in the filler neck. If your engine’s tank doesn’t have this filter, only fill the tank within one inch of the top.

Light pinging is normal under heavy loads, but if it’s persistent, consider switching to a different gasoline.

Oil

To check the oil, remove the oil filler cap and wipe off the dipstick. Insert the dipstick without screwing it back into the filler neck.

To change the oil, remove the bolt at the base of the engine just to the left of the filler neck and let the used oil flow collect into a container for recycling. Add new oil until it reaches the top of the neck.

Billy Goat aerators have a reduction gear built into the side of the engine. The oil should reach the top of the oil check bolt on the side of the case. To change the oil, let the engine warm up. Shut off the engine, remove the check bolt, and tilt the engine forward to drain out the old oil. Add fresh oil through the filler bolt hole in the top of the case until it reaches the check bolt hole.

Honda recommends using 10W30 in the engine and gear case for most operating conditions.

Air Filter

To access the filter elements, remove the wing nut on the top of the air cleaner cover, followed by the cover and a second wing nut.

To clean the outer foam element, wash it in water and a mild detergent, or soak it in a non-flammable solvent. Once dry, soak the foam in clean engine oil and squeeze out any excess.

To clean the foam element, knock it against a hard surface to remove any loose dirt.

Before reassembly, wipe out any dust that has gathered on the base or cover of the air cleaner. Make sure there is a gasket fitted to the base of the cleaner where the air enters the carburetor.

Spark Plug

To access the spark plug, disconnect the plug cap and unscrew the plug with a 13/16 inch plug wrench.

The spark plug gap should be between 0.028 and 0.031 inches (0.70-0.80 mm.) Replace the plug is the electrode is worn or the plug is damaged or fouled.

Thread the plug in by hand to avoid cross-threading, then tighten with the plug wrench. Once the plug seats, turn another 1/8-1/4 turn if it was used, or ½ turn if the plug is new. Reinstall the spark plug cap.

Sediment Cup

This cup is located directly below the fuel valve and to the right of the carburetor drain bolt. To remove, turn the fuel valve off, then unscrew the cup. Pour out the gas and debris into a suitable container and remove any remaining residue with a non-flammable solvent. When reinstalling, make sure the o-ring is fitted to the lip of the cup.

Spark Arrester

A spark arrester may be required in some locations to meet local fire safety regulations and can be added to any engine.

Remove the four screws holding the protector onto the muffler, along with two screws holding the exhaust deflector onto the muffler. Remove these pieces and slide the arrester out of the muffler opening.

Clean off any deposits with a wire brush. If there are holes or cracks in the spark arrester, it should be replaced.

Getting Parts for Your Billy Goat’s Engine

Billygoatparts.com is a certified dealer for Billy Goat and Honda Engines so you can get everything you need for your Billy Goat equipment from one source. We can ship anything you need to any address in the United States or Canada.

Posted in Uncategorized | Tagged , , | Leave a comment

Getting Your Pressure Washer Out of Storage

Getting Your Pressure Washer Out of Storage

Temperatures are rising, and that means it’s time to pull out your Billy Goat pressure washer and put it back to work. Here’s what you need to do to get it ready for the season from setting up the engine to cleaning the antifreeze out of the pump.

Checking for Leaks

Before you move your pressure washer, look underneath it for signs of leaks from the engine. If you loaded the pump with antifreeze before storing, it’s normal to have a drop or two of residue from escaped fluid. However, an empty pump indicates seal problems that may warrant a rebuild.

Pressure Washer Inspection

Inspect the high-pressure hose, detergent siphon hose, spray gun and detergent filter for damage. If there are cracks in the high-pressure hose or damage to the gun, they must be replaced before the pressure washer is used. Even minor weaknesses can let water escape, creating dangerous leaks.

Examine the inlet screen that fits over the port for the garden hose. If it has holes or signs of cracking, it needs to be replaced.

Any dust buildup should be wiped off of the pressure washer. Never use the pressure washer to clean the engine: the force can push water into the crankcase, where it will mix with the oil. This creates an emulsion that will not lubricate internal components, leading to premature damage.

Tire Pressure

Air will leak out of your pressure washer’s tires over time, and after months sitting in storage, they’re probably flat. Airing them up before moving your equipment will make the washer easier to roll and keep the bead from separating from the rim. The tires only need enough air to support the weight of the engine and pump, which is well below the 20 or so PSI maximum rating of the tires. In most cases, 5-8 psi is plenty to get your equipment rolling.

Engine Oil

If the oil wasn’t changed before storage, it should be changed now. While the engine hasn’t been used, prolonged storage can lead to the breakdown of even lightly used oil.

Pump Oil

Leakage and moisture contamination is possible during long-term storage. Check the pump to ensure the oil is clear and at the correct level.

Both CAT Pumps and Annovi Reverberi make oil specifically for their pumps to deliver maximum protection. Non-detergent SAE 30 oil can also be used in pumps from both manufacturers, but it will need to be changed more often as it will break down faster.

Antifreeze

If you stored your equipment correctly, you filled the pump with either “pump saver” antifreeze or RV antifreeze. This can be safely flushed out by operating the pressure washer. RV antifreeze can be safely disposed of in the sewer: operate your washer as usual while spraying into a bucket until the water coming out of the wand is clear. Once the water runs clear, pour the antifreeze collected in the bucket into a sink.

Pump saver antifreeze is biodegradable, but it’s also poisonous and is not safe to flush into the sewer. Instead of spraying the antifreeze into a bucket, spray it over a wide area of turf to prevent it from pooling. This will keep animals from drinking the antifreeze before it has time to decompose. The ethylene glycol and other chemicals in the solution will break down in a few days.

If you’re having trouble with pump performance after using RV antifreeze, you may want to use pump saver when storing your washer, even if it’s just for a few days. This antifreeze includes chemicals that dissolve deposits that can keep the plungers from getting a good seal. Deposit issues are more likely if you live in an area with hard water.

Getting Parts for Your Billy Goat Pressure Washer

Billygoatparts.com is more than an online retailer: we’re a certified dealer for Billy Goat, AR, Cat Pumps, Honda and Briggs & Stratton. This lets us offer OEM parts for everything on your Billy Goat equipment. Our site lets you search for parts based on your model, and you can see factory parts diagrams and descriptions so you can be sure you’re ordering exactly what you need. We can ship your order to any address in the U.S. or Canada.
Posted in Uncategorized | Tagged , , | Leave a comment

Getting Your Aerator Out of Storage

Getting Your Aerator Out of Storage

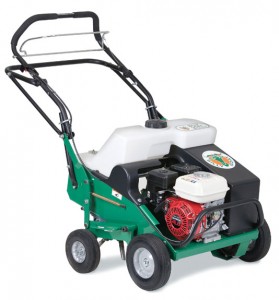
Winter is on its way out, and that means a fresh start on lawn care. Here’s what you need to check when getting your Billy Goat aerator out of storage so you can break up compaction caused by snowfall and prepare turf for reseeding and repair this spring.

Before You Begin

Before you move your aerator, stop to take a look at the ground where it was stored. If you see oil or fluid leaks, trace them to the machine so you can fix them later.

Fuel

If the aerator was stored with fuel, it needs to be drained and replaced with fresh fuel, even if the gas was treated. Use a siphon to remove gas from the tank. Honda engines have a drain plug on the debris cup, located directly below the engine controls. Remove this plug, then open the fuel valve to drain the remaining fuel into a suitable container. On Briggs & Stratton engines, simply run the engine to burn off the remaining fuel.

Gasoline should be used within one month of its purchase, or three months if it has been treated with a stabilizer. Fuel injection systems have no problem burning fuel that’s too old for your aerator’s engine, so it can be safely used in your car or truck.

Check the fuel cap for debris build-up, making sure the holes on the top are clean. This lets air in as gas enters the fuel line and carburetor.

Oil

The oil level in a Honda engine should be checked by inserting the filler cap/dipstick without screwing it in, while the dipsticks on Briggs & Stratton engines should be fully inserted. 5W-30 or 10W-30 is recommended for most operating conditions.

Honda engines come with their “Oil Alert” system, which will disable the ignition if the oil level is too low. If you’re having starting problems, it’s a good idea to check the oil level to make sure this system hasn’t been activated.

On some models, the engine has a reduction gear inside a large case on the side of the motor. The reduction gearbox uses the same oil as the engine.

Chain

The drive chain should be coated with non-detergent SAE 30 oil. This chain is almost fully protected from debris, but if there are signs of dirt, it can be cleaned off using a solvent like a chain degreaser or brake cleaner. Try to avoid any contact between these solvents and painted parts on the aerator. Once dry, a new coat of oil can be applied.

Hydrostatic Transmission

The transmission is maintenance free, but it’s still a good idea to check the seals around the axles for leaking hydraulic fluid. If there are signs of seepage, the transmission needs to be serviced or replaced.

Tire pressure

The recommended tire pressure will be written on the sidewall. For walk-behind aerators, this is typically 8.5 psi.

Tine Inspection

Make sure the reel is clear of debris and check the general condition of the tines: they should be replaced after they’ve worn down one inch, even if they still cut through the soil. Check the tightness of the bolts holding the tines onto the reel.

Belts

Check the belts for cracking that may have occurred in storage. On AE-series aerators, the belt can be accessed by unbolting the top cover next to the engine.

Bearings

Check the grease on the cam bearings, shaft bearings, and wheel bearings: if there is no grease visible along the edges, or the grease is dirty, it should be replaced with new lithium grease. Always clean the Zerk fitting before pushing new grease into a bearing.

Towable Aerators

These trailers may not have engines and drive systems, but there are a few areas that should be inspected before you put them to work:

With the tines in the raised position, chock the wheels and lubricate the grease fittings on the bearings using a grease gun. Billy Goat recommends standard lithium grease.

Check the tine reel nut torque. It should be set to 100 ft-lbs. Check all tine bolts for tightness.

Check the tire pressure. The recommended pressure will be stamped on the sidewall.

Examine the water tanks for signs of leaks or cracks.

Getting Parts for Your Aerator

Billygoatparts.com is a certified dealer for Billy Goat, Hydro-Gear, Honda Engines and Briggs & Stratton so we can supply you with parts for everything on your aerator no matter where you are in the U.S. or Canada. Not quite sure what you need? Our site can show you exploded diagrams and factory descriptions of parts specifically for your model so you can see exactly what you’re ordering.

Posted in Uncategorized | Tagged , , , | Leave a comment

Spring Overseeding Tips

Spring Overseeding Tips

Lawn looking a little thin? Need to fix bald spots and other damage left behind by winter weather? Maybe now is a good time to consider overseeding. By choosing the right grass and doing the right preparation, you can get your lawn looking lush and green again.

Choosing a Grass

Grass seed is available in mixes with one predominant variety. Choosing the right one depends on where you live and where it will be applied.

Northeast: Kentucky bluegrass
Kentucky bluegrass works well in cool climates and is disease resistant, making it a natural fit.

Southeast: Bermudagrass
This grass is heat resistant and works well in high moisture areas.

Midwest: Kentucky bluegrass and fescue
A milder climate in the summer lets both of these grasses thrive.

Gulf Coast: Bahiagrass, centipede grass, Bermudagrass
Centipede grass is good for poor nutrient soil, while bahiagrass is pest and disease resistant.

West: Tall Fescue
This grass is drought resistant, making it a good choice for areas with a mix of rainy and dry periods.

Pacific Northwest: Kentucky bluegrass and tall fescue
Both of these grasses can handle heavy rainfall.

Southwest: Bermudagrass
This grass needs 40% less moisture than fescue, making it a good choice for dry areas.

Transition region: Kentucky bluegrass, tall fescue, and zoysia
This region includes the central states between the East coast and Kansas, where weather can be unpredictable. Unlike modern varieties, standard zoysia works well in summer and can survive surprise spring freezes.

If you’re planting in a shaded area, consider a shade tolerant Kentucky blue or a tall fescue. Tall fescue grows faster than turf fescue, so mixing these grasses will result in an uneven lawn.

Endophytes are a type of fungi that grow on grass, making it unpalatable to insects and more resistant to heat stress, red thread, and dollar spot. Endophyte-enhanced seeds are a good choice for areas with major heat and pest problems, but it can make grazing animals severely ill. If there is any chance that horses or cows might get on your lawn, this type of seed should be avoided.

When to Seed

Temperatures need to be between 59 and 77 degrees to get the seeds to germinate, and there needs to be little to no chance of getting snow or heavy freeze.

Preparing the Soil

Get a soil test. While there are fertilizer blends designed for spring seed germination, they might not be the mix your soil needs to support growth. Strong phosphorus (P) levels are needed to encourage grass growth. If you’re going to apply fertilizer, do so before overseeding.

If you need to use pre-emergent herbicides, put them down a few weeks before you plan on overseeding. Otherwise, they could keep the new seeds from germinating.

Aerating the soil will break compacted areas, and it helps new seeds penetrate the soil while having plenty of access to air and water. If you aren’t going to aerate, consider adding a light top dress of soil after seeding to help the new plants take root.

Dethatching may be necessary if you have buildup that’ s over a half inch thick. Like aeration, this helps open up the soil to give the seeds a better chance of taking root.

Mow the grass to a height of two inches or less. This helps seeds spread by your overseeder land directly on the soil.

Overseeding

If you haven’t overseeded before or you need to cover a bald spot, go for the maximum amount on the package. If you have overseeded, aim for the middle or low recommendations, depending on the current grass density on your lawn. Expect to use at least 5 lbs. per 1,000 square feet of soil. The lid of your overseeder will have instructions for setting the correct drop rate.

The overseeder should move at a good walking pace. The OS500 may not have a drive system, but the blades will help pull it along as it cuts slots into the turf for the seeds.

Getting the New Grass to Take Hold

Bald spots should be covered with straw or a thin layer of soil to protect the grass from direct sunlight.

Lightly water the soil two to three times a day. The soil should be moist, not muddy. Once the new grass starts sprouting, decrease the watering frequency, but increase the amount to let the water penetrate deeper into the soil. Once the new grass is two inches tall, you can resume normal mowing and watering.

Getting Parts for Billy Goat Overseeders and Dethatchers

Need to work on your overseeder? Is your power rake due for some new tines? www.billygoatparts.com is a certified dealer for Billy Goat and their manufacturing partners, making us your one-stop shop for parts and accessories for their equipment. Our site lets you find parts based on your model and can show you factory parts diagrams and descriptions so you can be sure you’re getting what you need. We can ship your order to any address in the U.S. or Canada.
Posted in Uncategorized | Tagged , , | Leave a comment

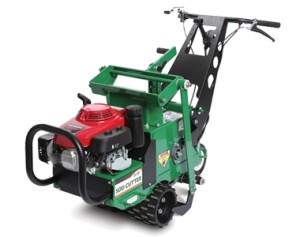
The New SC181H Hydro-Drive Sod Cutter

SC181H Hydro-Drive Sod Cutter

At first glance, the SC181H may not look new, but this update to their Hydro-Drive Sod Cutter brings major improvements to blade life along with some features changes that make it easier to use.

Better Cutting With Lasers

The blade of this sod cutter may look the same as its predecessor, but it’s much more wear resistant thanks to the introduction of a new laser cladding process that bonds a proprietary powder coating to the blade surface. When Billy Goat tested this new coating in sandy soil, it took 180 hours to wear down 0.04 grams of edge material, three times longer than a conventional blade. Whether you’re cutting through sand or soft clay, this advancement means less frequent blade changes and less downtime, helping your bottom line.

The Same Rugged Construction of Its Predecessor

This machine is still powered by a 133 cc Honda GVX that makes 5 hp, and it’s still built around the strongest frame in the industry, combining a 3/8 inch steel sub-structure with a ½ inch steel lateral support. The gearbox is built to match with oversized sealed bearings, shaft-mounted eccentrics and a one-inch lateral stability bar. Oversized isolation mounts are used on the handle and every major component to limit the transmission of bumps and vibration to the operator.

The drive system uses a maintenance-free Hydro-Gear RT310 transmission. This hydrostatic unit, usually found in snowblowers, allows infinite adjustment in both forward and reverse, and has a transport speed of 3.5 mph, making it the fastest model in the market. The transmission now uses the same fingertip control found on Billy Goat’s hydro-drive overseeder and brushcutter, making it easy to adjust speed on the fly to keep the cutter going through tough soil and roots.

The “Set and Forget” blade adjustment is set from the operator controls using a single lever. The blade can be lowered enough to cut up to 2.5 inches deep. The cutter comes with an 18-inch blade and can be fitted with a 12-inch blade for working in tight quarters.

The rear of the machine rests on a caster that can be left free to maneuver around landscaping features and buildings or can be locked into place to get consistent straight cuts on open turf. The Golf Applications version of the SC181H is fitted with knobby rollers to help it glide over turf and make lighter, softer cuts.

There are now 6 tie-down points instead of four, making it easier to secure to trailers and truck beds when moving between job sites. Like all of Billy Goat’s products, the designers put a lot of effort into making repairs as simple as possible, requiring a few common tools for replacing blades and belts and adjusting pulleys and cables. There’s even an hour meter, a rarity on equipment this small.

Warranty

Honda guarantees the engine for three years of commercial use, while Billy Goat guarantees the rest of the sod cutter for one year.

Getting Parts for these New Sod Cutters

Whether you have the standard SC181H or the golf turf version, you can get everything you need for your sod cutter at www.billygoatparts.com. As a certified dealer for Billy Goat, Hydro-Gear and Honda Engines, we’re able to ship replacement parts and accessories for Hydro-Drive sod cutters and everything else that Billy Goat makes to any address in the U.S. and Canada. Our site has built-in factory information including parts descriptions and exploded diagrams so you can find exactly what you need.

Posted in Uncategorized | Tagged , , | Leave a comment

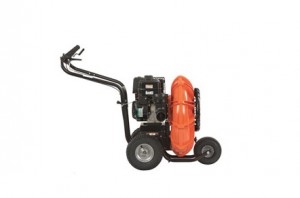
New Billy Goat F10 Force II Wheeled Blower

New Billy Goat F10 Force II Wheeled Blower

When it comes to leaf blowers, more power is always better. Billy Goat’s wheeled leaf blowers already have a huge advantage over backpack blowers, and with the new F10, they make this cleanup option even more appealing. Aimed at the commercial users and homeowners who need to take care of large properties, this model combines the impeller and case of the F9 with a new, more powerful and easier to use engine from Briggs & Stratton’s Vanguard line.

Power

What sets the F10 apart is its use of a single cylinder 305 cc Briggs & Stratton Vanguard engine. It produces 10 hp, more than the Honda and Subaru engines used in the F9, while only weighing a few pounds more.

Of course, power is only part of the equation when it comes to usability; this engine has a lot of features that make it more reliable and easier to maintain. It uses the Transport-Guard system which has a single switch to shut off the engine and cut the fuel supply, ensuring that fuel and oil won’t mix during transport. A clear sediment cup on the carburetor makes it easy to see when it’s full, and it can be drained without needing to use tools. The filter is a high capacity unit, something rarely seen outside of large V-twins, to reduce the amount of dust that reaches the intake while reducing cleaning and replacement intervals. This makes it particularly well-suited to the dusty operating environment created by a blower like the F10. The designers even made the ball bearings that hold in the crankshaft easy to replace, extending the engine’s service life.

This motor also borrows a few features from their line of kart racing engines, including a connecting rod that makes the most of the splash lubrication system and a head gasket that can handle higher torque loads.

Performance

Like other Force blowers, this model uses a composite housing. Using plastic instead of metal lowest the weight by 30% while increasing efficiency and reducing noise thanks to a precision fit that eliminates stagnant areas and reduces turbulence. Inside, there’s a closed face 16 blade fan that is cast in a single shot, forming the entire unit as one piece so there’s nothing that can shake loose and cause vibration problems.

Together, the impeller and engine force air out of the four-inch nozzle at just under 200 mph. This model uses Billy Goat’s Aim N Shoot system which lets the operator change the angle of the nozzle using a handle-mounted lever, going from low angles for open spaces to high angles to deflect debris off of and away from buildings. A rubber forward discharge elbow is also included, which snaps over the end of the nozzle.

Models

Billy Goat offers the F10 in two versions: the F1002V is a standard push model, while the F1002SPV adds a self-propulsion system. While testing the blowers, Billy Goat found that opting for the F1002SPV allows work to be completed about 30% faster on average with less operator fatigue.

Accessories

Need to make tight maneuvers around buildings and landscape features? The caster kit replaces the front wheel, letting the blower turn without lifting up the front end.

Working on steep terrain? The parking brake kit uses metal forks to clamp down on the rear tires to keep the blower from rolling.

Want to make the F10 easier to transport? The quick hold down kit bolts onto the floor of your trailer, letting you latch the machine into place without having to deal with straps.

Want to worry about one less thing when operating and maintaining your blower? Billy Goat offers a foam-filled front tire that won’t go flat or need to be aired up.

Warranty

Billy Goat covers the housing for 5 years and the rest of the machine for two years. Briggs & Stratton offers a three-year commercial warranty on the engine.

Getting Parts for Billy Goat Debris Blowers

Whether you have the new F10, an older metal impeller model or anything in between, you can get everything you need for it at www.billygoatparts.com. We’re a certified dealer for Billy Goat, Briggs & Stratton, Honda, and Subaru, which means we’re able to ship OEM blower and engine parts across the U.S. and Canada. Our site can show you parts diagrams and descriptions direct from the manufacturer, making it easy to find exactly what you need.

Posted in Uncategorized | Tagged , , | Leave a comment

New Billy Goat DL3700V Debris Loader

New Billy Goat DL3700V Debris Loader

What do you want from your debris loader? More power? Lower operating costs? Ease of use? The new Billy Goat 3700V is first debris loader on the market with a Briggs & Stratton Vanguard Big Block with EFI, helping it deliver all three improvements at once.

Engine

The big news for this new model is its engine, a Vanguard EFI Big Block. At just under one liter of displacement, this V-Twin produces 37 HP, putting it at the very top of the market. However, it’s the fuel injection that really makes this model stand out. It uses a closed loop system like you’ll find in modern cars, monitoring both the intake and exhaust to tune fuel delivery. This reduces 25% lower fuel consumption over carburetor-equipped models. It also allows the fuel mix to be adjusted depending on available air, so users in high altitude areas don’t have to fit new parts to get the engine to run correctly. EFI also makes cold weather easier to deal with, eliminating the need for a choke while starting far more easily at low temperatures. Battery electric start comes standard.

The injectors themselves have a fine spray pattern and use a high operating pressure. This makes the fuel system less sensitive to ethanol blends and stale fuel, avoiding problems with corrosion and gumming.

The rest of the engine is everything you expect from a Vanguard. The lubrication system is fully pressurized and comes with a spin-on filter and a cooler to control engine temperatures while extending oil change intervals. The centrally-located oil pump primes faster to reduce engine wear on start-up. Cast iron cylinder liners can handle hundreds of hours of use, while a cyclonic air filter stays cleaner longer, even in the dusty environments experienced by debris loaders.

Performance

The engine spins 20-inch impeller fitted with Billy Goat’s Piranha blades. As debris passes through, 18 cutting points break down material by as much as 12:1 so you can carry more debris with each load. The housing has a replaceable polymer liner that takes the brunt of abuse as leaves, lawn clippings, and other matter are drawn through. At maximum throttle, the 3700V moves air at a rate of 5,050 CFM.

Debris enters the loader through a 14 inch by a 10-foot clear hose. This hose attaches using a tool-free, thread-free clamp, making it easy to remove during transport and reattach when you’re ready to work. At the other end, the 8 inch wide, 360-degree rotating exhaust can be adjusted without requiring tools, making it easy to aim into truck beds and trailers. A rake holder is built into the skid mount so you’ll always have your lawn care tools on hand.

Accessories

The 3700V comes on a skid mount that can be bolted down to a cargo trailer or mounted on Billy Goat’s trailer kit. This highway class trailer is pre-wired with lights, letting you tow it on any road.

Need a little more reach from the chute? The metallic exhaust hose kit adds a flexible 10-foot extension to help direct debris, while the exhaust deflector kit adds an adjustable metal plate to change the angle material exits the chute.

Getting Parts for this New Model

Whether you have older equipment or a brand new 3700V, you can get everything you need for your Billy Goat from www.billygoatparts.com. We’re a certified dealer for Billy Goat and engine manufacturers including Briggs & Stratton so we can ship any part you need to any address in the U.S. or Canada. Need help finding a part? Our search engine has integrated factory parts diagrams and descriptions to help you locate exactly what you need.
Posted in Uncategorized | Tagged , , | Leave a comment