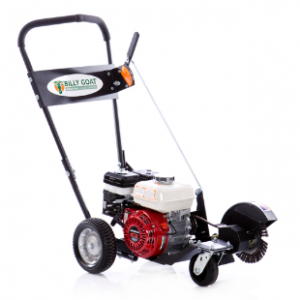
Winter is ending, and that means customers will be looking to have their driveways recoated to survive the cold and snow at the end of this year. Here’s what you need to know to keep your Grazor concrete cleaner running so you can ready driveways and sidewalks for seal coating.
Maintenance Schedule
Concrete Cleaner Maintenance
Every use: Check for excess vibration
Every 5 hours or daily: Check for loose, damaged or worn parts
Every 25 hours: Inspect belt, lubricate wheels and grease brush arm mechanism
Engine Maintenance
Before each use: Check engine oil level and air filter
First month or 20 hours: Change engine oil
Every three months or 50 hours: Clean the air filter, check the spark plug (Subaru only)
Every 6 months or 100 hours (Honda only): Clean the sediment cup, check the spark plug and, if installed, spark arrester.
Every 200 hours (Subaru only): Replace air filter, clean sediment cup and check spark plug electrodes
Every year or 300 hours: Replace spark plug and air filter
Changing the Brush
1. Disconnect the spark plug cap
2. Remove the brush guard, which is held on by two screws.
3. Using a heavy cloth, hold onto the brush. Use a ¾ inch wrench to turn the nut holding the brush to the machine counter-clockwise.
4. Inspect the washer for wear and replace as needed.
5. Install the new brush in reverse order. Be sure to use the nylon bushing that came with the new brush, even if the old one has little wear.
Changing the Drive Belt
1. Disconnect the spark plug cap
2. Using two ½ inch wrenches, unscrew the bolts and nuts on the brush guard and front pulley guard. Remove these guards.
3. Use a 3/8 inch wrench to remove the three bolts on the rear pulley guard. Remove this guard.
4. Remove the belt. On some older models, you may need to change the brush position to get the belt off. Put the brush in the “Store” position, then slide the belt off of the front pulley. Move the brush to the “3” position, and slide the belt off of the rear pulley.
5. Install the new belt in reverse order, reinstalling the guards once it’s fitted.
Changing the Pulleys
Always change the pulleys in pairs to decrease belt wear and ensure the service life of your equipment. Follow the instructions above for removing the belt. Once the belt is off, do the following:
1. Loosen the set screws on the pulleys using a 5/32 inch Allen wrench.
2. Slide the pulley off of the shafts
3. Slide the new pulleys onto the shafts. Place a long straight edge against the sides of both pulleys to make sure they’re aligned.
4. Install the set screws, torquing them to 15 ft-lbs.
5. Reinstall the belt and guards.
Engine Oil
To check the oil, remove the dipstick/filler cap and wipe it clean. Insert it back into the oil filler neck without screwing it in. Check the level on the dipstick. 10W30 is recommended for most operating conditions.
Spark Plug
The spark plug gap should be between 0.02-0.03 inches (0.6-0.7 mm) on Subaru engines and 0.028-0.031 inches (0.70-0.80 mm) on Honda engines. Replace the plug if the electrode is worn or there are signs of cracking or other damage. When installing the plug, start by threading it in by hand to prevent cross-threading. Use a spark plug wrench to seat the plug, then turn another 1/8 to ¼ turn if the plug is used or ½ turn if the plug is new to get a good seal.
Air Filter
To clean the filter on the Honda GX160, wash it in a non-flammable solvent or mild soap and water. Once dry, soak the filter in clean engine oil, then squeeze out any excess.
On Subaru engines, wash the foam element with kerosene or diesel fuel. Soak the cleaned filter in a mix of three parts kerosene to one part diesel and squeeze out any excess fluid. Tap the paper element against a hard surface to remove any surface dust.
Sediment Cup
Shut off the fuel valve, then unscrew the fuel cup, located directly below the fuel valve switch. Clean out any collected sediment, then reinstall. On Honda engines, this cup will have a small O-ring that needs to be fitted to the cup before screwing it back into the carburetor.
Getting Parts for Your Grazor
Billy Goat limits sale of this concrete cleaner to paving dealers, but you can get everything you need for your Grazor at www.billygoatparts.com. We’re not just a Billy Goat paving dealer, we’re also a certified dealer for Honda Engines and Subaru Power, letting us ship replacements for everything on this equipment. We can have your order delivered to any address in the U.S. or Canada.

