SC121H Sod Cutter Setup and Servicing

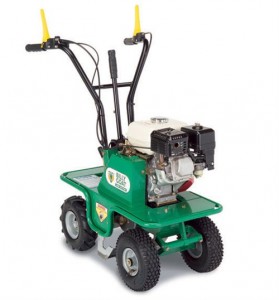
Billy Goat SC121H Sod CutterThe SC121H may be simple, but this small, lightweight device can cut sod into easy-to-remove strips just as well as larger, more complicated machines. Here’s how you can get this sod cutter up and running, and keep it performing at its best.

Assembly

Insert the handlebar into the two supports between the height adjustment lever and the gear lever selector. The handlebar has multiple holes, letting you choose the mounting position to get a comfortable operating height. Use two of the included screws to secure the handlebar to the supports.

Fit the end of the cutting height adjustment lever onto the end of the support. The hole in the lever needs to face the back of the machine to line up with the hole in the support. Install one of the provided screws in the hole.

The engine is shipped without oil. Add oil to the crankcase according to the directions in the included engine manual.

Tire Pressure

Check the pressure regularly to ensure the machine roles easily; the recommended pressure is listed on the sidewall. If one of the tires gets low, it can cause the cutter to drift to one side during operation.

Sod Cutting Blade

The sod blade is sharp, and should only be handled when wearing heavy gloves. Make sure the engine is off and the spark plug is disconnected before inspecting or replacing the blade.

To inspect the blade, raise it to the maximum cutting height. If the blade is worn, cracked or bent, it needs to be replaced, even if it’s intact. It’s made from brittle steel to deliver a sharp edge, and that means it can shatter with significant force once damaged. The blade screws and nuts are also subject to wear and need to be replaced along with the blade.

To replace the blade, remove the screws and nuts holding it onto the machine. There are two screws on each side where it attaches to the lift assembly.

Cable Adjustment

Before adjusting the cables, place the machine on a flat, level surface, shut off the engine, and disconnect the spark plug.

For both the forward control cable and blade control cable, there should be no play between the upper end of the cable and the adjustment screw on the end of the lever. Turn the adjuster to take up the slack. If the slack can’t be removed with the adjuster, the belt is too loose and needs to be adjusted or replaced.

The service brake cable should have 2-3 mm of play when the lever is released. Squeeze the lever and make sure the brake pad contacts the drive pulley.

Belt Replacement

To access the belts, remove the guard by unscrewing the bolt on the bottom of the frame between the right side wheels and the bolt on the front of the cover.

Blade Belt
1. Disconnect the connecting rod by removing the nut and screw securing it to the arm.
2. Slide off the belt by turning the lower pulley counter-clockwise.
3. Install the new belt in reverse order.

Forward Control Belt
1. Remove the blade control belt (see above.)
2. Remove the blade (see above.)
3. Remove the forward control belt by spinning the lower pulley counter-clockwise.
4. Install the new belt in reverse order.

Checking Belt Tension
Check the belt position by operating the related control lever. With the handle closed, there should be 2 mm of space between the belt and the belt guides. Next, disconnect the spark plug wire. Pull lightly on the starter handle. If the belt is set up correctly, the drive pulley will spin without moving the belt. If the belt moves, slide the engine back slightly.

Transmission Oil

Change the oil after the first 20 hours of use, then every 100 hours thereafter. Billy Goat recommends SAE 90 transmission oil.

To check the oil, remove the oil fill screw on the back of the transmission. If oil doesn’t leak out, remove the fill cap bolt on top of the transmission and add oil through this hole.

To change the oil, remove the fill plug bolt and oil fill screw. Place a drain pan under the transmission and remove the drain plug, located on the left side of the transmission case. Once the transmission is empty, reinstall the drain plug and add oil through the fill hole until the oil drips out of the fill screw hole. Reinstall the screw and fill bolt.

Get the Parts You Need

Billygoatparts.com is a certified Billy Goat and Honda Engines dealer. That means we can ship parts for the SC121H and the GX 160 that powers it straight to your door, whether you live in the United States or Canada. Finding parts is easy, too: just select your model and serial number, and our search engine will show you parts and accessories compatible with your machine as well as factory diagrams and descriptions.

Posted in Uncategorized | Tagged , , | Leave a comment

CR550HC Overseeder Setup and Servicing

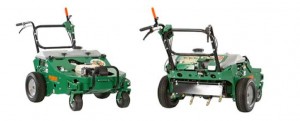
CR550HCDid you get a new CR550HC overseeder? Is it due for a service, or you need to address poor cutting performance? Here’s everything you need to know to set up this power rake and keep it performing at its best from checking the flail blades to replacing the drive belt.

Set Up

The CR550 comes fully assembled, but there are still a few things you’ll need to do before using it:

1. Flip the handle up and slide the lock loops down until they’re around both the upper and lower handle sections.
2. Add oil to the engine crankcase.
3. Add gasoline to the fuel tank.
4. Make sure the plug wire is connected to the spark plug.

Maintenance Schedule

Before each use: Check the engine oil level and the air filter.
Every 25 hours: Grease the reel bearings, inspect the belt, oil the height adjustment linkage and check for damaged, worn or loose parts.

Blade wear will vary depending on how the rake is used.

Flail and Slicing Blades

Accessing the Blades
1. Let the engine cool and disconnect the spark plug. If it has a Honda engine, close the fuel valve.
2. Lean the unit back on its lower handles. Tie the handle down to a fixed object or place weights on the handle to keep the machine from tipping over.

Flail Blades
1. Inspect the blades. Replace blades that are cracked or bent.
2. Measure the blades from top to bottom. The blades should be replaced if they are less than three inches long. Billy Goat recommends replacing all of the blades at the same time.

Slicing Blade
1. Replace the blade if it’s bent or cracked.
2. Measure the blade from the center of the bolts to the blade tip. If it’s less than three inches, replace the blade.

Rotating the Flail Reel

The blades on the reel are double-sided so the reel can be flipped to use both blade faces.

1. Remove the 6 lock nuts holding the belt and shaft guards on the frame. The height adjuster will need to be lowered to reach some of these nuts. Remove the guards.
2. Remove the drive belt by walking it off of the groove in the reel pulley.
3. Remove the four lock nuts and washers that attach the bearings to the machine.
4. Slide the reel down and out of the rake.
4. Remove the cap screw, washer, reel pulley, key and spacer from the end of the reel. Install these parts in reverse order on the other end of the reel.
5. Reinstall the reel, pulley, and guards in reverse order.

Drive Belt Replacement

To replace the belt, you’ll need a ratchet wrench, a 3/8 inch socket, and a socket extension.

1. Remove 6 screws holding the belt guard onto the machine. Remove the guard.
2. Remove the belt by spinning the reel pulley and walking the belt off of the groove.
3. Walk the new belt on by spinning the reel pulley and pushing the belt into the groove.

Once the belt is in place, check the spring tension by closing the bail on the handle. The spring should stretch to a length of 1-1 ¼ inches. This length can be changed by adjusting the clutch cable.

Need Something for Your Power Rake?

Billygoatparts.com carries the parts you need to repair your Billy Goat equipment and the engines that power them, whether your CR550 has a Briggs & Stratton or a Honda. We make finding the right part easy by letting you see factory parts information and diagrams straight from the manufacturer for your specific model.

Posted in Uncategorized | Tagged , , | Leave a comment

Getting Your Equipment Ready for Spring

Spring Overseeding TipsSpring is coming, which means either bringing your lawn back to life or getting your business back in gear for the season. These tips will help you get your Billy Goat equipment up and running, and address common problems caused by long term storage.

Engine

If you have a DL37 loader with the Briggs & Stratton EFI engine, it should have been stored with a full tank of stabilized gas. This fuel is ready to burn.

Honda, Subaru and Briggs & Stratton recommend storing their carburetor-equipped engines with no fuel in the carburetor, tank or fuel lines, even if that fuel is stabilized. If fuel was left in the engine, it will have trouble igniting, causing starting and running problems.

To drain the fuel from Honda GX series engines, remove the sediment cup on the base of the carburetor and turn the fuel valve on. For other engines, use a siphon hose to remove fuel from the tank, then disconnect the fuel line to the carburetor to remove the gas from the rest of the fuel system. You may need to remove the air filter and apply carburetor cleaner directly to the jets to remove varnish buildup. Once the fuel system is empty, add fresh gas.

Before starting the engine, inspect the air filter and spark plug cables. These are common targets of rodents. Damaged insulation can cause the plug wire to arc, while a chewed up air cleaner can break apart and enter the combustion chamber.

Oil

Before you move your equipment, check the ground for signs of oil. Tracing these up to your equipment will make it easier to locate leaks.

Once used in an engine, oil contains acidic components left over from combustion that can corrode metal. If the oil wasn’t changed before storage, you should do so now to prevent contamination.

Hydrostatic transmissions used in walk-behind equipment are sealed for life, so they require no maintenance. However, geared transmissions do have an oil reservoir that needs to be checked. If you have a pressure washer, check the sight glass on the side of the pump housing. If the oil looks cloudy, change it. If it’s low, top it up.

Antifreeze and Pump Saver in Pressure Washers

These fluids are biodegradable, but they’re also poisonous to animals and should not be poured into a drain. Instead, run your pressure washer and spray a wide area of open soil to flush out the antifreeze.

Battery

Electric start models use an onboard 12-volt battery that needs to be recharged during long periods of inactivity. Check the output with a voltmeter: if it’s below 12 volts, the battery needs to be recharged. Charging should be limited to two days when using a charger with a one amp output or one day at two amps. Using a faster charge rate will damage the battery.

Inspect the area around the battery for signs of corrosion and clean off the contacts. If the battery has caps on top, check the electrolyte level. Add distilled water until the level reaches the full mark on the side of the battery case.

Tires

Air up the tires before moving your equipment to keep the bead from rolling off of the rim. The recommended pressure is printed on the sidewall.

If the tire has separated from the rim, wrap a ratcheting strap around the tire tread and tighten it down. This will push the sidewalls against the wheel. Add air until the tire seats.

Cables

Make sure the control cables on your equipment are moving freely. If they aren’t, spray a penetrating oil into the housing until it starts dripping out of the other end. Gently pull and push on the controls to loosen them up. Once the lever moves freely, apply cable lube or non-detergent oil to the cable, pouring it into the housing until it drips out of the other end.

Need to Fix Something Before You Use Your Equipment?

You can get everything you need for your Billy Goat by visiting www.billygoatparts.com. We’re an authorized dealer for Billy Goat as well as all of their manufacturing partners including CAT, AR, Briggs & Stratton Vanguard, Subaru Power and Honda Engines. Ordering is easy, too: just select your model and serial number, and our site will show you parts with factory descriptions and diagrams. We ship across the United States and Canada.

Posted in Uncategorized | Tagged , , | Leave a comment

Cleaning Your Billy Goat Equipment

pressure washerWith jobs that expose them to high levels of dust and dirt, your Billy Goat equipment gets dirtier than most lawn cleanup tools. These tips will help you keep them clean so they perform better and last longer.

Engine

Vacuums and loaders are exposed to high levels of dust, and that means their engines will need to be cleaned more frequently than on other equipment.

This is particularly true of the engine: the fan will coat the cooling fins in dust, increasing operating temperatures and decreasing performance.

To clean the engine, start by disconnecting the spark plugs and removing the top cover of the engine. It’s usually held in by two or three bolts. Set this cover aside, taking care not to put weight on the starter rope. It may be tempting to use water to clean an engine, especially if you have a pressure washer, but this can do major damage, causing internal rust and turning the oil into a thick, pasty emulsion. Instead, wipe down exposed areas with a damp cloth and use a stiff bristle brush to remove buildup from the cooling fins and other hard to reach places.

Check your engine’s owner’s manual for instructions on cleaning the air filter. Depending on the model, it may have a dry foam filter, an oiled foam filter, a paper filter or a paper filter surrounded by a foam element. If your equipment is being used in dusty areas, it’s a good idea to inspect the air filter daily or before each use, cleaning as needed.

Some engines may be equipped with a spark arrester. This metal screen fits inside the tailpipe. Carbon buildup is normal and should be cleaned off with a wire brush.

Drive Chains

Do not use standard solvents or high-pressure water to clean the chain. This can force dirt deeper into the chain, increasing wear.

To clean a chain, first, wipe it off with a rag to remove surface contaminants, then soak the chain in kerosene or chain cleaner to the chain. Use a brush to scrub off dirt between the links.

Always lubricate the chain immediately after cleaning. Any motorcycle chain or general purpose chain lubricant will work fine. Do not use chainsaw bar oil. This high tack formulation will gather dirt, increasing wear and tear on the chain.

Belts

Under normal use, the belts on your machine shouldn’t need to be cleaned. However, exposure to oil can decrease friction, causing the belt to slip. While you may be able to wipe off oil shortly after exposure, a belt with a glossy appearance is beyond recovery and should be replaced.

Aerator Tines

Dirt should be removed from tines after each use to prevent rust. These can be washed by hand or by using a pressure washer. Always wear gloves when handling tines: they’re self-sharpening, so the ends will always have a sharp edge.

If you have hollow core tines that aren’t ejecting cores, they may be due for replacement. Check your owner’s manual for recommended minimum tine lengths for your machine.

Vacuum Bags

How often your vacuum’s bag needs to be cleaned will depend on how much dust it’s filtering. A clean bag will have soft fabric that will become stiff as the pores become clogged with dirt. Vacuum bags can be machine washed or the dirt flushed out with a power washer. Allow the bag to air dry before use.

If you have a QV Quietvac, the dust sock needs to be handled delicately when cleaning. Simply dump out any gathered dust, and shake it out. You can also use compressed air to blow out the pores as long as the nozzle is kept at least 6 inches away from the fabric.

Lawn Vacuum and Debris Loader Impellers

The impeller and housing may need to be cleaned occasionally to remove jammed debris. Impellers on loaders can be accessed by removing the hose from the intake and unbolting the impeller cover. On vacuums, the engine and top plate need to be removed from the rest of the unit. Check your owner’s manual for full instructions.

The bolt that holds the impeller to the driveshaft is one use only. If you need to remove the impeller from the driveshaft for any reason, install a new bolt and washer, tightening it to the torque specified in your owner’s manual.

Greasable Components

Apply new grease as directed in the owner’s manual. By pushing new grease through Zerk fittings, you’re displacing old, dirty grease that can cause bearing and joint wear. Billy Goat recommends using waterproof lithium grease. Wipe off any grease that pushes past the fitting seals.

Need Something for Your Billy Goat?

Do you need a new bolt for your machine’s impeller? Did you just find a hole in your debris bag? If it’s Billy Goat, you can find it at www.billygoatparts.com. We’re an authorized dealer for Billy Goat and their manufacturing partners, including Briggs & Stratton, Honda Engines and Subaru Power.
We ship to the U.S. and Canada.

Posted in Uncategorized | Tagged , , | Leave a comment

New Next Gen 25-inch width PLUGR Aerator

Next Gen 25-inch width PLUGR AeratorThe new Next Gen 25-Inch Width PLUGR Aerator isn’t just a bigger version of their other PLUGR aerators: it’s an all new design that offers major improvements in operation, maintenance and performance. Able to cover up to one acre per hour, it offers a 30% greater return on investment than a drum aerator, and its Variable Aeration Density system lets you change hole patterns to heavy and light aeration as well as patching and seeding.
Control

The hydrostatic drive is controlled using two levers on the handles: one moves the machine forward, while the other rolls it backward. To protect the operator and prevent lawn damage, the reverse lever is only enabled when the tines are in the transport position.

The EZ Drop tine system uses a single lever for depth control, allowing the operator to raise the tines while in motion to get over obstacles like sprinklers and utility covers. With the lever open, the tines are in position, but not connected to drive, so they can move freely.

The EZ Lift system uses a rear foot pedal to lift and lock tines in the transport position with a single motion, then drops them back into operating position as soon as the tine lever is engaged. This lets the operator roll over pavement without having to tilt the machine back on its rear wheels.

The PLUGR is designed to handle slopes up to 15 degrees. The front casters can be locked to keep the aerator tracking straight on hills.

Aeration

Instead of a roller, the PLUGR uses a cam to plunge tines into the soil. The cam’s reciprocating motion reduces compaction around core walls. Billy Goat’s Variable Aeration Density (VAD) system allows the cam and drive speed to be adjusted to get three hole patterns:

– 48 holes per square foot at 0.5 mph for patching and seeding
– 12 holes per square foot at 2 mph for high hole density aerating
– 8 holes per square foot at 4 mph for fast aerating

Depending on the mode, the PLUGR is able to make 2-10 times more holes per pass than a drum aerator, decreasing job times and saving on fuel. Maximum core depth is 2.75 inches, which is almost an inch deeper than most drum aerators.

Unlike stand-on and drum aerators, the PLUGR is capable of making in-ground turns thanks to its reciprocating tines. That means there’s no need to awkwardly lift the aerator or worry about turf damage when changing direction. An integrated water tank adds 40 lbs. of weight over the tines when full for better soil penetration. When work is finished, the two drains on the base of the tank can be opened to make the aerator lighter and easier to transport.

Power

The PL2501SPH is powered by a Honda GX160. This 4.8 HP engine has a reputation for rock-solid reliability, and its low friction design makes it quiet and cheap on fuel.

The PL2501SPV uses the new Vanguard 200. It has a cyclonic air filtration system with a self-cleaning filter, so the engine will last longer and stay at peak performance when working in dusty areas. It produces 6.5 HP, giving it an edge in performance over the Honda.

Maintenance

Billy Goat equipment is well known for being easy to care for, and this new aerator is no exception. Both the water tank and hood flip up without requiring tools, providing access to the machine’s drive and aeration components. The reciprocating system only uses 6 tines, making them easier to care for and replace than the multitude of tines needed for drum-based systems. While the front tires are pneumatic, the rear tires are foam-filled, so they never need to be aired up.

Getting Parts for the Next Gen PLUGR

Whether you have the company’s latest model or you need help keeping older equipment running, you can get everything you need for your Billy Goat from www.billygoatparts.com. We’re an authorized dealer for Billy Goat and their manufacturing partners including Briggs & Stratton and Honda Engines, which means we offer everything you need for equipment. Select your model and serial number using our search engine, and our site will show you compatible parts, factory descriptions and parts diagrams, making it easy to find what you need. We ship across the U.S. and Canada.

Posted in Uncategorized | Tagged , , | Leave a comment

New Billy Goat Hurricane Stand-On Blowers

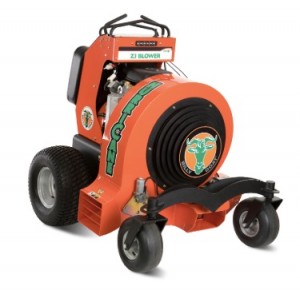
Billy Goat Hurricane Stand-On BlowersBilly Goat recently announced a new line of leaf blowers that may look familiar if you’ve shopped for lawn equipment recently. As part of a deal with Hurricane Power, Billy Goat is adding the X3 and Z3 stand-on blowers to their lineup. What can you expect from these new machines, and how do they stack up when compared to the company’s Force walk-behind blowers?

New to Billy Goat, but Not to the Market

These “new” blowers are the same ones offered by Hurricane Power, just with new paint and graphics. Billy Goat’s parent company, Briggs & Stratton, acquired Hurricane’s Stand-On blower line back in August. These were a natural fit for Billy Goat as their class-leading performance compliment their line of Force wheeled blowers.

What is a Hurricane?

These standers use metal impeller cases. These aren’t as efficient or quiet as the plastic housings used on Force blowers. This isn’t much of an issue since the engines can be bigger than those used on wheeled blowers, and their high output makes them a better fit for large lawns where the noise is less likely to disturb neighbors.

Instead of having a single, adjustable chute, the Hurricane has three discharge chutes mounted on the left, right and front of the impeller case, each with their own door. These doors are controlled with a joystick, making it easy to aim the flow of air. Output for both the X3 and Z3 is 8,500 CFM at 165 MPH.

The drive system uses twin Hydrogear IZT transaxles operated using a quad control handle: the levers that control wheel speed are surrounded by a pair of fixed bars, giving the operator several hand position options. The parking brake is self-activating, letting you release the controls and step off of the platform to move branches and other debris.

The operator stands on an isolated platform and can lean against a large knee pad. This provides an excellent view of the area surrounding the blower and makes it easy to ride when climbing steep inclines. A torsion bar front suspension helps absorb bumps while keeping the chutes aimed close to the ground.

The Hurricane comes with a 10-gallon fuel tank for all-day operation. Built-in tie downs make the blower easy to transport. An LED light comes standard for night work.

The overall footprint of these blowers isn’t much larger than a walk-behind blower. Combined with their zero turning radius, they’re a compelling alternative to tractor and mower-powered blowers, offering far better maneuverability.

Models

Billy Goat offers two versions of the Hurricane blower.

X3: A 23 HP 627cc Vanguard V-twin spins the impeller to a top speed of 3,200 RPM, and it can go up to 9 mph.

Z3: A 33 HP 993cc Vanguard Big Block engine gives this blower the same air performance as the X3, but the engine only needs to operate at 2,600 RPM, greatly reducing noise. The added power lets this blower reach a speed of 11 mph.

How Do They Compare to Force Blowers?

All of Billy Goat’s walk-behind blowers output air at over 200 mph, giving them more lifting power than these riding blowers. This makes Force blowers a better choice for pulling up wet, compacted leaves. However, the F18, Billy Goat’s most powerful walk-behind, only moves 2,900 CFM, and they have only one vent for air. The Hurricane’s multiple vents allow it to clear areas without backtracking, and its high air output and high operating speed let it clear areas far faster than any Force blower.

Where Can I Get Parts for These New Blowers?

New or old, you can get everything you need for your Billy Goat from www.billygoatparts.com. We’re not just an authorized Billy Goat dealer, we’re also a dealer for Briggs & Stratton, so we’re able to ship replacements for everything on these new blowers straight to your door whether you live in the U.S. or Canada. Ordering is easy: just select your model and serial number, and our site will show you parts listings, diagrams, and information direct from the manufacturer. That means you can be sure you’re always ordering the right parts for your machine.

Posted in Uncategorized | Tagged , , | Leave a comment

Storing Your Debris Loader

Debris Loader Set-Up and Maintenance: DL14 and DL18Depending on where you live, fall leaf cleanup is either over or just now winding down. Before you put your Billy Goat DL Series into storage for the season, there are a few things you can do to make sure you can put it back into service with minimal issues next fall.

Cleaning

Dirt and debris accumulation can hold moisture, causing your equipment to rust while it’s in storage.
Before you start cleaning, disconnect the spark plugs to prevent an accidental start.

Do not use a pressure washer or hose to clean your machine. This can force water inside the engine or trap it inside the bearings, leading to rust and damage. Instead, use a damp rag to wipe down the outside of your machine. When you get near the engine, switch to a dry rag and a stiff brush. You may need to remove the engine cover to reach the cooling fins. Be sure to remove the impeller cover and clean out any debris inside the housing.

Fuel

Most engines will need to have the fuel system drained, even if the gasoline was treated with a stabilizer. Some Honda engines have a sediment cup built into the base of the carburetor. Removing this cup and turning the fuel switch on will let fuel flow out of the tank and fuel lines. For all other engines, fuel can be drained by disconnecting the fuel line from the carburetor. Collected gasoline can be added to your car’s fuel tank.

Once the fuel system is empty, start the engine and let it run until it stalls. This removes any remaining fuel inside the carburetor.

Vanguard EFI engines can be stored without draining the fuel system as long as the fuel is treated with a stabilizer shortly after purchase. Let the engine run on this fuel for a few minutes to ensure that this treated fuel is in the lines, pump, and injectors. Filling the fuel tank will reduce contact between the gasoline and oxygen, slowing degradation.

Oil

Combustion leaves acids in the oil that can damage your engine during storage. Changing the oil now, even if it’s still reasonably fresh, will remove these acids from your engine’s crankcase. The oil doesn’t have to meet the manufacturer’s recommendations for the temperatures your machine will experience when it’s stored, just the temperatures it will be used at when you put it back to work next season, typically 10W30 or 5W30.

Check the engine owner’s manual for instructions on cylinder lubrication. On some models, Honda and Briggs & Stratton recommend adding a teaspoon of oil to each cylinder through the spark plug hole. With the spark plugs out of the engine, pull the recoil starter to circulate this oil around the cylinder, then reinstall the plugs to seal the combustion chamber. The exhaust will be smoky when it’s first started next season as this oil burns off.

Lubrication

Apply a spray oil or silicone lubricant on bare metal parts like the chain and the joints on the debris deflector and chute. This will keep these parts moving and create a protective layer that will inhibit rust formation.

Battery

If your loader has an electric starter, disconnect the battery before putting your machine in storage. Putting the battery on a trickle charger will keep it from degrading over the next few months. If you don’t have a trickle charger, charge it with a standard automotive charger every couple of months. A flat battery can be charged for up to 48 hours at one amp, or 24 hours at two amps.

Unmounting

These loaders become unstable if they’re removed from their mount, whether it’s on a skid mount, hitch mount or trailer. Before you remove the loader from its mount, remove the hose, boom and discharge chute. This will lower the center of gravity, making it less likely that it will tip over.

Storing

Ideally, your debris loader should be kept inside a building. It needs to be kept away from sources of spark and flame that can ignite vapors from the remaining fuel in the engine. Cover the inlet and chute openings to keep animals from nesting inside the machine. Don’t cover your loader with a tarp. This can trap moisture, promoting rust.

Need Something for Your Billy Goat Equipment?

Now is the perfect time to fix your loader so it’s ready to go next season. Whether you need equipment parts, engine parts or accessories, you can get it from www.billygoatparts.com. We have sections dedicated to popular engine parts, impeller components and accessories, or you can search for parts specific to your machine. Our site even has factory parts diagrams built into the search engine to make it easier to find what you need. We ship your order to any address in the USA or Canada.

Posted in Uncategorized | Tagged , , | Leave a comment

Setting Up and Maintaining QV Quietvac Lawn Vacuums

QV Quietvac Contractor Vacuum Billy GoatWith its cyclonic filtration, low noise and super fine dust sock, Billy Goat’s QV QuietVacs are perfect for clearing parking lots, sidewalks and new construction. These tips will help you set up your new contractor vacuum and keep it running at peak performance.

Setting Up Your New QV Vacuum

1. Remove the vacuum from the box, taking care not to snag the control cables.
2. Attach the handle by placing the bolt and large washer on the inside-facing part of the hood. Slide the handle onto the bolts with the bend facing forward, taking care not to get the cables tangled. Place the small washers on the bolts, and screw on the included lock nuts.
3. Attach the nozzle to the front of the machine using 6 serrated nuts.
4. Check the included engine manual for instructions on setting up the engine. Be sure to add oil: while there may be some residual oil left over from factory testing, the sump is drained before shipping.
5. Check the tire pressure. The correct pressure is listed on the sidewall.

Maintenance Schedule

Before use: Clean the debris bag and check the tire pressure.
Every 5 hours or every day: Check for loose or damaged parts and do a thorough inspection if the vacuum is exhibiting unusual vibrations.
Every 50 hours: Check the drive belt and add grease to the Zerk fittings. There are fittings on the wheels, casters and shaft bearings.
As needed: Clean the bag and dust sock.

Dust Sock Care

The dust sock should only be used in dry conditions. Moisture can damage the sock fabric and reduce its effectiveness.

To clean the sock, remove it from the bag and dump out any collected dust. Gently shake the sock, or spray it with compressed air, keeping the nozzle 6-12 inches away from the fabric. Never hit the bag or knock it against objects to knock dirt loose.

Impeller Removal and Belt Replacement

The impeller bolt and washer must be replaced with new parts each time the impeller is removed from the vacuum.

1. Disconnect the spark plug.
2. Chock the wheels to keep the vacuum from rolling.
3. Unbolt the nozzle from the nozzle plate, then unbolt the nozzle plate from the housing.
4. Remove the belt from the lower pulley, then push it off of the groove in the impeller hub. If you need more slack to move the belt, loosen the bearings holding the lower pulley in place.
5. Slide the belt off of the drive pulley.
6. Remove the impeller bolt and washer.
7. Slide the impeller off of the drive shaft and set it aside. If it won’t budge, apply some penetrating oil and hook a pair of crowbars between the impeller and the housing. Pry off the impeller.

If you need to replace the belt, loosen the set screws on the pulley at the end of the impeller drive shaft. Slide the pulley down the shaft until you can remove the belt. Slide the new belt onto this pulley, and tighten the set screws. Walk the belt onto the bottom pulley.

8. Using a new bolt and washer, install the impeller. Make sure the belt is seated in pulley built into the hub.
9. Align the lower pulley with the impeller so that the belt is running straight. Tighten down the set screws. Make sure the key is in place at the bottom of the pulley.
10. Bolt the nozzle plate and nozzle plate onto the front of the machine, then reconnect the spark plug wire.

Drive Cable Adjustment

The cable may need to be adjusted if the drive system won’t engage or it doesn’t disengage cleanly when the drive levers are released.

1. Disconnect the spark plug.
2. Remove the bag, then unbolt the transmission cover.
3. Squeeze and release the drive levers, watching the arms on the back of the transmission. The arms should fully engage when the levers are held down, then return to their starting position when they’re released.
4. If the arms aren’t moving like they should, loosen the pair of nuts on the cable barrel next to the drive levers. Moving the barrel up decreases cable tension, while moving the barrel down increases tension.
5. Recheck the arm movement. Once the cables are adjusted, reinstall the transmission cover, reattach the dust bag and reconnect the spark plug.

Get Everything You Need for Your Vacuum

Billygoatparts.com isn’t just a Billy Goat dealer, we’re also a certified dealer for Honda Engines and Briggs & Stratton, which means we have all the parts and accessories you need for your hard surface vacuum. Need help finding the right part? Our search engine can find parts based on your model and serial number, and even has diagrams and descriptions direct from the manufacturers, making it easy to match up what you need with what you’re ordering. We ship across the U.S. and Canada.

Posted in Uncategorized | Tagged , , | Leave a comment

Setting Up and Maintaining the LB352 “Little Billy” Lawn Vacuum

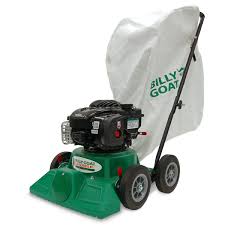
LB352 “Little Billy” Lawn VacuumIt may be small and have a simple design, but the new LB352 “Little Billy” still delivers the performance you expect from Billy Goat. Here’s what you need to know to get your new lawn vacuum up and running, and what you’ll need to do to keep it performing at its best for years to come.

Assembly

Check the included engine manual for instructions on engine setup. Oil and fuel will need to be added, but the spark plug should be left disconnected until assembly is complete.

1. Rotate the upper handle up until it lines up with the lower handle. Tighten the knobs at the handle joint.
2. Attach the neck of the debris bag onto the discharge opening on the back of the machine.
3. Attach the two bag hanger straps to the handle.
4. Connect the spark plug wire.

Maintenance Schedule

Before each use: Clean the debris bag, check the bag strap for tightness
Every 5 hours or daily: Check for loose or damaged parts and excessive vibration

The bag needs to be cleaned periodically to let air flow through the fabric. How often it needs to be cleaned will depend on how much dust is being pulled through the vacuum.

Check the included engine manual for maintenance information. The air filter will need to be cleaned more often than recommended by the manufacturer when operating your vacuum in dusty conditions.

Bag Cleaning

If the bag fabric is clean, it should feel soft. As dirt clogs the pores, the fabric will stiffen and airflow will be reduced, hampering performance.

The bag can be cleaned with a pressure washer or machine washed to remove dirt from the fabric. Let the bag air dry before reinstalling. For convenience, you may consider getting a second bag so you always have one ready while the other bag is being cleaned.

Impeller Removal

The impeller may need to be removed to remove jams. Always use a new impeller bolt and lock washer when reinstalling the impeller.

1. Drain gas and oil from the engine.
2. Remove bag and upper handle.
3. Turn the vacuum over, supporting it so that the weight of the machine isn’t on the recoil starter.
4. Unscrew the nuts at the ends of the rear axle. Remove the parts of the axle in this order: washer, wheel, a second washer, spacer and finally the axle.
5. Remove the intake plate and the middle inlet plate behind it. You should now have full access to the impeller.
6. Remove the impeller bolt and lock washer.
7. Lift the impeller out of the housing. If it doesn’t want to move, get a bolt that has the same thickness and thread pitch as the impeller bolt, but is one inch longer. Thread this bolt by hand until it seats, then use it as an anchor point for a gear puller, attaching the arms of the puller to the back plate. Tighten the puller to lift the impeller off of the drive shaft.
8. Reinstall in reverse order. Tighten the new impeller bolt to 33-38 lb-ft.

Troubleshooting

Vacuum vibrates abnormally:
– The impeller is out of balance. Check it for debris buildup and damage.
– The engine isn’t bolted down.

Poor vacuum performance:
– The debris bag is dirty.
– The nozzle is too high to pick up debris.
– The nozzle is too low and is pushing debris around instead of picking them up.

The engine won’t start:
– The impeller is jammed by debris.
– There is a problem with the engine.

Get the Everything You Need for Your Vacuum From One Place

Is the engine due for a tune-up? Do you need a new impeller bolt, an extra bag or a dust shield? You can get everything you need for your LB352 vacuum at www.billygoatparts.com. We’re an authorized dealer for Billy Goat and Briggs & Stratton, so we’re able to ship OEM parts and accessories to your door whether you live in the U.S. or Canada. Need help finding something? Our site can show you parts diagrams and descriptions direct from the factory for your model, making it easy to order exactly what you need.

Posted in Uncategorized | Tagged , , | Leave a comment

Setting Up and Maintaining the PL1800 PLUGR Aerator

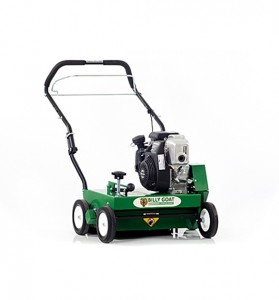
PL1800 PLUGR AeratorThe PL1800 may deliver professional quality aeration, but this compact aerator’s simple mechanical drive makes it easy to work on. Here’s what you need to know to get a new PLUGR set up and keep it running.

Assembling Your Aerator

1. Oil and gas need to be added to the engine before starting it. Check the included engine owner’s manual for instructions.
2. Attach the tine lift cable to the tine lever in the center of the handle. Insert a pin through the cable and tine lever to secure the lift cable. This pin is included in the parts bag.
3. Attach the bail cable to the bail. The end of the cable slips into a hole on the side of the bail.
4. Connect the spark plug wire to the plug.

Now is a good time to record the model and serial number of your aerator and its engine. Billy Goat puts the model information on a plate, typically on the back of the aerator. Briggs & Stratton prints model and serial number information on either the front of the engine or next to the muffler. Honda stamps the serial number into the side of the engine block.

Maintenance Schedule

Daily or before each use: Check the engine oil level and clean off any debris.
Every 10 hours: Inspect the aerator for loose or damaged parts and grease the cam bearings.
Every 50 hours: Check the drive belt for wear.
Every 100 hours: Replace the tine bushings and grease the shaft and wheel bearings.

Tine Replacement

1. Loosen the jam nut on the tine, then unscrew the tine.
2. Screw the new tine into place as far as it will go, then tighten down the jam nut.

Belt Tension Adjustment

The belt needs to be tightened if the engine isn’t powering the wheels when the drive control is engaged. There should be a little slack in the belt to reduce strain on the engine and drive bearings.

1. Loosen the engine mounting bolts.
2. Slide the engine to change the tension, then tighten down the mounting bolts.

Drive Belt Replacement

The camshaft is very heavy and should be supported by a hoist during this repair.

1. Disconnect the spark plug.
2. Remove the lower and upper tensioner brackets.
3. Slide the belt off of the engine pulley.
4. Attach the hoist to the camshaft to support it. Remove the four bolts, washers, and nuts that attach the cam bearing to the frame.
5. Lift the camshaft out of the frame and remove the belt.
6. Slide the new belt onto the camshaft pulley, then follow the previous directions in reverse order to reassemble.

Troubleshooting

Engine won’t start:
– Make sure the stop switch on the handle is set to “On.”
– Set the throttle to “Fast.”
– Close the choke.
– Make sure the spark plug is connected.
– The Oil Alert system on the Honda-powered PL1800H will cut the ignition if the engine oil level is too low. Check the oil level.
– Use fresh fuel. Fuel should be used within one month of purchase, or within three months if it was treated with a stabilizer.
– Make sure the air filter is clean.

Machine vibrates abnormally:
– One or more tines are damaged or missing and need to be replaced.
– Bolts are loose on the handle or engine.

Engine stalls or slows when aerating:
– The aerator is on too steep of a slope, causing fuel starvation. Try rolling up and down hills at a 45-degree angle instead of moving straight across.
– The oil level is too low.

Engine is locked up:
– Check for debris around the reel
– Have the engine serviced

Aerator doesn’t move when the drive bail engaged:
– Increase drive belt tension
– Inspect the belt, pulleys and clutch cable for wear and damage.

Need Something for Your Aerator?

Billygoatparts.com is an authorized dealer for Billy Goat, Briggs & Stratton and Honda Engines, letting us offer OEM replacement parts for everything on your PLUGR aerator. Our site has built-in factory diagrams and descriptions, making it easy to find what you’re looking for. We ship across the U.S. and Canada.

Posted in Uncategorized | Tagged , , | Leave a comment