Spike vs. Plug Aerating

Spike vs. Plug AeratingIs core aerating really better than spike aerating? For the past 20 years, core aerating has been championed as the superior method because it physically removes dirt. However, new research suggests there are times when using solid tines deliver the same or better results. Here’s why you should have both types of tines for your Billy Goat aerator, and when you should use them.

Your Bottom Line

No matter how you use your aerator, your tine choice comes down to the amount of work you want to do.

If you’re a homeowner, you either use spike tines to get the job done fast, or you don’t mind mowing the plugs left behind by core tines.

If you’re a professional, you have to balance labor, time and cost against results. Core aerating may seem like a better choice in the end, even if customers complain about the soil plugs. However, if there are cases where tine aerating performs the same or better, doing so saves you a second trip. That cuts cost and frees up human resources and equipment.

When are solid tines the best choice? It depends on your goals as well as the grass and soil you’re working with.

Top Dressing

While core aerating was all the rage, a few golf courses were noticing improvements in their soil when they were forced to use spike aeration. Sand top dressing is a vital part of field care, as it helps balance organic materials to get consistent growth. When these courses used spike aeration, they were getting more consistent results, and could often cut back on sand application. Further research reveals that spike aerated lawns have about 30% more sand penetration than core aerated lawns. Spike holes also have a more consistent depth, making sand penetration even.

Granted, a golf course doesn’t undergo the same care as a regular lawn. These sports fields see 20 cubic feet of sand or more applied to every 1,000 square feet each year. However, the same lessons learned on the course can be applied to suburban and commercial lawns. Using spikes will integrate top dressing into the soil better than core aerators. This applies to fertilizer and adjuncts as well as sand. It also improves seed access to soil when overseeding, working hand-in-hand with the soil slicing blades on your Billy Goat overseeder.

Grass Varieties

Before you switch wholesale to solid tine aeration, you need to consider the makeup of the lawn you’re caring for. Warm season grasses have a longer growing season, creating a thick root system. This both makes the ground firmer and makes these roots more susceptible to compaction issues. Meanwhile, cool season grasses have less dense root networks, allowing for more soil movement.

Sometimes, you have to use core aeration to relieve compaction in dense lawns with warm season grasses. However, if you’re up north in an area that has primarily cool season grasses, you may only need core aeration to deal with severe compaction caused by lack of care or construction.

Soil Types and Compaction

Choosing the right aerating method also depends on the type of soil you’re dealing with.

Solid tines bore a hole in the soil. In a matter of days, the holes collapse, shifting the surrounding soil. This opens up new channels for water and air in soft and mildly compacted soil. However, this sideways push can collapse spaces in heavy clay soil and wet soils, actually increasing compaction.

Core tines extract soil. The surrounding soil fills in the hole, spreading it out. This reduces compaction in all soils, including heavily compacted and clay soils. However, recovery times take longer, which can push other lawn care tasks off schedule.

In most cases, you can use core tines to break up soil initially or fix major problems, then use tine aeration for soil maintenance. This helps keep recovery times to a minimum, improving grass performance while minimizing labor.

Get Tines and More at Billy Goat Parts

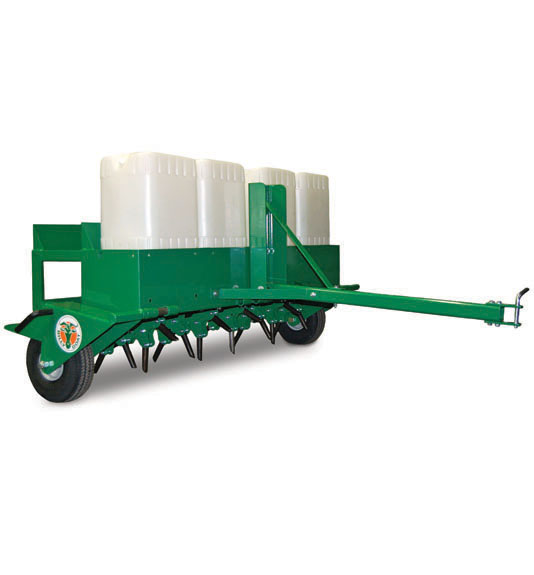
Are you ready to try alternate lawn care methods with your PLUGR, AE Series or AET towable? Do you just want some spare tines, or need parts for major repairs? Billy Goat Parts has everything you need. www.billygoatparts.com is a certified dealer for Billy Goat, which means we’re able to ship OEM parts for your aerator to your door, whether you live in the U.S. or Canada. Our site can show you parts diagrams and descriptions specific to your model, making it easy to find compatible parts and accessories. Need parts for your aerator’s engine or transmission? We’re also a dealer for Tuff Torq, Subaru, Honda and Briggs & Stratton.

Posted in Uncategorized | Tagged , , , | Leave a comment

Hurricane X3000 Maintenance

Hurricane X3000Are you the proud owner of Billy Goat’s new Hurricane X3000 walk-behind leaf blower? Here’s what you need to know to break in your machine and keep it performing at its best.

Maintenance Schedule

For engine maintenance, check the owner’s manual or read “Servicing the Vanguard V-Twin” on this site.

Break-In
After the first 10 hours: Check the hydraulic fluid level, parking brake, lug nuts, tire air pressure, and hydraulic pump drive belt.
After the first 75 hours: Change the hydraulic fluid.

Regular Maintenance
Every 40 hours: Check the hydraulic fluid, parking brake, lug nuts, air pressure, hydraulic pump drive, and belt.
Every 400 hours: Change the hydraulic fluid.
Annually: Change the hydraulic oil and filters.

Hydrostatic Drive

Each transmission has its own fluid reservoir, located at the back of the blower. The fluid should come to the bottom line on the tank when the transmission is cold. Hydro-Gear recommends 15W-50 Mobil 1 synthetic motor oil or an equivalent.

To change the filter and oil:
1. Park the machine on a flat surface and engage the parking brake. Let it cool completely.
2. Jack up the rear of the blower and support it on blocks.
3. Remove the rear tires. Switch on the bypass valves for both transaxles.
4. Place a jack under the skid plate. Remove the 6 bolts holding the plate on the machine, then lower the jack and plate.

Do the following to each transaxle:
5. Remove the filter guard: it’s held on by three screws. Remove any debris around the filter, and set a drain pan beneath it.
6. Remove the oil filter, then unscrew the drain plug on the bottom of the transmission case. Let the fluid drain out of the transmission.
7. Thread the new filter on by hand. Once it seats, spin it another ¾ turn to get a good seal. Install the filter guard, torquing each bolt to 65 in-lbs.
8. Remove the purge port, located on top of the transaxle next to the speed control lever. Add oil to the expansion tank until oil appears at the bottom of the purge port. It should take about 2 ½ quarts for each transaxle. Reinstall the purge port plug, torquing it to 180 in-lbs.
9. Fill the expansion tank until the fluid reaches the cold mark. Purge the transaxles.

Purging

Repeat until the transaxles run smoothly.
1. With the wheels off of the ground and the neutral bypass engaged, start the engine. Increase the engine speed to 1,800 RPM and disengage the parking brake.
2. Move the directional controls forward and reverse 5-6 times.
3. Release the bypass valves.
4. Move the directional controls forward and reverse 5-6 times.
5. Shut off the engine. Fill the expansion tank as needed.

Belt Drive Replacement

1. Park the blower on a level surface and remove the key. Give the engine time to cool down.
2. Remove the belt guard and two flange huts.
3. Use a ¾ inch wrench to push the idler pulley away from the belt. Slide the belt off of the pulleys.
4. Thread the new belt onto the pulleys. Push the idler pulley away to get the belt between the drive pulley and the right hydro pulley.
5. Install the belt guard and nuts.

Motion Control Adjustment

Forward Adjustment:
1. Park the blower and stop the engine.
2. Chock the wheels and release the parking brake.
3. Move the motion controls all the way forward. There should be a 1/16 inch gap between the control levers and the handlebar.
4. If a lever is out of adjustment, follow the control cable down the back of the machine to the adjuster. Loosen the top and bottom jam nuts on the adjuster. The top nut is left hand threaded.
5. Push the control lever forward. Spin the adjuster until the clearance between the lever and handlebar is correct. Tighten the jam nuts.

Neutral Adjustment:
1. Park the blower and stop the engine.
2. Raise the rear of the machine, and support it with blocks. The wheels should be off of the ground.
3. Make sure the levers are in the neutral position. Follow the control cable to the control arm. On the side, you’ll see an Allen head screw with a small-cap screw. This is the neutral adjustment.
4. Loosen the cap screw, then slightly loosen the adjustment screw.
5. Turn the screws to bring the arm back to the neutral position:

The left wheel rotates forward or right wheel rotates backward – Turn the screw clockwise.
The left wheel rotates backward or right wheel rotates forward – Turn the screw counterclockwise.

It only takes a small adjustment to bring the lever back to neutral center.

6. Tighten the cap screw. Make sure the control levers are in neutral.
7. Get on the blower, start the engine, and let it reach idle.
8. Release the parking brake. Move the controls forward and back, then let them return to neutral. If one of the wheels still moves, it needs to be readjusted.

Wheels and Tires

The tire pressure should be between 40-46 psi. Torque the wheel lug nuts to 75 ft-lbs.

Need Something for Your Billy Goat Equipment?

Billygoatparts.com is your source for everything you need for your Billy Goat. We’re not just an authorized dealer for Billy Goat: we’re also a dealer for their partners including Briggs & Stratton Vanguard and Hydro-Gear. That means we have replacement parts for everything on your leaf blower. We ship across the United States and Canada.

Posted in Uncategorized | Tagged , , | Leave a comment

Best Practices for Aerating Playing Fields and Parks

Best Practices for Aerating Playing Fields and ParksWhether your business landed a municipal contract, work for the city, or have a major corporate employer, caring for public green spaces requires different tactics from the residential lawns most care for. Chief among these is the use of aerating to combat soil compaction. These tips will help you keep lawns looking green, preserve plant life and maybe even prevent injuries.

What Makes Caring for Public Areas Different from Private Lawns?

There are two contradicting factors at play:

– Visitors expect to see a healthy, green lawn, especially on sports fields.
– Foot traffic is much heavier than on a residential or commercial lawn.

In other words, compaction happens faster, while expectations are higher.

Ideally, the soil should be about 50% dirt and 50% air and water. As people, animals, and vehicles pass over the grass, the weight crushes the fragile support structure inside the soil. The resulting damage takes three main forms:

– Compacted soil can’t absorb water and air needed to support the root system. This weakens the grass and can prevent new grass roots from breaking through the soil.
– During heavy rains, precipitation pools on top of the soil, promoting mold growth. Heavy rains can be disastrous, washing away surface soil.
– Without airspace to absorb impacts, foot and ankle injuries increase.

In open areas, the greatest damage comes from “desire paths.” These are hard, grass-free trails created when people and animals walk the shortest path to get between two points. Usually, the best way to deal with these paths is to make them official, laying down gravel or concrete. Playgrounds and picnic areas have more distributed compaction, requiring field-wide care.

On sports fields, the wear and tear is more spread out, but at the same time can be more intense. Compaction happens deep within the soil, so the cleats worn by golfers, soccer players, and football players do nothing to stop the process.

Aeration vs. Tilling

If you’re breaking new ground to establish a new lawn or playfield, you’ll probably start by tilling the earth. This breaks up established plants to create a clean slate for new grass. The grinding action of the discs compacts the soil and flakes off small particles of dirt. While it may seem like you’re relieving compaction as you break up the top layer of dirt, you’re actually increasing it.

Spike or core aerating breaks up surface compaction gently without creating dust. This makes it easier for grass seeds and sod to take root in the soil, even if the ground was just tilled.

Core vs. Solid Tine Aeration

For years, core aerating has been the go-to for quality aerating. However, changes in tine design combined with new turf research are narrowing the gap between core and solid tine aeration.

The soil plugs left behind by core aerating are mowed after they’ve had a couple days to dry out. This creates a thin layer of fresh mulch on the grass. However, it’s unsightly, and recovery time can take several days. If you’re in a hurry, soil plugs can be picked up and mulched instead of grinding them into the soil.

Spike tines don’t leave plugs, and the holes they make are smaller. As a result, recovery times are shorter, and aerating requires less labor.

In most areas, the best results can be had by using core aerating at times when ground traffic is light, switching to spike aerating during the peak of the season. This gets the best results while keeping the area open as often as possible.

When and How Often to Aerate

Aerating may be needed once or twice a year on residential lawns, but some landscapers find that they need to aerate sports areas like soccer fields every 4-6 weeks during peak playing season. Testing the play area soil with a screwdriver is the easiest way to gauge compaction. If you have trouble pushing it in, it’s probably time to aerate.

The same rules you apply to residential aeration apply here: make sure the soil is moist, make sure the grass is out of hibernation, and lift the tines out of the soil before turning.

Keep Your Equipment Running Smoothly

Whether you have an AET Series, a PLUGR or a Next Gen, you can get everything you need for your Billy Goat aerator from www.billygoatparts.com. Our search engine has built-in factory diagrams and descriptions, making it easy to find parts that fit your equipment. Need something simple for your aerator’s engine? We have sections for popular engine parts from Billy Goat’s manufacturing partners. We ship parts and accessories across the U.S. and Canada.

Posted in Uncategorized | Tagged , , , | Leave a comment

Frequently Asked Questions About Lawn and Hard Surface Vacuum

LB352 “Little Billy” Lawn VacuumHaving problems with your Billy Goat vacuum? Want to learn some ways to make it easier to use? Here are the answers to the most frequently asked questions about Billy Goat’s lawn and debris vacuums.

What’s the Difference Between a Lawn Vacuum and a Hard Surface Vacuum?

Most of the difference comes down to nozzle height. A lawn vacuum keeps the nozzle high to pass over grass while vacuuming leaves. A hard surface vacuum can get close to the ground to collect fine dust. The MV multi-surface vacuum can do both thanks to its wide nozzle height range.

Lawn vacs are designed primarily for maximum flow rate and large debris, while hard-surface vacuums focus on removing fine particles. At the extreme end of the spectrum, the QV Quietvac’s dual-stage filtration system traps microscopic dust, just like your home vacuum.

How Much Can My Vacuum Bag Hold?

If you’ve used your vacuum a few times, you probably know that it slows down if you try to fill the bag completely. The bag has small pores that let out the air drawn in by the impeller, while capturing dust and debris. Covering these pores restricts airflow, reducing suction power and putting a strain on the engine. For the best performance, you should empty the bag when it’s about half full.

Moisture is also a factor. Wet leaves weigh 35-40% more than dry leaves, so you’ll need to empty the bag more frequently to keep from overloading it.

How Do I Clean the Bag?

Give the bag a quick rinse with a hose after each day of use to remove heavy dirt build-up. Let the bag dry completely before using it.

Eventually, fine dirt will build up in the fabric, reducing airflow. When this happens, wash the bag with water and a mild detergent, then rinse it off. Using a pressure washer may seem faster, but it will damage the fabric.

If you’re using a felt bag to capture fine dust, you will need to clean the fabric more frequently.

Commercial users should have a couple of spare bags on hand. That way you’ll always have a fresh bag on hand while the other bags are drying.

Why Does My Vacuum Run Worse with a New Bag?

The new fabric is stiff, and the pores haven’t opened up yet. When you get a new bag for your vacuum, you should break it in. Attach the bag, start the engine, and open the throttle half-way. Let the vacuum run for a half hour. The air pressure will stretch the fabric, helping it breathe better.

Billy Goat recommends using the same break-in procedure after washing a bag with detergent.

Why is the Performance Bad Despite having a Clean Bag?

Check the nozzle height. It should be about an inch above the surface being cleaned. This helps the impeller draw in air with the dust and debris. Be sure you’re doing the same if you’re using the hose: keeping the nozzle above debris will clear them faster.

Why is Concrete Dust Dangerous? How Can I Remove it Safely?

Breathing in concrete dust causes silica poisoning. The fine silica powder left over from drilling concrete has microscopic edges that cut through lung tissue. When the body repairs these cuts, it leaves behind scar tissue, reducing lung capacity. Over time, this can have a major impact on cardiovascular health. Workers who experience heavy exposure can be disabled in as little as two years.

Used correctly, the QV Quietvac removes concrete dust safely. The vortex chamber and bag captures most of the dust. From there, the dust sock removes particles as small as 0.1 microns. However, it’s only effective when removing dry material.

The dust sock is delicate, so extra care needs to be taken during use and cleaning. If you need to vacuum wet material, remove the sock. When you need to clean the sock, shake it gently, then use compressed air to flush out any trapped particles. Keep the nozzle at least 6 inches away from the sock to prevent the air pressure from tearing the fabric.

Where Can I Get Bags and Other Parts for My Billy Goat Vacuum?

You can get everything you need for your lawn or hard surface vacuum at www.billygoatparts.com. We’re a certified dealer for Billy Goat, Honda Engines and Briggs & Stratton, so we carry replacements for everything on your equipment. Our site has a section just for vacuum bags, and you can use our search system to see parts diagrams and descriptions for your model. We can ship your order to any address in the United States or Canada.

Posted in Uncategorized | Tagged , , | Leave a comment

Troubleshooting Debris Loaders

Billy Goat Debris LoaderAre you having trouble getting your debris loader going at the start of leaf season? Is there an intermittent problem that’s giving you a headache? Here’s how you can solve the most common problems with Billy Goat’s line of DL debris loaders.

Unclogging Your Loader

Several problems can be traced to a clog somewhere in your debris loader. Here’s how you can clear it safely:

1. Shut off the engine. Wait until the engine and impeller come to a complete start.
2. Disconnect the spark plug wires and battery cables. This prevents the engine from starting on accident. Remember that the impeller is directly connected to the crankshaft, so spinning it will turn the engine over.
3. Disconnect the hose from the impeller housing. Locate the clog.

Clogs inside the impeller can be removed from the intake. In some cases, you may need to unbolt the impeller cover to clear the debris completely. When removing the cover, be sure to unplug the interlock switch.

If there is a clog in the discharge chute, carefully unbolt and lift the chute off of the debris loader. The chute is heavy, especially when it’s jammed with debris. It’s a good idea to have a second person on hand to help lift the chute off of the loader. Remove the debris and reattach the chute.

Vacuum Performance is Poor

The loader needs to pick up some air along with the debris to function properly. Keeping the end of the nozzle and inch or two above debris will help the loader vacuum faster.

Check the hose and impeller housing for clogs that may be reducing airflow. Make sure there are no tears or holes in the hose that may be letting air in.

Vacuum performance will vary depending on the debris being removed. Wet leaves and grass are harder to pick up than dry leaves, so it will take more time to pick them up.

The Engine is Locked Up

This is almost always caused by a clog. If the hose and impeller are clear, then there’s something wrong with the engine. Have it looked at by a professional mechanic.

The Engine Won’t Turn Over

If you have an electric start engine, check the battery. It needs to have a good connection and be fully charged to power the starter. When used over a normal workday, the engine provides enough power to charge the battery fully. During the off-season, the battery should occasionally be recharged or be connected to a trickle charger to keep it from going flat. All electric start engines have a backup pull starter, so you don’t have to have a working battery to use your loader.

Your debris loader has an interlock switch that cuts the ignition if the hose isn’t connected to the impeller intake. When fitting the hose, make sure this flap-shaped switch is under the hose and hose clamp. Make sure the switch is plugged in, and the wiring is intact from the switch to the engine.

The Engine Turns Over, but Won’t Start

Does the engine have a stop switch, a fuel valve or a throttle? Make sure these are in their operating positions.

Make sure the spark plug wires are connected.

Honda and Vanguard engines have a low oil sensor that will cut the ignition. Check the oil level, and add more oil as needed.

Fuel will go stale in a month after purchase and only lasts up to three months when treated with a stabilizer. If you aren’t sure how old the fuel is, drain the tank and carburetor, then add fresh fuel. If you accidentally stored the engine with fuel during the off-season, you may need to clean the carburetor to restore fuel flow.

The Engine Runs, Then Dies

A small clog can temporarily turn into a big one as debris enters the hose. If the engine wants to stall as you vacuum, make sure there’s a clear path from the nozzle up to the discharge chute.

If there is too much oil in the engine crankcase, it can create drag on the crankshaft, slowing the engine until it stalls. Check the oil level and drain as needed.

Do You Need Parts for Your Debris Loader?

When you need parts or accessories for your Billy Goat equipment, visit www.billygoatparts.com. We’re an authorized dealer for Billy Goat and their partners including Briggs & Stratton and Honda Engines. That means when you order from us, you know you’re getting a quality OEM replacement. Our site makes it easy to get the parts you need with sections for commonly-ordered parts and a search engine with built-in parts diagrams. We can ship your order to any address in the U.S. or Canada.

Posted in Uncategorized | Tagged , , | Leave a comment

Is Billy Goat Equipment Right for Your Rental Business?

SC181H Hydro-Drive Sod CutterAre you looking to expand your rental business? Do you want to offer lawn care and groundskeeping equipment that’s reliable and easy to use? Billy Goat may be exactly what you’re looking for. From cement cleanup to seeding, they build quality machines that are simple to learn and designed to keep operating costs low.

What Does Billy Goat Offer My Customers?

No matter who you supplying equipment to, Billy Goat makes something to fit their needs.

– While everything Billy Goat makes is commercial grade, they offer a range of sizes to fit the needs of users ranging from homeowners to municipal contractors.
– Rent construction equipment? The QV Quietvac can be used for cement cleanup when properly equipped, while their other vacuums make quick work out of trash and debris pickup.
– Billy Goat’s reciprocating aerators perform better than drum aerators and are easier to turn.
– The new AGR1300H landscape auger is small enough to fit in a 6-foot truck bed, yet it offers the performance of a PTO-powered auger. Once deployed, its Z-link support drops the auger straight down, eliminating the constant angle adjustments of similar augers.
– Their line of walk-behind blowers offer unparalleled performance thanks to their composite construction and optional hydrostatic drive.
– The new line of stand-on blowers offer maximum power and cleanup speed by delivering the power of a large tractor attachment in a ZTR package.
– Billy Goat’s sod cutters and brushcutters are perfect for tough jobs that renters only need to do once every few years.

How Hard is it for Renters to Learn New Equipment?

Thanks to the new Text to Video program, it couldn’t be easier. Billy Goat started rolling out T2V last year, adding information to the handles of their equipment. This includes a quick start guide and instructions on how to access a 90-second video explaining the operation of the machine.
That means fewer calls asking for help and fewer mistakes that can damage equipment.

Clear labeling around the machine also help guide new users. For example, overseeders have labeling on the seed hopper that explains how to set up the machine to get the right drop rate.

How Long are Billy Goat Machines Warrantied?

All walk-behind blowers except the F6 are guaranteed for two years of rental use. Everything else Billy Goat offers is warrantied for one year of rental use.

Briggs & Stratton classifies rentals as commercial use. Under this policy, Vanguard engines are guaranteed for three years. B&S engines with the Dura Bore cast iron cylinder sleeve are guaranteed for one year. This includes the engines used in smaller equipment like the F601X leaf blower.

Honda Engines has a similar warranty policy. They guarantee GC-Series engines for three months, GXV140 and 160 engines for 24 months, and all other GX-Series engines used by Billy Goat for 36 months.

How Hard are these Machines to Maintain?

Billy Goat makes a point of building their equipment so that they can be maintained and repaired using common hand tools. That means you can do most of the work in-house, reducing downtime and costs. Manuals include parts breakdowns, so you can see exactly what you’re working on and what you need to replace.

Parts are also chosen to reduce maintenance. All hydrostatic transmissions used in Billy Goat equipment are sealed for life, and direct drive power is used wherever possible to cut down on drive belts and chains. On some equipment, you can upgrade to puncture-resistant tires, eliminating one more point of failure.

We also have articles on this blog with tips for maintenance and troubleshooting for everything Billy Goat makes based on both factory information and customer feedback. Our site also integrates factory parts diagrams into the search engine, making it easy to order exactly what you need.

Where Can I Get Parts for My Equipment?

More downtime means less money you can make on your equipment. If you need replacement parts for your equipment fast, go to www.billygoatparts.com. We’re an authorized dealer for Billy Goat as well as their manufacturing partners including Honda Engines and Briggs & Stratton. That means you can get everything for your equipment from one source. We have a massive parts warehouse, so we can ship what you need shortly after you order. We can have your order delivered to any address in the United States or Canada.

Posted in Uncategorized | Tagged , , | Leave a comment

AET 48/72 Towable Aerator Maintenance

AET 48:72 Towable Aerator MaintenanceIf you’ve owned Billy Goat products before, you know that they aren’t just reliable: they’re also easy to maintain. This applies to the AET 47/72 towable aerator just as it does everything from the brand. Here’s how you can keep your modular aerator performing at its best and solve common issues with performance.

When to Perform Maintenance

There is no set maintenance schedule for this aerator, aside from giving it a thorough inspection before each day of use, and cleaning the tines after use.

Core tines are self-sharpening. However, after a certain point, wear and impacts will take their toll, dulling the end of the tine. There isn’t a set wear point. Instead, these parts should be replaced when they are damaged or start to dull.

The pillow block bearings should be greased at least once per season, but you will probably need to grease them far more often, as grease is wiped away when washing the aerator. While handwashing limits water exposure, you should always apply new grease after using a pressure washing.

Always wear heavy gloves when handling tines. Even when they’re too dull to aerate, they have no problem cutting skin.

Replacing Individual Tines

If you just need to replace one or two tines, you don’t need to take off the entire tine assembly.

1. Raise the tines and chock the wheels.
2. Loosen the outermost nut and carriage bolt that hold in the tine. Do not remove these parts.
3. Loosen and remove the innermost carriage bolt and nut that hold the tine to the reel.
4. Using a pry bar, push the tine plates apart. Once this space is opened, the tine should slide off.
5. Slide the new tine in place. Install the inner carriage bolt and nut. Tighten down the outer bolt and nut.

Tine Reel Removal and Repair

1. Raise the tines and chock the wheels.
2. The reel is sharp and very heavy. Support the reel, or set up a place to drop it once it’s unbolted.
3. Remove the nuts and bolts holding the reel bearings. There are two on each side of the reel.
4. Lift the reel up and tilt it to the side to disengage it from the drive chain.

Now you can replace all of the tines on the reel, or replace damaged parts on the reel.

5. Remove the cotter pin and nut on the end of the reel shaft.
6. Slide the tine rows and spacers off of the reel, keeping them in order for reassembly.
7. Replace any damaged parts.
8. Reassemble the reel and install it by following the previous instructions in reverse order.

Bearing Lubrication

Use lithium-based NLGI #2 grease. Marine, automotive and general-purpose greases are all suited for use on this machine.

1. Raise the tines and chock the wheels.
2. Apply grease to the bearings using a high-pressure grease gun.
3. Wipe off any grease on the outside of the bearings or fittings.

Troubleshooting

Abnormal Vibration
Stop using the AET 48/72 immediately. Inspect the aerator and check the tightness of all fasteners. Replace any damaged parts.

Poor Aerating Performance
Tines work their best with moist soil. Water the day before you plan on aerating.

If you have water jugs, make sure they are full and resting on the top plate. Each jug weighs 40 lbs. when full. Each modular unit holds up to two jugs. If you don’t have the jugs, place cement blocks or steel on the top plate. Add no more than 80 lbs. to each section.

Get the Parts You Need Shipped to Your Door

Billygoatparts.com is more than an online storefront. We’re a certified Billy Goat dealer, so you know you’ll always get quality OEM parts. Our site has built-in factory information including descriptions and diagrams, making it easy to locate compatible replacements for your equipment. We can ship anything from spare tines to major components to any address in the U.S. or Canada.

Posted in Uncategorized | Tagged , , | Leave a comment

AET 36/60 Towable Aerator Maintenance

AET 36/60 Towable Aerator MaintenanceIt folds. It swivels. It turns in soil. The AET 36/60’s innovative design makes it one of the easiest aerators to use on the market. However, even a tool as simple as this is bound to have some issues. Here’s what you need to know to keep your AET 36/60 breaking soil and fix common problems.

Maintenance Schedule

The tines are very sharp. Always wear heavy gloves when working on your aerator.

Before each use or each day of use: Thoroughly clean the aerator, especially the tines.
Every 10 hours of operation: Inspect the aerator for loose and damaged parts
Every 50 hours: Grease the wheel bearings and tine hubs.

Tines for Older Models

Billy Goat redesigned the tines for all AET36/60 trailers and included these new tines as original equipment on newer aerators. When you order a tine replacement kit, it may not be the same model number as the tines you are currently using. However, they will fit your equipment, and they can be mixed with older design tines.

Tine Replacement

Billy Goat’s tines are made out of self-scouring metal. As a tine wears, the cutting surface will remain sharp until it’s near the end of its life. If the edge is dull, or the tine is bent or chipped, it needs to be replaced. Wear varied depending on soil makeup and impacts with rocks, so there’s no set length for replacing tines.

1. Raise the tines.
2. Remove the bolt and nut holding the tine to the hub.
3. Replace the tine.
4. Reinstall the bolt and nut.

Lubrication

When lubricating your aerator, use a high-quality NLGI Grade 2 lithium grease. Any grade 2 grease will do, including multi-purpose, marine and automotive formulas. Apply grease wheel bearings and tine hubs.

Always grease the aerator after cleaning it with a pressure washer.

Troubleshooting


Aerator Vibrates Abnormally
Stop using the aerator immediately. Inspect the aerator for damaged or missing parts, and lodged debris. Remove debris and replace parts as needed. Check the tightness of all bolts.

Poor Aerating Performance
Worn tines won’t penetrate the soil. Inspect the tines, making sure each one is straight and has a sharp edge. Check the tightness of the bolts holding the tines onto the hubs.

The soil should be moist when aerating. For the best results, water the area the day before aerating.

Keep the tine stars locked when using this aerator with a trailer hitch. If they can swing freely, the trailer won’t track straight. Unlock the tines when using the trailer with a three-point hitch. This lets the tines swivel while making turns.

If the soil is still too hard, and the wings are extended, add weight to the tray. The top tray is designed to hold 16 x 4 x 8-inch concrete cap blocks. Each standard block weighs 33 lbs. Total weight for the entire aerator should not exceed 350 lbs or 10 blocks. With the wings folded in, there is more than enough weight on the tines to penetrate the soil.

Get the OEM Parts You Need for Your Aerator

When you need parts for your AET 36/60 or anything else Billy Goat, visit www.billygoatparts.com. Our site has factory diagrams and descriptions for every piece of equipment they make, so you can quickly find exactly what you’re looking for. Need something for motorized equipment? We’re also an authorized dealer for Honda, Subaru and Briggs & Stratton. That means we can send you everything you need for your Billy Goat. We can ship your order to any address in the United States or Canada.

Posted in Uncategorized | Tagged , , | Leave a comment

Frequently Asked Questions about Aerating, Dethatcing and Overseeding

Frequently Asked Questions about Aerating, Dethatcing and OverseedingIf you want to go beyond basic lawn care to get a lush, green lawn, you need to understand how to care for the soil. Fertilizing gets the most attention, but aerating, dethatching and overseeding is every bit as important to build up your lawn. Not sure where to start? Here are some answers to common questions about this part of lawn care.

What’s the Difference between Dethatching and Aerating?

To have a healthy lawn, your grass needs drainage and access to oxygen. Thick thatch and compacted soil can interfere with both.

Thatch is the layer of woody organic material above the soil. Stems, roots, and rhizomes are harder to break down, so they stay in your lawn longer than grass blades. A thin layer protects the soil, but too much can cause drainage, insect and root issues.

Soil compaction is caused by weight pushing out spaces between soil particles. Aerating physically breaks up the soil. Contrary to popular belief, aerating isn’t an alternative to dethatching. At most, core tine aerating removes just 5-10% of thatch.

When Do I Need to Dethatch or Aerate?

As a general rule of thumb, thatch should be no more than ½ inch thick. Lawns should be aerated when drainage and growing issues crop up due to ground compaction.

Dethatching and aerating will help you establish new grass with overseeding. Thatch can prevent seeds from reaching the ground, while compaction makes it harder for new roots to penetrate the soil.

What Can I Do to Dethatch and Aerate Less Often?

Address lawn care issues can help reduce thatch buildup.

Poor watering practices: Frequent watering in small amounts encourages roots to grow toward the surface. Unless you’re establishing new grass, your lawn should only be watered every three or four days. Balance irrigation with rainwater to maintain 1/2-1 inch of water per week.

High nitrogen levels: Overfertilizing with fast release nitrogen encourages thatch buildup. Be sure to get a soil test to use as the basis of your fertilizing plan. If you’re still having problems, switch to organic fertilizer. It releases slower than inorganic lawn treatments.

Bagging clippings: It sounds counter-intuitive, but it actually breaks down thatch faster. This material is easy for microorganisms to digest, making it easier for them to break down woody material in thatch.

High pesticide use: Using pesticides in high quantities kills off earthworms. These worms help disperse organic material and break it down, speeding up thatch decomposition.

Compacted soil is caused by weight crushing the soil. This weight can come from construction equipment, vehicles and foot traffic. Heavy clay soils are the most susceptible to compaction, while sandy soils suffer the least.

– Don’t park on your lawn, especially in winter. Cold, soggy soil compacts more easily than dry soil.

– Avoid foot and bicycle traffic. Add a walkway to keep pedestrians off of the grass.

What’s the Difference Between Coring and Solid Tines?

Core tines have a hole with a razor sharp edge. As they plunge into the ground, they cut a hole and pull out a plug of soil. Once dry, plugs can be mowed to break them up and distribute them across the lawn. The holes can be unsightly and take months to disappear.

A solid tine is a spike that pushes through the soil, breaking up compaction. This causes compaction directly around the resulting hole, but the hole is smaller, and there’s no plug left over. This saves work and helps the lawn heal faster.

Opinions about core and tine aerating are starting to shift in the golfing community. In the past, core aeration was universally seen as the superior option. However, landscapers are learning that the compaction caused by these tines in sandy soil is minimal while decreasing recovery times from months to weeks. As we learn more, there may be a shift to solid tine aeration across the landscaping industry.

Modern aerators like Billy Goat’s PLUGR series don’t penetrate in a straight line. By moving at a slight angle, they produce less compaction than the straight up-and-down action of older designs. This makes both core and solid tine aerating easier on lawns than straight and drum aerators.

How do I Get Even Seed Coverage?

Always dethatch and aerating beforehand to give seeds a clear path to the soil.

When choosing seeds, remember that conditions vary across your lawn. You need a mix of shade-loving and sun-loving varieties to get even growth.

Apply half of the seeds at a time, first going in one direction, then running the overseeder 90 degrees in the other direction. This fills in any gaps.

Get the Quality Parts You Need for Your Billy Goat Equipment

Is it time to do some maintenance on your overseeder? Do you want to use different tines with your aerator? If you need something for your Billy Goat, visit www.billygoatparts.com. We’re a certified dealer for Billy Goat, Honda and Briggs & Stratton, which means we offer everything you need for your equipment.

Posted in Uncategorized | Tagged , , | Leave a comment

Which Vacuum is Right for You?

TKV Self-Propelled VacuumIf you’re looking for a debris vacuum, Billy Goat has you covered. They offer 13 models designed for everything from picking up leaves on narrow walkways to cleaning up after major construction projects. Which vacuum is right for you? Here’s how you can pick the right model and accessories to fit your needs.

Leaf and Limb Disposal

All models can pick up leaves, but the KV and TKV Series are the only vacuums that come with an integrated chipper. Both models can handle branches up to two inches in diameter.

Getting in Hard-to-Reach Places

A hose kit can be added to any Billy Goat lawn or hard surface vacuum. These kits include mounting hardware to keep the hose out of the way when using the main nozzle.

The LB352 is the smallest vacuum in Billy Goat’s lineup. At just 20 inches wide, this vacuum is perfect for clearing small spaces including sidewalks, gardens, patios and pool areas. Want something with more clearing power? The KV Series is wider, but it can be outfitted with front caster wheels for better maneuverability.

Electric Start

The MV601SPE is the sole model available with electric start.

Hard Surfaces

The QV Series has a nozzle designed specifically for hard surfaces.

The MV Series has a gobbler door that can be adjusted from the operator’s position, making it easy to transition from turf to hard surfaces. The KV Series also does both paved surfaces and grass. However, nozzle adjustment requires stopping the vacuum and changing its wheel height.

High Dust Environments

The QV Quietvac’s cyclonic filtration combined with the fine dust sock lets it filter out dust as small as 0.1 microns. This makes it safe to use for concrete dust removal as long as the area is dry.

An electrostatic dust sock is available for the MV Series. It isn’t suitable for cement cleanup, but it does keep the operator from being coated in dust when working on dry dirt. Like the QV’s dust sock, it’s only effective when picking up dry debris. There’s also a sand-resistant liner that can be fitted to the impeller chamber to save wear and tear on the machine.

Fast Debris Clearing

For all out vacuuming speed, the QV Quietvac and MV Multi-Surface vacuums have the highest air volumes and the widest vacuum nozzles at 33 inches and 29 inches respectively. If you need a residential model, take a look at the KV series with its 27-inch nozzle.

The TKV650SPH, MV601SPE, and MV650SPH have a single speed drive system. This helps the operator roll the vacuum up hills.

The QV Series is the only walk-behind vacuum on the market available with a hydrostatic drive. This drive system is built into the QV550HSP and QV900HSP, propelling them to a top speed of 3 mph. The adjustability of this drive lets the operator use it in all conditions, increasing speed over any surface.

Low Noise

The QV Quietvac’s cyclonic filtration system isn’t just effective, it helps tame the noise from the impeller. It makes 77 dBa of noise at full RPM, dropping down to 76 dBa at 2,800 RPM, the engine speed needed for typical use. This makes it the quietest vacuum in this segment of the market.

Debris Capacity

All models have a serrated impeller that breaks up debris, compacting them at a 12:1 ratio under ideal conditions. Expect to empty the bag more frequently when picking up wet debris.

LB Series: 28 gallons
QV Series: 36 gallons
KV, TKV and MV Series: 40 gallons

Billy Goat makes disposable liners for the MV series. These fit inside the reusable bag, so they’re loaded as you use the vacuum. This saves a step when loading debris for disposal.

Get Everything You Need for Your Billy Goat Equipment

Is your Billy Goat equipment due for service? Need to add a hose kit or other accessories to your debris vacuum? Want to get an extra bag so you’ll always have one ready to use while the other one is being cleaned?

If it’s Billy Goat, you can order it from www.billygoatparts.com. We’re an authorized dealer for Billy Goat and their partners including Honda Engines and Briggs & Stratton. That means you can get all the genuine parts and accessories for your equipment from one place. We have sections for common parts including engine parts, wheels, and accessories. You can also look up your model and compare parts listings with factory diagrams, making it easy to find the parts you need for your vacuum. We ship across the U.S. and Canada.

Posted in Uncategorized | Tagged , | Leave a comment