Laying Down Sod

Laying Down Sod

Whether your lawn suffers from neglect or is torn up from new construction, sod can re-establish a thick layer of grass in a matter of weeks. A layer of sod can be laid down at any time from early spring to late fall in most of the U.S, and even in winter in places with mild climates. Whenever you choose to lay down sod, you need to take the right steps when preparing and caring for the soil to get the new grass to thrive and become part of your lawn.

Test the Soil

For the best results, the soil should be slightly acidic. Have the soil tested and get the amendments needed to bring the soil to a pH between 6 and 7.5 and any nutrients needed to get the right balance of potassium, phosphorus, and nitrogen.

Order the Sod

For the best results, you’ll need to be able to install sod the same day it’s cut to keep it from drying out.
When ordering sod, make sure you know what kind of foot traffic it will experience and if it will be installed in sunny or shady areas: the farm or retailer should have blends to fit your needs. Order at least an extra 5% to compensate for cuts made around curves.

Prepare the Soil

Start by using a sod cutter to remove the existing grass down to the roots. The ground needs to be wetted down first so the blades can penetrate through the soil and roots. By cutting out the current ground cover instead of tilling it, you’ll make the ground easier to penetrate by removing the existing root structure while taking out dormant weeds that could sprout once the sod has been placed.

Next, go over the bare soil with a tiller, cutting down at least four inches into the surface. Use the tiller to mix in the amendments and fertilizer. This creates a soft base for the new root structure to take hold.

Use an iron rake to smooth out the surface. Once it has been leveled, the soil should be about an inch lower than surrounding paved areas. Lightly water the soil to help it make contact with the sod.

Lay Down Sod

Start with the longest straight area in the yard, which is typically next to a fence. As you roll out the sod, smooth it down to remove wrinkles. Supporting your knees on a board will help spread your weight, reducing soil compaction. If you leave footprints on the exposed soil, smooth them out with the rake.

Continue rolling out sod, laying it down so the edges never meet. For the second row, cut the first roll in the middle to create an offset to these edges. When rolling over sprinklers and other obstacles, use the sod knife to cut holes so these objects can pass through the new grass. Using a lawn roller can help eliminate any space between the sod and the ground and smooth out the final surface. Roll over the lawn in one direction, then again at a 90-degree angle. Repeat until you can walk over the sod without having your foot sink into the ground.

Get the Sod to Take Hold

For the first few weeks, avoid foot traffic as much as possible to keep from pushing the sod around and breaking contact with the soil.

Water frequently, preferably in the morning to give the sod bed time to absorb the water without it evaporating or pooling and promoting fungal growth. Start with daily watering during the first week, then every two days during the second and just twice a week during the third week. Use a soil probe to ensure the ground is moist to a depth of three to four inches.

Mow once the grass has grown to a height of three inches. Too much weight can tear the sod from the ground, so use a walk-behind mower instead of a riding mower. As always, only cut 1/3 of the grass height at a time.

After a month, the root system of the grass should be getting into the underlying soil. Reapply fertilizer to make up for what has washed away during the first couple weeks of watering.

Keep Your Sod Cutter Working

When you need to fix your Hydrodrive or SC, you can get all the parts you need for your Billy Goat equipment at www.billygoatparts.com. We’re a certified dealer for Billy Goat and Honda Small Engines, which means we can provide you with every part on your sod cutter, and we ship those parts across the U.S. and Canada.

Posted in Uncategorized | Tagged , , | Leave a comment

Transporting Lawn Care Equipment

transporting lawn care equipment

While Billy Goat does make some consumer products, chances are if you own their equipment, you use it professionally. Going to job sites can mean bringing a long list of items from devices to fuel containers, which means even a minor mistake during transport can turn into an expensive repair or a dangerous situation. These tips will help you ensure you can get everything where you need it while minimizing the chance of damage and injury.

General Tips

As always, check the manuals for instructions for specific equipment. Some devices need to have the fuel tank drained before transport. If this is the case, always unplug the spark plugs before draining to prevent accidental fuel ignition.

Engines can remain hot long after they’ve been shut down: it’s not uncommon for mufflers to retain heat for over half an hour. Make sure there’s nothing flammable near the engine, and never cover equipment in a tarp unless it’s completely cool.

Never store gasoline in an enclosed area like a trunk or the cab of a truck. Fumes from the fuel can gather inside, poisoning the driver and passengers. Worse still, if you have an accident, the gasoline can spill and catch fire turning a minor accident into a life-threatening situation.

All walk-behind equipment should be loaded sideways to keep the wheels from letting the equipment roll forwards and backward. While movement will be limited, this equipment should still be tied down.

When lifting equipment, always pick it up by the frame or handles. Picking it up by other components could break them.

Riding Mowers and Tractors

These are the heaviest pieces of equipment, so they need to go at the front to balance the weight of the trailer or bed. At least 10% of the total weight of the trailer needs to be on the hitch ball to keep the trailer stable when towing.

Start by position the truck or trailer in an area where it will be level while the ramps will at or close to a 15 degrees angle. When loading a mower, lift the deck to its maximum height to ensure the blades can’t snag on the ramps or trailer.

Drive up to the back of the trailer and check the positions of the ramps, making sure all the wheels will roll over them.

When loading the mower or tractor, position it as far forward as possible without touching any walls, stakes or other supports. Even when the mower is tied down, it will still move around a little and could scrape against these surfaces.

Shut off the engine and engage the parking brake. To secure the equipment, use a pair of ratchet straps, running them over the frame and attaching the ends to the sides of the bed or trailer.

Pressure Washers

Before loading, the hose needs to be depressurized and detached from the pump. Billy Goat pressure washers can carry the gun and hose onboard, but these mounts aren’t secure enough for transport. Either tie down these components on their mounts or transport them separately from the pressure washer.

Aerators

The tines can get caught on ramps, potentially sliding them off of the trailer or flipping the aerator. Always set the depth to the maximum height before loading and make sure the linkages haven’t been damaged, letting a tine hang low enough to catch on the trailer or ramp. If you have a towable aerator, remove the water weights before loading.

Debris Loaders

Billy Goat designs their intake hoses with quick release hose clamps and a simple chain attachment to the boom. This lets you easily remove the hose before transport. The impeller intake cover should be down and the boom should be locked into place. Swiveling exhaust chutes also need to be fixed in place using the locking pin before transport.

Maintenance

Broken equipment isn’t just dangerous to use, it can be difficult to load. If you need to fix your Billy Goat equipment, visit www.billygoatparts.com. We’re a certified dealer for Billy Goat and the engine manufacturers they use including Honda and Briggs & Stratton so we can supply you anything you need from aerator tines to spark plugs whether you live in the U.S. or Canada.

Posted in Uncategorized | Tagged , , , | Leave a comment

Brush Cutting Tips

brushcutter

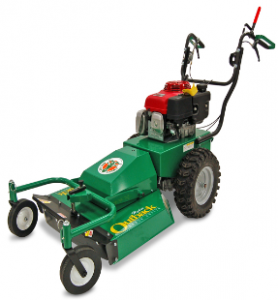
A Billy Goat walk behind brush cutter is an easier, faster and more powerful than a hand-held cutter, but they still take more care to operate than a walk-behind mower. These tips will help you use your equipment safely and effectively.

Wear the Right Gear

Having the right PPE is a must when using any small engine equipment, and this is no exception. Non-slip shoes and clothing that isn’t too loose fitting will lessen the chance of slipping or getting hung up on branches during operation, while eye protection will help protect against ricochets. Hearing protection is also a good idea since the engine will be producing enough noise to cause hearing damage over extended use periods.

Work at the Right Time

Always work when there’s plenty of daylight and the ground is dry. This doesn’t just make it easy for the blade to cut through plant matter, it also means you won’t have mud to slip on.

Do a Walk-through

Before you start cutting, look around the area for low stumps, trash, rocks and other obstacles that could damage your brush cutter or turn into a dangerous projectile when it meets the cutter’s blade. Even if the deflectors stop the object, the impact can dent the housing. Mark any stationary objects so you can avoid them, keeping in mind the maximum branch widths your model will cut. If your brushcutter can handle saplings that are up to two inches wide and you try to cut a three-inch wide trunk, you’ll only bind up the blade, damaging it and stressing the drivetrain components in the process.

Clear the Area

If something does get tossed out by the cutter, it can damage equipment and hurt people and animals in the area. Make sure pets, children, cars, and anything else fragile is away from the cutting area before you start work. It’s well worth taking a minute or two to move your vehicle out of the way if it means you don’t have to replace window glass.

Start High

If you have an adjustable height cutter and you’re not familiar with the area you’re cutting, go over it with the deck set at or near the maximum height. Once the top layer of growth has been removed, you can see how low it’s safe to trim.

Overlap and Slow Down

Cutting smaller swaths will improve your cutter’s performance. On heavy growths, using half of your brushcutter’s deck width at a time will get the best finish. If the cut is uneven, slow down so the blade has more time to cut.

Mow Across the Sides of Slopes

Side slope cutting will make the brushcutter easier to manage, it will be less likely to roll off, and if it does tip, it won’t fall on you. If you have a model with front casters, lock them into place to keep the cutter tracking straight.

Keep Your Equipment in Top Condition

Is a worn blade or a loose belt keeping your brushcutter from performing at its best? When you need parts for your Billy Goat equipment, visit www.billygoatparts.com. We’re a certified dealer for Billy Goat, Honda Small Engines, and Briggs & Stratton so we can provide you with everything you need for your equipment and the engine that powers it. We ship across the U.S. and Canada.

Posted in Uncategorized | Tagged , , , | Leave a comment

Aerating & Dethatching

Aerator

Dethatching and aerating usually go hand-in-hand to prepare lawns for seeding, but they can also help deal with soil compaction and thatch buildup, helping keep your grass beautiful and healthy. Here’s what you need to know to get the most out of these lawn care procedures.

Thatch

Thatch is a layer of organic material that builds up on the surface of soil. While mulched grass clippings usually decay quickly, harder plant pieces including nodes and roots can stay around long enough that they build up faster than they decompose. A thin layer of thatch can help protect root systems from cold weather and drought, but a thick layer can create an oxygen barrier when wet and can cause roots to grow up out of the soil, making them more susceptible to drought. Thick thatch can also let the wheels on your mower sink on hills, causing the deck to tilt and scalp the turf.
As a general rule, thatch works best if it’s less than a half inch thick and becomes a problem if it’s over an inch thick.

Serious problems with thatch buildup are the result of improper turf care. Acidic soils can reduce the number of microorganisms in the soil that can decompose plant matter, while aggressive fertilization and pesticide application leads grass to produce more roots and stems.

Soil Compaction

The thatch layer controls surface access to the root system, but it’s the soil itself that makes the biggest difference when it comes to water and mineral absorption. The soil will compact slowly over time, while new construction, heavy foot traffic or kids playing in your lawn can all accelerate this process. A compacted layer as thin as a quarter-inch can halt water penetration. Compacted soil doesn’t just limit access to the root system, it also reduces oxygen, making it harder for microorganisms to thrive and digest thatch.

Preparing Your Lawn

Sod needs at least a year to fully integrate into the soil. If you try to aerate or dethatch before then, the sod will fall apart.

To help the blades and tines on these machines penetrate the soil, the grass should be cut to half its usual height and the ground should be moist. It’s also a good idea to mark sprinklers and other obstacles so you can avoid them when cutting through thatch and soil.

Dethatching

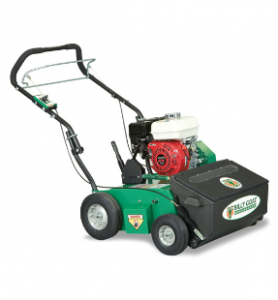
The blades on the power rake should be adjusted so that they penetrate the thatch and barely touch the soil. When moving it over turf, make sure each pass overlaps by an inch or two to ensure all the thatch is being lifted up. For the best results, go over the turf a second time at a 90-degree angle. This cross pattern will lift up the maximum amount of thatch.

Once the thatch is piled up on the top of the lawn, it needs to be swept up and disposed of. While raking will work, a lawn vacuum will make removal a lot faster.

Aerating

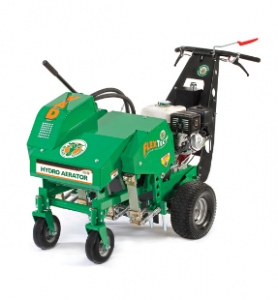
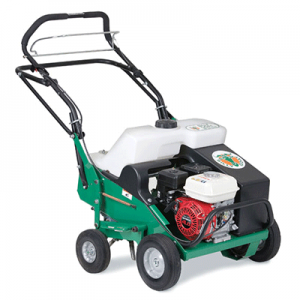
For the best results, use core tines. These cut small plugs out of the soil, opening up the surface with minimal impaction. If you need a cleaner surface or want to save time, solid spikes will slightly compact the sides of the holes they make, but they won’t leave plugs. With either type of tines, the aerator should only make one pass over the ground.

Aerators are heavy so the tines push down into the soil instead of pushing the aerator up off of the ground. Towable Billy Goat models have water jugs that need to be filled and placed on top of the aerator to provide the weight needed for soil penetration. No matter what type of aerator you’re using, it’s a good idea to have a couple people on hand to help you move the equipment, whether you’re unloading it from a truck or attaching it to a tractor or mower.

Cores can be shredded by mowing them. This will quickly dull the blades, so they’ll need to be sharpened before you use the mower to cut grass.

Get Your Billy Goat Equipment Ready This Season

When you need parts for your power rake, aerator or anything else Billy Goat, visit billygoatparts.com. We can supply you with replacements for everything on your equipment because we’re a certified dealer for Billy Goat and a wide range of engine manufacturers including Honda and Briggs & Stratton. Finding the right part is easy thanks to built-in factory parts diagrams that let you see exactly what you’re ordering. We ship across the U.S. and Canada.

Posted in Uncategorized | Tagged , , , | Leave a comment

Using an Outdoor Vacuum

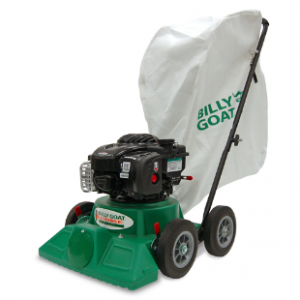
billygoat outdoor vacuumWhether you’re cleaning up a construction site or a leaf-covered lawn, an outdoor vacuum takes the work and complexity out of debris removal by letting you collect and deposit materials with a single machine. No matter where you’re working, these tips can help you get the most out of your Billy Goat vacuum.

What’s the Difference Between an Outdoor Vacuum and an Indoor Vacuum?

The vacuum you use at home has a height-adjustable nozzle, a motorized brush that lifts up carpet, a motor with a fan that creates suction, and either a cyclonic system that uses centrifugal force to separate out dirt or a bag that lets air pass through it while keeping dirt inside.

An outdoor vacuum has a lot of mechanical similarities to an indoor vacuum, but it’s built to pick up heavy debris instead of fine dirt. Instead of a fan, it uses an impeller that can withstand impacts and can chop up debris for more compact storage. There’s no brush, and the nozzle is built to withstand heavy abrasion. There’s always a bag to store debris, even if the vacuum uses cyclonic filtration, and that bag is reusable.

What’s the Difference Between Hard Surface and Lawn Vacs?

Billy Goat makes vacuums designed for lawns, hard surfaces like driveways, and both hard and soft terrain. The difference between these two main types of vacs influences the design. Casters are more common on surface vacs since they need to maneuvered around walls, while lawn vacs use fixed wheels to stay on track when rolling long distances. Lawn vacs have a higher nozzle height to stay above the grass, while surface vacs are built to withstand occasional abrasion against cement. Multipurpose vacs split the difference, offering more flexibility with the nozzle so it can be effective anywhere.

What Your Vacuum Can and Can’t Pick Up

Your vacuum will have a maximum debris size it can handle, which should be clearly stated in the instructions. However, there are a few more considerations you should make when vacuuming.

A litter vacuum can handle cans, metal, glass and other trash, but only in small amounts since they can be hard on the impeller. Likewise, while you can pick up some sand with an outdoor vacuum, its abrasiveness can cause serious wear. Never use a vacuum on gravel: the rocks can cause major damage and can become wedged between the impeller and the housing.

Before vacuuming, you should look over the area and pick up any objects that are too large for the vacuum, including bottle and limbs. Some Billy Goat models have a built-in wood chipper to take care of limbs as you work.

The cutting and compaction done by the impeller works best on dry materials. If you vacuum wet leaves and clippings, you’ll fill up the bag far more frequently.

Using and Cleaning the Bag

All the air that enters the nozzle eventually makes its way out of the vacuum through small pores in the surface of the collection bag. Over time, these pores clog with dirt, limiting the movement of air and the suction power of the vacuum. How long this takes can vary a lot depending on how dusty your work area is. If you notice a drop in performance, wash the bag and let it dry before using it again. If you frequently work in places with dust or sandy soil, it’s a good idea to have an extra bag on hand so you can have one ready to use while the other one is being cleaned. Still having air flow problems after cleaning a bag? The pores can be flushed out using a pressure washer.

Overfilling the bag can also keep air from getting out. As a general rule, the bag should be unloaded once it’s about 3/4 full.

Engine Maintenance

With all the dust flying around when the vacuum is operating, it should be no surprise that air filters get dirty faster on these machines than just about any other type of small engine equipment. Always inspect the filter before each use and clean it frequently. Likewise, oil should be changed more often to deal with contaminants that make it through the air filter.

Getting Parts to Maintain Your Billy Goat Vacuum

Whether you need an extra bag or some engine parts, you can get it from www.billygoatparts.com. We’re a certified dealer for Billy Goat as well as the manufacturers of the engines used in their equipment so we can provide you with everything you need to maintain your vacuum. Our site makes it simple to find parts by integrating factory diagrams and descriptions so you can see exactly what you’re ordering. We ship to both the U.S. and Canada.

Posted in Uncategorized | Tagged , , | Leave a comment

Overseeding – How to do it the right way

billygoat overseederUsing a Billy Goat overseeder is easy: just load it with seed, set the seed drop density and cutting depth, and engage the bail when you’re rolling over places you want to seed. However, there’s a lot more to effective overseeding, from choosing the right grass to getting it to take root.

What’s the Point of Overseeding?

A blade of grass lives for about a month and a half. During that period, it extends the roots and sends out new blades of grass, called tillers. Hundreds of these tillers can be produced by the original plant, but as this root network matures, the death of grass blades can out-pace their replacement with new tillers. This causes the lawn to thin out.

When you overseed, you’re starting the growth process over again with new plants. This maintains the replacement of mature blades, keeping your lawn thick and healthy looking. The establishment of new grass also helps push out undesirable weeds like crabgrass.

When Should I Overseed?

The best time to put down grass seed is late in the summer or early in the fall. This gives the new grass time to germinate when it’s still warm, then grow and put down a solid root system as the temperature drops. This helps it survive the winter while taking advantage of fall’s higher soil moisture. When the grass comes out of hibernation, it grows as temperatures warm up, further extending its reach and blocking spring weeds as they germinate.

Preparing Your Lawn for Overseeding

To germinate, the seeds need to make contact with the soil. To get the best results, as much material should be cleared between your seeder and the ground.

Dethatch the grass to remove the layer of decomposing clippings.

Cut the grass to a height of two inches or less. Use a collection system to pick up the clippings and the material lifted up by dethatching.

Aerate the soil to help the seeds penetrate and give them better access to air and water. If you’re using a plug aerator, you will probably want to dethatch and cut the turf first so your mower blades will only need to deal with the core plugs.

If you have lawn issues like bald spots or poor soil quality, these should be corrected before overseeding.

Which Seed Should I Use?

It’s best to match the winter grass you’re laying down with the summer grass currently on your lawn: if you have fescue, get more fescue. Have Bermudagrass? Ryegrass, Bluegrass, and Tall Fescue will work with your turf.

Most fine fescue sold in North America is shade gras so it won’t grow well on open turf. If you want to overseed with this variety, look for something without this label. Ryegrass is available in both annual and perennial forms, so plan your planting accordingly.

How Much Seed Should I Use?

Golf courses use as much as 30 lbs. per acre to deal with the unique needs of course turf, including heavy foot traffic and ball speed consistency. This has led to the misconception that lawns need several times the recommended amount of seed.

As a general rule, you should follow the recommended maximum stated on the seed package if it’s the first time you’re overseeding, and somewhere between the minimum and middle recommendation if you’re reseeding. Most overseeding failures are due to improper care after seeding, not from a lack of seed.

Caring for an Overseeded Lawn

If you’re going to spread fertilizer, do it before seeding so that the seeds stay close to the surface.

Once the grass has been spread, the lawn should be lightly watered two to three times a day to keep the soil moist, but not damp. This will help the seeds germinate. Once the grass starts sprouting, add more water at a time, but do it less frequently so the moisture penetrated deeper without making the ground wet enough to promote root rot.

The existing grass cover should provide enough sun protection for the new seed, but if you have bald spots, these should be raked over with a light later of soil or another covering like straw.

Fertilizer may need to be applied with or directly after overseeding, especially if the soil is low in phosphorus. New seed needs this mineral to grow, but since it doesn’t leach into water like other minerals, it may not be accessible to these new plants. This mineral will be labeled “P,” and it will be the middle number on the fertilizer bag’s content label. Most fertilizers designed for overseeding will include extra phosphorus.

The lawn shouldn’t be mowed again until the new grass is at least two inches tall, which should take two to three weeks. At this point, you can resume your normal watering.

Keeping Your Billy Goat Overseeder Ready for Planting

Need to work on your overseeder? You can get everything you need at www.billygoatparts.com. We’re a certified dealer for Billy Goat and all the engine manufacturers they use including Subaru, Honda, Kohler and Briggs & Stratton, and we ship across the U.S. and Canada.

Posted in Uncategorized | Tagged , , , | Leave a comment

Pressure Washer Use

billy goat pressure washer useNo matter how big or small your Billy Goat pressure washer is, it can make it easy to clean almost any surface. However, it can also easily damage those surfaces and even cause serious injuries. Here’s what you need to know to use your pressure washer safely and effectively.

Safety

Even a residential power washer can spray water at pressures that you won’t see even at a DIY car wash, so extra care should be taken when using these devices.

Always wear protective eyewear, gloves, and non-slip shoes when operating your pressure washer.

Never point the nozzle at a person. The high pressure can allow the water to penetrate skin causing blood poisoning. On that note, if you see any leaks in the hose, gun or wand, shut down the pressure washer immediately. A small leak can very quickly turn into a dangerously high-pressure spray.

Alkaline and acid cleaners should never come in contact with bleach. The resulting chemical reaction can cause fires, release poisonous gasses and create high pressures that can destroy anything trying to contain them, including parts of your pressure washer. Always flush the detergent system before shutting down the pressure washer to prevent accidental mixing of dangerous chemicals.

Getting the Most Out of Each Nozzle Tip

Billy Goat includes 5 nozzle tips with their pressure washers including 0 (red,) 15 (yellow,) 25 (green) and 40-degree (white) tips as well as a soap nozzle (pink.) The pressure is the same coming out of every tip, so the wider the angle, the gentler the spray will be.

For the best results, the same distance between the nozzle and the surface should be maintained throughout the cleaning process. To find the right distance, start about four feet away and slowly move forward until you find the right balance between the force and spread of the spray. Working from the top down will help prevent streaking.

The 40-degree tip works well on delicate surfaces like siding, stucco, and wood. Cleaning a deck? This is tip is gentle enough to clean without damaging the wood. If you do accidentally get the tip close enough to fur the surface, you can sand it back with a fine sandpaper or steel wool.

The 25-degree tip is the best choice for washing cars and boats as well as cleaning off bricks and patio furniture. It’s also great for sweeping surfaces, pulling off leaves and mud from sidewalks and driveways.

The 15-degree tip is for heavy duty cleaning including concrete, roofing, and drains. It can be used like a chisel: simply spray at a 45-degree angle to the surface, and you’ll be able to peel back layers of dirt. Using it this way is great for taking off graffiti.

The 0-degree tip is so powerful that it can easily damage most surfaces. It should only be used to remove caked on dirt and mud from concrete and metal surfaces, remove weeds from cracks in paved surfaces and take off the layer of compacted grass clippings on the inside of mower decks.

Using Soap and Detergents

Billy Goat pressure washers are fitted with a downstream detergent injection system, adding chemicals drawn from the detergent hose after the pump, preventing damage to the pump’s seals. This system only functions if the soap tip is fitted to the spray wand. This tip has the widest spray pattern, making it safe to use on any surface.

There are many options for cleaning chemicals, including formulas designed for washing cars, heating coils, aluminum and vinyl siding. Some metal cleaners and de-liming agents can also be used to remove stains from concrete. Whatever you decide to use, make sure it’s designed specifically for pressure washers.

Check the instructions before use to see if the detergent needs to be diluted. Most liquid concentrates are designed to be drawn directly into the pressure washer where they’re diluted by the incoming water, while most powder concentrates are designed to be mixed with water, typically at a 10:1 ratio, before being drawn into the pressure washer.

Starting the cleaning process by presoaking the surface with the detergent will make dirt easier to remove, but the cleaning chemicals should be sprayed off before they’re allowed to dry. To find the right mixture concentration, start with the metering valve 1/4 open, then gradually increase the mix until you get the results that you want.

Where to Get Parts for Your Billy Goat Pressure Washer

www.billygoatparts.com is a certified dealer for Billy Goat as well as the companies that make the engines and pumps used on their pressure washers. That means we can provide you with any part you need for your equipment, and we can ship that part to any location in the U.S. and Canada.

Posted in Uncategorized | Tagged , , , | Leave a comment

Pressure Washer Maintenance

Billy Goat Pressure Washer OverviewBilly Goat makes quality equipment, but even the best machinery needs to be used and cared for properly. If you recently purchased one of their pressure washers, there are some things you should know to get the most out of it.

Before Each Use

Cleaning the pressure washer: Debris buildup should be removed before each use or each workday if you use your pressure washer constantly. The linkages, springs, and controls should be clean as well as the muffler and the cooling fins on the engine and pump. These parts can be wiped off with a damp cloth. Caked on dirt and can be safely removed with a soft bristle brush, while piles of loose debris can be removed with a vacuum cleaner. Never use the pressure washer’s high power spray to clean the pressure washer itself: water can leak into the crankcase and intake, causing damage to the engine.

Checking the inlet screen: Examine the water inlet screen and remove any debris. If the screen is cracked, replace it before using the pressure washer.

Inspect the washer: Check the high-pressure hose, spray gun, detergent siphon hose, and detergent filter for cracks and damage. While a cracking detergent hose will just keep the pump from drawing soap, damage to high-pressure components can lead to dangerous leaks. Replace damaged parts before using your pressure washer.

Changing the Pump Oil

Changing the oil inside the pump is just like changing oil in the motor: there’s a drain plug at the bottom to remove the oil and a cap with a dipstick covering the filler neck.

Only use non-detergent SAE 30 oil. Oils with detergents in them like multi-weight motor oils can leave deposits that will keep the pump from working correctly. Both CAT Pumps and Annovi Reverberi recommend using their own hydraulic oils, although standard 30 weight oil can be used in a pinch so long as they’re changed frequently.

How often should pump oil be changed? Unfortunately, it’s hard to provide a specific interval.
Under ideal conditions with OEM oil, an oil change may only be needed every 500 hours. However, internal leaks, heavy loads, and lower quality oil can cut that time significantly. It’s best to check the oil occasionally and change it if there is any sign of cloudiness or other degradation.

Keep in mind that even with the best lubrication, the seals inside the pump will fail after a few years. Fortunately, both pump manufacturers offer rebuild kits.

Storing During the Winter

If there is any water left inside, it can freeze and damage the pump. Both AR and CAT Pumps make special “pump saver” antifreeze with a blend of lubricants designed specifically for long term storage and freeze protection of pressure washer pumps. If this specialized antifreeze isn’t available, an alcohol-free RV antifreeze can be used. Disconnect the spark plug to keep the engine from starting. Using a three foot (one meter) length of hose, pour the antifreeze into the inlet. Pull the recoil starter twice to cycle the antifreeze through the pump. Reconnect the spark plug.

Water Supply

Problems with incoming water can cause problems that initially seem to be coming from the pressure washer itself. Your pressure washer’s manual should specify the water supply rate needed to run the pump. Usually, this isn’t a problem if you have water from a local utility, but well water systems may not be able to supply water at the rate needed for the pump.

Billy Goat pressure washers are not designed to be run with hot water. Using water that is over 100ºF (38ºC) can cause chattering, erratic performance, and loss of pressure. Sometimes, using a hose that has sat in the sun can cause problems until the water cools it down.

Releasing Pressure

Once you’re done using your pressure washer, the pressure inside the system needs to be released:

Let the motor idle for a couple minutes.
Move the throttle to “slow.” Once the engine holds a steady speed, shut it off.
Point the spray gun toward a safe area and squeeze the handle to release the water and reduce the pressure inside the pump, hose, and gun.

The hose and gun should not be disconnected until they have been depressurized in this manner.

Getting Parts for Your Billy Goat Pressure Washer

www.billygoatparts.com is your one stop shop for everything Billy Goat. We’re a certified dealer for the brand, as well as Honda, Briggs & Stratton, AR and CAT Pumps, letting us supply you with parts for everything on your pressure washer including the engine and the pump. We can ship parts across the U.S. and Canada.
Posted in Uncategorized | Tagged , , , | Leave a comment

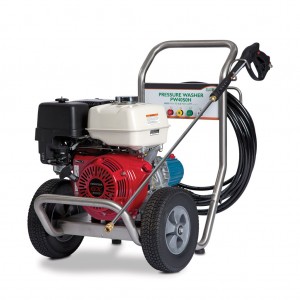
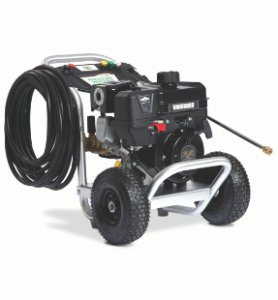
Billy Goat Pressure Washer Overview

When it comes to outdoor cleanup, Billy Goat is well known for their vacuums and blowers. Recently, they’ve expanded their pressure washer offerings, including three new models to provide the capabilities needed by a range of users from residential owners to commercial and rental buyers. By combining Billy Goat’s trademark quality construction with pumps and engines from industry leaders, you can be sure your pressure washer will handle any job from washing cars to removing layers of dirt from construction equipment.

What You Get with a Billy Goat Pressure Washer

All models mount the engine and pump on a lightweight, corrosion-resistant aluminum frame with pneumatic tires for easy transport. The handle includes storage for the spray gun, hose and nozzles, keeping them within easy reach.

A 50-foot stainless steel braided hose and a spray gun with a 20-inch stainless steel wand is included with all models; these components are designed with the model’s pressure and output in mind to get the right balance between weight and durability. Both the gun and hose have quick disconnects for easy drainage and storage. 0, 15, 25 and 40 degree and soap nozzles are included, letting you use these washers to clean anything from vinyl siding to concrete.

Billy Goat offers four commercial quality models:

PW25A0V

This brand-new model uses an Annovi Reverberi triplex pump. It uses a die cast pump body with a forged brass head and is backed by a 5-year commercial warranty. The pump is driven by a 205 cc Vanguard engine with Transport Guard, which cuts the fuel whenever the ignition is switched off, ensuring fuel won’t flood the carburetor or seep into the oil pump. This makes it a great choice for rental companies that want to offer a pressure washer that will endure transport and operation by new users.

Together, this pump and engine combination produces 2,500 PSI at a rate of 2.5 gallons per minute. That’s a peak output of 6,250 Cleaning Units.

PW30A0V

Another recent addition, this washer has all the features of the PW25A0V, adding an upgraded pump that increases power to 3,000 PSI at 3 gallons per minute for a total of 9,000 Cleaning Units.

PW37A0H

This new model combines an Annovi Reverberi triplex pump and a 270 cc Honda GX series engine. It produces 3,700 PSI at 3.5 gallons per minute for a total of 12,950 Cleaning Units.

PW40S0H

The most powerful model in Billy Goat’s power washer lineup, the PW40S0H uses a CAT Pumps triplex pump. Designed for the hardest use conditions, this pump is resistant to heat, freezing, and corrosion, and uses industrial quality ceramic plungers. It’s driven by a 390cc Honda GX series engine, and both components are mounted on rubber isolators to reduce movement and increase life. Output for this model is 4,000 PSI at 4 gallons per minute for a total of 16,000 Cleaning Units.

Where to Get Parts for Billy Goat Pressure Washers

www.billygoatparts.com carries everything you need to fix and maintain your pressure washer from small parts to complete engines. Our site’s search engine has built-in factory parts diagrams and descriptions so you can quickly identify the part you need, and we can ship your order to any address in the U.S. and Canada.

Posted in Uncategorized | Tagged , , , | Leave a comment

The Ultimate Wheeled Blower: The F18

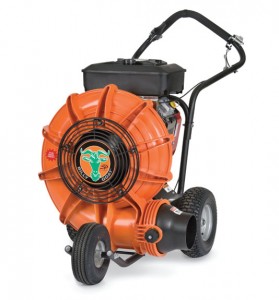
f18The Billy Goat Force F18 wheeled blower is practically in a class by itself. It uses an engine normally found in commercial lawn mowers to drive an advanced composite fan delivering an enormous amount of high speed air. The end result is more power than nearly anything on the market in a package that’s quiet and easy to use.

Better Living through Plastic

A metal grill protects the fan from incoming debris, but the housing is made out of a composite. This lets Billy Goat cast the housing to get the perfect shape, eliminating air voids and other causes of turbulence present in metal housing. This is paired with a 17 inch wide 16 blade fan with closed faces, providing maximum surface area for performance. The end result is greater efficiency and less shaft vibration for longer engine life while delivering more power. Despite a massive 6 inch nozzle, this blower can maintain air velocities just below 200 mph. It’s also far less noisy than backpack and hand-held blowers despite its superior performance. Continue reading

Posted in Uncategorized | Tagged , , , | Leave a comment