
Whether your lawn suffers from neglect or is torn up from new construction, sod can re-establish a thick layer of grass in a matter of weeks. A layer of sod can be laid down at any time from early spring to late fall in most of the U.S, and even in winter in places with mild climates. Whenever you choose to lay down sod, you need to take the right steps when preparing and caring for the soil to get the new grass to thrive and become part of your lawn.
Test the Soil
For the best results, the soil should be slightly acidic. Have the soil tested and get the amendments needed to bring the soil to a pH between 6 and 7.5 and any nutrients needed to get the right balance of potassium, phosphorus, and nitrogen.
Order the Sod
For the best results, you’ll need to be able to install sod the same day it’s cut to keep it from drying out.
When ordering sod, make sure you know what kind of foot traffic it will experience and if it will be installed in sunny or shady areas: the farm or retailer should have blends to fit your needs. Order at least an extra 5% to compensate for cuts made around curves.
Prepare the Soil
Start by using a sod cutter to remove the existing grass down to the roots. The ground needs to be wetted down first so the blades can penetrate through the soil and roots. By cutting out the current ground cover instead of tilling it, you’ll make the ground easier to penetrate by removing the existing root structure while taking out dormant weeds that could sprout once the sod has been placed.
Next, go over the bare soil with a tiller, cutting down at least four inches into the surface. Use the tiller to mix in the amendments and fertilizer. This creates a soft base for the new root structure to take hold.
Use an iron rake to smooth out the surface. Once it has been leveled, the soil should be about an inch lower than surrounding paved areas. Lightly water the soil to help it make contact with the sod.
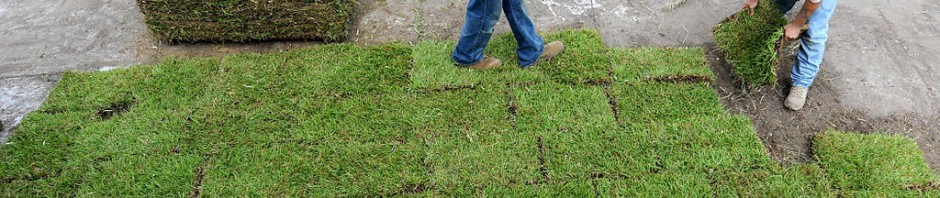
Lay Down Sod
Start with the longest straight area in the yard, which is typically next to a fence. As you roll out the sod, smooth it down to remove wrinkles. Supporting your knees on a board will help spread your weight, reducing soil compaction. If you leave footprints on the exposed soil, smooth them out with the rake.
Continue rolling out sod, laying it down so the edges never meet. For the second row, cut the first roll in the middle to create an offset to these edges. When rolling over sprinklers and other obstacles, use the sod knife to cut holes so these objects can pass through the new grass. Using a lawn roller can help eliminate any space between the sod and the ground and smooth out the final surface. Roll over the lawn in one direction, then again at a 90-degree angle. Repeat until you can walk over the sod without having your foot sink into the ground.
Get the Sod to Take Hold
For the first few weeks, avoid foot traffic as much as possible to keep from pushing the sod around and breaking contact with the soil.
Water frequently, preferably in the morning to give the sod bed time to absorb the water without it evaporating or pooling and promoting fungal growth. Start with daily watering during the first week, then every two days during the second and just twice a week during the third week. Use a soil probe to ensure the ground is moist to a depth of three to four inches.
Mow once the grass has grown to a height of three inches. Too much weight can tear the sod from the ground, so use a walk-behind mower instead of a riding mower. As always, only cut 1/3 of the grass height at a time.
After a month, the root system of the grass should be getting into the underlying soil. Reapply fertilizer to make up for what has washed away during the first couple weeks of watering.
Keep Your Sod Cutter Working
When you need to fix your Hydrodrive or SC, you can get all the parts you need for your Billy Goat equipment at www.billygoatparts.com. We’re a certified dealer for Billy Goat and Honda Small Engines, which means we can provide you with every part on your sod cutter, and we ship those parts across the U.S. and Canada.
