How the Right Equipment Can Cut Fall Job Times

billy-goat-F1802V-housing-lg

Is your equipment helping you get maximum profits? By choosing the right fall lawn care equipment, you can get jobs done faster, letting you do more work and keep your customers happy by ensuring leaf coverage won’t hurt their lawns.

Moving Leaves

Backpack leaf blowers have been around since the early 1950s, and over the course of the following 30 years were adopted by professionals who needed a method for moving debris that didn’t require water. When walk-behind blowers were introduced, they offered a massive increase in power, but their weight coupled with their inefficient housings and fans made them difficult and inefficient to use.

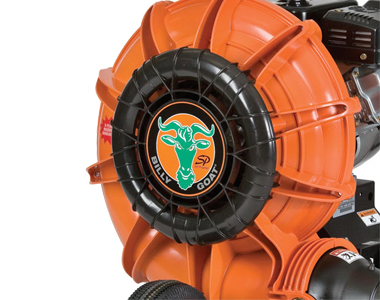
Today, modern composite construction allows shapes that produce efficient air flow, reducing power demands and noise while also significantly reducing the blower’s overall weight. With models that have drive systems and electric start, Billy Goat’s Force blowers are as simple to use as a small walk-behind mower. The benefits go well past operator comfort since this equipment can use large displacement four stroke engines, letting them do as much work as 7 backpack blowers. While the initial cost may be higher than a backpack blower, the cost savings in personnel and the ability to get more jobs in during the season’s peak can greatly increase profits. For groundskeepers at large facilities, it can shave significant time off of clearing courtyards, parking lots, and other large spaces.

Picking Up Leaves in Confined Spaces

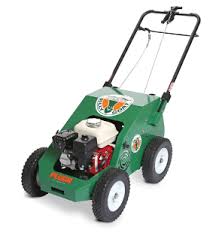
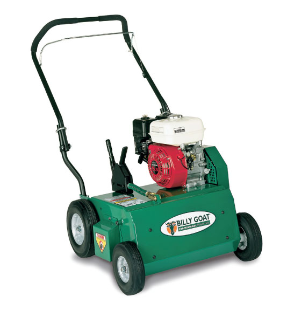
What if your business mostly centers around residential yards? A wheeled blower is impractical in small, fenced-in areas, but it’s the perfect area to use a wheeled vacuum. This device can pick up leaves and other debris and bag them in a single pass. Since the impeller chops up leaves into small pieces as they pass through, they’re compacted to allow more debris to be stored on board for less frequent bag emptying and lower disposal costs. The TKV vacuum also has an integrated chipper for slicing up small branches, cutting one more step out of the cleaning process. These professional quality models are also great for rental businesses and homeowners with large lawns.

Waste Disposal with Less Mess

A truck loader turns a messy two person job into a quick one person job, picking up and breaking up leaves in much the same way as a lawn vacuum, albeit at a much larger scale. Since debris loaders are stationary, Billy Goat is able to fit their models with larger motors and impellers, letting them reduce material at a 12:1 ratio. Granted, it won’t be able to get the same reduction ratio on already broken leaves processed by a lawn vacuum, but it still makes it much easier to get bags of leaves into a truck or trailer for disposal.

Need a way to drop off yard waste without the expense of a dump truck? Dump inserts add a dump bed to the inside of a standard truck bed, keeping overall operating costs low. Using Billy Goat’s Customfit system, the loader can be mounted on a swing away hitch. This lets it operate directly in front of the bed gate when loading, then can be moved away from the tailgate to let the bed tilt and dump its cargo. For an even simpler setup, the loader can be mounted on the tailgate of an unmodified truck and fitted with a swiveling chute. Once it’s time to drop off the debris, the loader can be used to vacuum from the bed out to the disposal area. Larger operators can use the debris loader with their dump trucks by mounting the loader on a trailer or even fit it directly to a cargo trailer using a skid mount.

Need to Service Your Billy Goat Equipment? There’s an Easier Way to Do That, Too.

Are you ready to put your fall equipment to work? Visit Billygoatparts.com for the parts you need to maintain and repair your blowers, vacuums, and loaders so you can be ready for the autumn rush. Our site has built-in factory diagrams and descriptions to help you find exactly what you need, and we can ship your parts to any location in the US. and Canada.

Posted in Uncategorized | Tagged , , | Leave a comment

Managing Lawn Waste to Reduce Water Pollution

lawn care clean upLate summer and early fall lawn care involves a lot of debris: there’s thatch to lift off the soil, leaves that need to be removed as they fall from the trees, and even increased grass clippings in areas where water restrictions are lifted as temperatures fall. Properly disposing of all that material doesn’t just keep HOA’s happy and avoids breaking city ordinances, it also helps protect the environment by stopping algae blooms that can harm wildlife.

Yard Waste, Fertilizer and Algae Blooms

If leaves and grass clippings end up on the pavement, they’ll eventually be drawn into the drainage system. Most of these systems empty directly into waterways. Once there, the same organic material that could be feeding the lawn feeds algae instead, causing blooms.

Regular algae blooms can remove oxygen from the water, block light and even clog fish gills, killing aquatic life. Although much rarer than green algae, cyanobacteria (blue green algae) blooms release toxic chemicals that kill aquatic life and cause organ and nerve damage in humans, forcing the shutdown of recreational areas.

The problems aren’t just with grass and leaves. Like grass, algae thrives on phosphorus and nitrogen, which can be supplied by runoff from excess fertilizer.

Reducing the impact of lawn waste and fertilizer is a matter of both managing the lawn to reduce the need for soil correction while making sure the right amount of fertilizer is applied to bring everything back in balance.

Turning a Lawn into a Waste Eating Machine

The more mulch that is handled on site, the less waste there is to dispose of. A mulching mower can turn grass clippings and leaves into small pieces that can be easily digested by the microorganisms on the lawn’s surface, returning nutrients to the soil. If it’s necessary to remove material for weed control or other issues, it should be bagged by the mower or collected using lawn vacuums and blowers. Side discharge mowing should be avoided wherever possible since it lets debris roll off the lawn and onto the pavement where it can make its way into storm drains.

Bald spots can’t digest mulch, but those areas can be recovered through overseeding. In transitional areas across the central U.S, seeding cold grasses can keep the lawn active as warm grasses go into hibernation, letting the lawn can digest more material.

Dethatching increases the access the soil has to air and water, but it shouldn’t be necessary unless there’s something wrong with how the lawn is being taken care of. In most cases, excessive thatch is caused by mowing the lawn too short or applying too much fertilizer. Mulching can actually reduce thatch since it helps build an environment where microorganisms can thrive and break down woodier plant material. Aerating also improves nutrient access and is helpful on almost any lawn.

Using Fertilizer Correctly

There are plenty of fall fertilizers on the market, but the only way to know which one to use and what amount to use requires soil testing. Send out samples at least two weeks before you plan on fertilizing to give the lab time to process the results. For the most accurate information, send two samples: one from an area in the best condition, and one in an area with problems like bald spots or weeds. If you’re keeping the grass healthy with good lawn care practices, the amount of fertilizer needed will be minimal.

Dealing with Lawn Debris for Minimal Impact

If it can’t be mulched into the soil and there isn’t a way to set up a mulch or compost pile on site, leaves and grass clippings need to be taken to an off-site compost pile. Dethatching will remove so much woody material that removal will almost always be required, while the acidity of leaves can cause issues with sandy soils, requiring disposal no matter the circumstances.

Thorough collection can reduce the environmental impact: picking up leaves that have been pushed out of the yard will keep them from getting into waterways. Using a four stroke walk-behind blower or lawn vacuum can reduce air pollution relative to two stroke blowers while getting the job done faster. A truck loader also helps get as much of the leaves as possible off of the lawn when loading them for transport.

Keep Your Billy Goat Equipment Ready to Work

Billygoatparts.com is a certified dealer for Billy Goat and their engine suppliers, so we have everything you need for their blowers, aerators, overseeders, dethatchers and more. Our site has built-in factory parts diagrams so you can see the parts you’re searching for and how they fit on your equipment. We can ship your order anywhere in the U.S. and Canada.

Posted in Uncategorized | Tagged , , | Leave a comment

Fall Leaf Collection

fall leaf collection

It may be the middle of summer, but with fall on its way, it pays to plan ahead. There’s no precise way to know when trees will start shedding their leaves, but once they start, it takes a lot of effort to keep them from turning your lawn into a soggy, grass-choking mess.

Can Leaves Be Mulched?

Leaves are acidic, but that acidity usually won’t affect the soil as long as the leaves are dealt with properly. Mulch sits on top of the soil, and in most cases, the soil surface acts as a buffer, preventing acidification. The exception is sandy soil, which can easily absorb mulch, affecting its pH. As for other factors including nitrogen loss, thatch and weed infestation are not altered when mulching leaves. This means in most areas, well-mulched leaves can be left on the lawn, unless they come from a black walnut tree.

Black walnut trees contain a chemical called “juglone.” It’s used in the roots to fend off other plants, but it’s present throughout the entire plant, including the leaves. Tomatoes, blackberries, blueberries, azaleas, rhododendrons and many other plants are susceptible to this poison. If the leaves are added to a much or compost pile, the juglone will decompose after about four weeks, making it safe to use on soil. If they’re mulched directly into the soil, it can take two months or more for the chemical to break down, which could affect planting in the spring.

Mowing

For most lawns, leaves can be managed through frequent mowing using your Cub Cadet’s mulching mode. Have a mower like the CC 30 that has a side discharge deck? Mow the lawn when it’s slightly damp so that the leaves clump together as they exit the chute. After your first pass, go back and mow over these leaf trails to chop them into small pieces, then rake them into the grass.

Ideally, the leaves should be slightly damp to suppress dust. Wet leaves will be hard for the mower to lift and chop, while dry leaves will create massive amounts of dust, necessitating the use of a dust mask and safety glasses when mowing. Leaves should be chopped up before they get to more than three or four inches in height, which may require more frequent mowing while the leaves are falling. Wet, matted leaves should be removed within four days to reduce negative effects to the grass.

A sharp blade is critical for getting small, easily digested pieces of leaves. If you haven’t sharpened the blades on your mower since the start of the season, now is a good time to inspect them.

Vacuuming

If you have a lot of leaves or you have black oak leaves that need to be picked up, the easiest way to handle them is with a lawn vacuum. The action of the impeller creates suction to lift the leaves and breaks them up, compacting them for easy disposal.

When using the vacuum, the nozzle of the vacuum should be adjusted so that it’s close to the ground without touching it.

As with mowing, the leaves should be moist, but not wet. However, there are ways to work around different conditions: wet leaves can be picked up if the bag is emptied when it’s just half full, and dry leaves will require more frequent bag cleaning to remove the resulting dust from the bag’s pores.

When using the hose, let the vacuum do the work for you. Keep the end of the nozzle slightly above the ground will let the impeller’s strong suction pull out any leaves crammed between walls and landscape features.

How Do I Dispose of Leaves?

The most environmentally friendly way to deal with yard waste is through composting. If you don’t want to do it yourself, most areas have a composting area set up for fall waste, letting you drop off your leaves to be turned into mulch. Some municipalities also have trash pickup days that will accept yard waste so you don’t need to deliver your leaves to the waste site.

Where to Buy Cub Cadet Parts

Need some new high lift blades or an extra bag to keep your vacuum working? Visit www.cubparts.com for all of your Cub Cadet needs. We have a wide selection of OEM parts in stock, and we can ship them anywhere in the U.S. and Canada.

Posted in Uncategorized | Tagged , , | Leave a comment

Cleaning Up After Storms

yard_storm_-_Google_Search

Even a minor severe thunderstorm can bring straight line winds and hail that can take out leaves and small branches, turning yards and parks into a big mess. Fortunately, the same Billy Goat equipment used for handling fall leaves can help you with every step of clean-up.

The Initial Inspection

Before you begin work, you need to take stock of the damage and address any safety issues:

Have downed power lines? Inform the electric company and stay out of the area.

Are there broken limbs still caught in the trees? These present a serious safety hazard and need to be removed before work can begin on the ground.

Are there any potentially hazardous object on the ground, buried beneath debris? An open door to a shed or a garage can mean tools and other materials may have been swept out. These items need to be recovered lest they become projectiles when moved by power equipment.

Moving the Bulk of Debris with a Blower

A walk-behind blower is a safe way to move most of the debris since the equipment won’t make direct contact with any hidden obstacles. Ideally, the leaves and debris should be slightly moist to reduce dust, but they can still be moved when wet; it will just take more time. The wind should also be calm or blowing in the direction you want to move the debris.

Start by blowing out areas near buildings. Aiming the nozzle upwards to help deflect debris away from the wall. Once the debris is out in the open, it can be pushed onto a tarp or to the curb for loading. Work one direction, rolling the blower backward and forward and getting the leaves and debris lined up with the tarp or loading area. If there is excess dust being pushed by the blower, aim the nozzle up slightly. To push this strip into a smaller area for collecting, keep the nozzle at its lowest setting to keep from disturbing the pile that you’re building.

Raking and the Second Inspection

A litter vacuum will be able to handle a rock or a can now and then, but it shouldn’t be used to pick up gravel. Once the majority of the debris has been removed, rake in any escaped gravel and do another check for hidden obstacles that could pose a hazard.

Vacuuming Remaining Debris

If you need to move material while it’s still wet, empty the bag when it’s only ½ full instead of ¾ full. Since this moisture reduces dust, the bag can be filled several more times than usual before the bag needs to be cleaned to restore air flow. Keep the vacuum nozzle as low as possible without scraping the ground for maximum performance.

Using a TKV outdoor vacuum? Don’t forget that it has an on-board wood chipper to help you dispose of small limbs.

Truck Loading

Using a truck loader saves a lot of shoveling, but it also has another benefit: the impeller breaks up the debris, making it more compact. This decreases the total mass of the yard waste, which can cut disposal costs significantly.

The nozzle is designed to withstand abrasion, but there should be enough suction that it can be kept a couple inches above the material being removed. Always shut down the engine before fixing jams; there are safety mechanisms in place to do this automatically, but it doesn’t hurt to be extra cautious.

If your loader has a swiveling chute, it can be turned to blow outside the trailer or truck bed. This lets you use the loader to get the last bit of debris out when unloading.

Keep Your Equipment Ready When Storms Strike

When you need parts for your Billy Goat equipment, visit www.billygoatparts.com. We’re a certified dealer for Billy Goat as well as every manufacturer that they partner with including Honda, Briggs & Stratton, Subaru, and even AR, so we carry everything you need for maintenance and repairs. Finding parts is simple thanks to a search system that has built-in factory diagrams and descriptions, and we can ship those parts anywhere in the U.S. and Canada.

Posted in Uncategorized | Tagged , , | Leave a comment

Drum Vs. Reciprocating Vs. Tine Wheel Aerators

Drum Vs. Reciprocating Vs. Tine Wheel Aerators

Which aerator design is best? Drum aerators remain popular, but newer designs provide superior performance and are a lot easier to use. What are the differences, and which one is right for you?

Drum Aerators

The oldest type of aerator, this piece of equipment looks like a carpet roller covered in tines. This design limits the amount of holes that can be made to between 4-6 per square foot. The tines are mounted on a system that can retract into the drum, separating the aerator for the soil. While it’s possible to lift push aerators out of the ground, in most cases the tines need to be retracted to make turns.

A lot of weight is needed to get tines to penetrate the soil, but by the nature of their design, the amount of weight that can be put on the drum is limited. This makes it much harder to penetrate any soil that isn’t damp, reducing the effectiveness of the aeration. Towable drum aerators can be heavier, but they still run into the same problems when turning, making them a pain to use.

Reciprocating Aerators

These are sometimes called “cam” aerators because they use a cam mechanism to move the tines back and forth. This cam looks a lot like an engine crankshaft with shafts and tines replacing the rods and pistons. The engine spins the cam, forcing the tines into the soil instead of depending only on the weight of the aerator. That makes these machines a lot lighter than a drum aerator and it helps the machine get consistent penetration with a variety of soils.

The number of tines is also significantly lower, which simplifies maintenance. Billy Goat’s AE and PLUGR models use 4 or 8 tines instead of the dozens needed for a similarly sized drum aerator. It also means there’s less chance of damage, eliminating the wear and vibration of a drum. Add in a powerful engine and drive system, and a reciprocating aerator cut job times by up to 50%. This design is limited in size to walk-behind units, limiting their use to small lawns.

Towable Tine Wheel Aerators

Tine wheel-based aerators like Billy Goat’s towable AET models share some features with drum aerators, but since they’re backed by the power of a tractor, it’s easy to work around the drum’s problems to create a trailer that can cover large spaces quickly with minimal effort.

With this design, weight is only an issue for transport, so Billy Goat’s AET series aerators are designed to use removable blocks, sandbags or water-filled jugs to push down the tines when the trailer is in use. Once the work is done, these weights can be removed so it’s easier to load the attachment onto a trailer. This eliminates the need for a heavy drum that surrounds the tines.

Billy Goat’s AET can lift the tine wheels together as a unit using a built-in manual lift. This eliminates the need for a retracting tine system, significantly improving serviceability. The 36/60” model has swiveling tine bodies that can move with the tractor if a three point hitch is being used, so there’s no need to raise the tines through turns.

The 48/72” uses a chain drive system driven by the wheels as the unit is towed, increasing the speed of the tine stars. This results in a denser hole pattern than what can be achieved with a drum aerator.

Get the Parts You Need to Keep Your Billy Goat Working

Need some tines or other parts for your Billy Goat aerator? www.billygoatpart.com is a certified Billy Goat dealer, so we can supply you with everything you need to keep your equipment moving. Our site has built in parts diagrams and descriptions to make it easy to find what you need, and we can ship your order to any location in the U.S. or Canada.

Posted in Uncategorized | Tagged , , , | Leave a comment

Dethatching

dethatcherThatch is one of the most overlooked and misunderstood parts of a lawn. This layer of soil covering vegetation can be helpful in small amounts, but it can cause serious problems for grass if it gets too thick. Here’s what you need to know to identify thatch problems, get the best results using your Billy Goat power rake and keep thatch from building up again.

What is Thatch, and Why is it Bad?

Dead plant matter gathers on the surface of the soil creating a layer of organic material called thatch. A thin layer of thatch can be beneficial, particularly during the summer as it creates a barrier that holds in moisture. However, if it’s more than a half inch thick, it can keep moisture, fertilizer, and air from reaching the soil. If that thick layer of thatch gets wet, it can promote the growth of molds and become a home to pests. If it’s left on the ground for too long, the grass roots will grow into the thatch, leading to a shallow root system that won’t be able to weather droughts and freezes.

What Causes Thatch Buildup?

There are four main reasons thatch can gather in thick layers on your lawn:

– Overfertilizing, particularly if it adds excess nitrogen
– Consistently mowing too high
– Oversaturated soil caused by heavy rains or overwatering
– Compacted or heavy clay soil that makes it difficult for decomposing plant matter to be absorbed

Stem-heavy grasses including warm season varieties like St. Augustine, Bermuda and Zoysia and cool season grasses like bentgrass and Kentucky bluegrass varieties with form thatch faster than other grasses. Mulched grass clippings decompose quickly and won’t lead to thatch buildup; in most cases, it will reduce thatch by making the root system and soil surface healthier so that harder materials can be digested more quickly.

What’s the Difference Between Aerating and Dethatching?

These terms are sometimes used interchangeably, but they’re completely different processes. Dethatching lifts thatch away from the surface of the soil while aerating punches holes in the soil to relieve compaction. Aerating will remove thatch with the soil plug, but it’s not a replacement for dethatching.

Preparing the Lawn for Dethatching

Before dethatching, mow the grass to half of its normal height to let the blades of the dethatcher reach through the thatch more easily. The lawn should be dethatched when the soil is slightly moist to help with blade penetration, either after a light rain or with some watering.

Flag hidden obstacles like irrigation heads to keep from running over them with the power rake. If you have a PR550 power rake, it can be fitted with a spring tine reel that will lift thatch without damaging objects you may run over.

Have a plan for removing the thatch once it has been lifted from the soil: depending on the size of the lawn and the thickness of the thatch, there could be several truckloads of material that will need to be dealt with. It can be decomposed into mulch or compost on site or at a green waste treatment facility.

Dethatching warm weather grasses works best in the spring, while cold weather grasses should be dethatched in the fall.

Dethatching

The blades of your dethatcher need to be set to the right width for your grass: one to two inches of space between the blades is ideal for warm weather grasses, while three inches work best with less dense cold season grasses. Blade depth should be set so that the thatch is pulled up while digging no more than ½ inch into the soil.

For the best results, make two passes across the lawn, running the second pass at a 90-degree angle from the first. This criss-cross pattern will lift as much thatch as possible while limiting root damage.

Once the thatch has been lifted, it can be gathered for disposal with the same methods used for removing fall leaves, whether that means pulling it onto a tarp with a leaf rake or using a lawn vacuum.

After Dethatching

All that pulling and movement from the blades will make the turf look awful at first, but after two or three weeks of recovery, it will grow back to create a much thicker lawn. In the meantime, there are some things you can do to help it bounce back:

– Overseed over any bare patches.

– Apply fertilizer. If it’s almost time for seasonal fertilizing, wait until after dethatching to fertilize.

– A dethatched lawn isn’t just good for grass, it’s also good for weeds. If you dethatched in the spring, apply a pre-emergent herbicide to halt the spread of crabgrass.

Get Parts for Your Billy Goat Dethatcher

www.billygoatparts.com is a certified dealer for Billy Goat and the engines that power their equipment so we can ship any parts or accessory you need for your dethatcher to any address in the U.S. and Canada. Not sure exactly what you need? Our site has built in factory parts diagrams and descriptions to help you identify the right replacement.

Posted in Uncategorized | Tagged , , , | Leave a comment

Which Engine Should I Get with My Billy Goat?

675 SeriesNo matter what kind of Billy Goat equipment you’re looking at buying, there’s a good chance you’ll be able to get the model you want with some choice in engines. Which one should you get? Here’s what you can expect from each manufacturer and how their different advantages can best fit your individual use case.

Briggs & Stratton

B&S makes a lot of engines, letting manufacturers pick exactly the right design for their equipment. For Billy Goat, that means using a range of motors from their consumer and professional lines to get the best balance between power and weight. Consumer engines like the 675 Series put ease of use first, which means easy starts with low starter handle resistance and the elimination of priming bulbs and manual chokes.

For maximum power on their equipment, Billy Goat uses Briggs & Stratton’s Vanguard series of commercial V-twin engines. Their compact design allows them to fit in spaces designed for single cylinder engines while keeping weight down to a manageable level. A high-performance dust management system including a dual element filter and fine mesh flywheel cover make these a great choice for blowers and other dirty applications. These motors have an automatic compression release so they’re easy to turn over when starting. E-Smart models come with electric start and a pull start backup if the battery fails.

Most of these engines are warrantied for three years for residential use and two years of commercial use. Vanguard engines come with a three-year warranty for both residential and commercial owners.

Honda

Look at almost any piece of mid-size commercial grade power equipment and you’ll find one of Honda’s horizontal shaft GX or vertical shaft GXV engines, and for good reason: the design has proven to be one of the most reliable on the market. This starts with a digitally-controlled ignition system and a dual stage air filter ensure clean, effective fuel combustion for low emissions and a cleaner combustion chamber. This is backed with a ball bearing-supported forged steel crankshaft and cast iron cylinder sleeve can withstand years of heavy use. Larger displacement motors come with a balancer shaft to reduce vibration, while the Oil Alert system keeps the motor from running if there isn’t enough oil to protect internal components. Automatic compression release and optional electric start make them easy to get running.

The CR550HC power rake uses a Honda GC Series engine. Like Briggs & Stratton, Honda designs their residential grade motors for ease of use. Its overhead cam design, aluminum block, resin camshaft and internal timing belt make this motor exceptionally quiet and lightweight.

Subaru

Look inside one of Subaru’s EX series engines and you’ll find a lot of similarities to the engines used in modern cars. It has an overhead cam design, which allows cooling fins to surround the valve stems for better head temperature control. This design allows the use of an efficient pentroof head, while a steel timing chain and cast iron cylinder sleeve ensure long term reliability. This design also reduces vibration up to 35% compared to competitors’ models for increased operator comfort. The end result is a motor that bridges the gap between commercial reliability and consumer ease of use.

The key advantage of these engines is the warranty: Subaru Industrial Power Products guarantees these motors for 5 years, longer than any small engine manufacturer.

No Matter What You Choose, You Can Get Parts from BillyGoatParts.com

www.billygoatparts.com isn’t just a certified Billy Goat dealer, we’re also a dealer for every engine brand used in Billy Goat equipment, making us your one-stop shop for everything on your equipment. Our site has integrated factory parts diagrams to make it easy to find what you’re looking for, and we can ship those parts to any address in the U.S. and Canada.

Posted in Uncategorized | Tagged , , | Leave a comment

Cleaning Your Billy Goat Equipment

images (23)

Mechanical maintenance may get the most attention, but if you want to get the most from your Billy Goat equipment, you also need to keep it clean. Dirt buildup can hide damage, reduce performance and lead to overheating. These tips will help you safely clean the engine, body, and tools that make up these machines.

Engine

Most engines should be cleaned after 25 hours of operation, while motors exposed to high levels of dust such as those on debris vacuums will need to be cleaned more frequently.

Before you start cleaning, the engine needs to be cold: the head and exhaust may retain heat for up to a half hour after the engine has been shut off. The spark plug wires should be disconnected to prevent accidental starts, and the engine shroud needs to be removed for full access to the motor.

Wipe off any debris that has gathered on the cooling fins and flywheel screen using a thin bristled brush. Engine and parts brushes work best: they’re strong enough to lift dirt, and since these surfaces are bare metal, there’s no danger of leaving scratches.

If there is still material left on the surface, use a non-flammable solvent to loosen it; water should never be used as it can seep into the engine and contaminate the oil while using compressed air can force debris into inaccessible areas on the motor.

Check around exposed moving parts including the throttle cable and governor, making sure they move freely. These can be cleaned using the same brush and solvent method.

If there is grease or oil buildup on the outside of the motor, use a paint-safe degreaser to remove it. Household degreasers, cleaning formulations designed for removing stickers and light penetrating oils like WD-40 work well for this. After wiping off the treated area, use a damp towel to remove any remaining residue.

Body

The deck and handle can be cleaned the same way you would wash a car. If you’re using a pressure washer, never aim the nozzle directly at anything filled with grease including wheel bearings and joints. As with the motor, the water contamination can cause premature failure.

Tips for Specific Equipment

If you spray water into the intake of a wheeled blower, make sure the impeller and housing have had time to dry completely before use. If the impeller blades hit water that has pooled in the base of the housing, the impact could damage the blade surface.

Weeds and other materials that have wrapped themselves around brushcutter spindles and impeller shafts should be cut away to prevent binding. Thick buildup inside brushcutter decks can be scraped off using a putty knife.

Aerator tines are self-cleaning: if there’s dirt or mud on them, this will be pushed out once they cut through soil again. If the tines want to clog, the cutting surface may be dull and due for replacement. Leftover dirt should be washed off before putting the machine in storage for the season.

Pressure washers have filters on the detergent hose and water inlet that need to be cleaned before each use. Usually, a simple rinse will be enough to remove debris, while stubborn buildup can be safely removed using a toothbrush. To clear clogged nozzles, use a small pin to push through the hole from the outlet side, being careful not to widen the hole. Always draw clean water through the detergent hose to flush chemicals from the soap system after use.

Keep Your Billy Goat Working

Find something broken while you were cleaning? Need parts to maintain your Billy Goat? You can get everything you need at www.billygoatparts.com. We’re a certified dealer for Billy Goat as well as Briggs & Stratton, Kohler, Honda Engines and Subaru Industrial Power Products, so we stock parts to replace everything on your equipment. Our site makes it easy to find parts by integrating factory parts diagrams and descriptions into our search system, and we can ship your order to any address in the U.S. and Canada.

Posted in Uncategorized | Tagged , , | Leave a comment

Washing Vehicles and Equipment with Your Pressure Washer

pressure washer billy goatNo matter what you originally bought your Billy Goat pressure washer to clean, at some point you’ll want to use it to clean vehicles and equipment. With the right technique, you can remove dirt and grime quickly and with less potential damage than hand washing.

Can a Pressure Washer Damage Paint?

While there are pressure washers out there designed specifically for vehicle detailing, Billy Goat’s models are designed for general washing duties, providing a wide range of options when cleaning. That means it can produce water pressures that can do paint damage, but only if the washer is used incorrectly. While a portable pressure washer makes cleaning equipment easier, it can also get superior results to a hand wash: since no fabric touches the paint, there’s no chance of picking up grit that can scratch the surface.

Even with the right techniques, there is a chance of doing damage if some issues aren’t addressed beforehand:

– If the paint has been weakened by damage or is bubbling up from rust, the pressure washer might remove it.
– If a trim piece is loose, the force from the water jet may be enough to pull it off.
– If a door or window seal is in bad shape, the water could come through and soak the interior.

Do a thorough inspection before you start cleaning to avoid any issues.

What Not to Do with Your Pressure Washer

Always flush the soap system with water before switching chemicals. Never let alkaline and acid cleaners come in contact with bleach. These chemicals will react with each other creating high pressures that can rupture pressure washer components, and the resulting gases from the reactions are poisonous.

If it contains grease or oil, assume it’s not watertight. Spraying at seals and seams in engines, transmissions, axles, and spindles can force water inside, reducing the effectiveness of lubrication and causing premature failure of equipment.

If dirt won’t come off using the methods outlined below, try changing your cleaning chemicals instead of increasing the force of the water jet. Using a narrower nozzle or moving closer to the surface could flake away paint.

Rinsing

When rinsing a vehicle or equipment, use the green 25-degree tip. As you spray, keep the tip two to four feet from the surface of the equipment and at a 45-degree angle. This ensures a safe surface pressure, a wide cleaning area and water movement that will help push dirt off of the surface. Move the nozzle constantly to ensure the water doesn’t have time to penetrate any seals.

Starting a cleaning job with rinsing will knock off loose dirt that can get in the way of detergents. Chemicals should be rinsed off after their specified dwell time: most soaps can be removed immediately after application, while others need to sit for a few minutes to act on dirt and grime.

Soaps and Detergents

Attaching the pink nozzle to the end of the wand will let the pump draw from the detergent hose and mix it in with the water. Soap is drawn after the pump, so there’s no worry about damaging seals with cleaning chemicals. Since it’s using the chemicals to clean instead of water pressure, it also has the widest, gentlest spray pattern. Use the same distance and angle as you did when rinsing, making sure to get an even coat across the surface.

For the best results, use detergents and soaps made specifically for pressure washers, since they’re made in concentrations that will mix correctly with the water. While there are a lot of options out there, they come in three main formulas:

Car wash detergent removes dirt while leaving the underlying protective surface intact.

Heavy duty degreaser will remove grease, tar, pollen and other hard-to-remove surface contaminants. These will also strip away wax. This is a great option for equipment and heavily soiled cars and trucks.

Pre-rinse loosens surface dirt to be rinsed off before using regular detergent. This is less harsh than a degreaser, although it does add a couple steps to the washing process. Pre-rinse agents usually need to dwell for a few minutes before being rinsed off.

A Maintained Pressure Washer is an Effective Pressure Washer

Whether you lost a tip, need parts for a tuneup or have to do some major repairs on your Billy Goat pressure washer, you can get everything you need at www.billygoatparts.com. We’re a certified dealer for Billy Goat and the manufacturers who make the pumps and engines used in them including AR and Honda. We can ship those parts anywhere in the U.S. and Canada.

Posted in Uncategorized | Tagged , | Leave a comment

Brushcutting Tips

brush cutting tips

Sometimes, growth can be too thick for a mower to handle, but it’s also not widespread enough to need cutting with a tractor-operated brush hog. Billy Goat’s walk-behind brushcutters are designed to fill in the gap between this equipment, providing serious cutting power in a walk-behind package. These tips will help you get the most out of these machines so you can clear land with ease.

How does a Brushcutter Differ from a Mower?

At first glance, a walk-behind brushcutter just looks like a beefed-up walk behind mower. In some cases, that may be true: some manufacturers just take a basic mower design and add a thicker blade and a tougher drive system. However, with a Billy Goat brushcutter, you get a deck that is essentially a miniaturized brush hog. This changes the overall design of the mower and how it should be used.

The blade is shaped like a mower blade, but it’s much thicker to cut through thick weeds and small trees. The surrounding deck is built to deflect debris so it won’t mulch or vacuum grass straight to be cut by the blade. This leaves a rougher cut than a finish mower. Cut materials exit out of the back of the deck, so mowing direction is less important; this lets you mow over inclines based on which approach will keep the machine stable.

The blade isn’t driven directly by the motor. To get a better weight balance, the engine is placed directly over the axle. The motor shaft extends into the axle and has a clutch to engage the drive pulley. When engaged, a belt transfers power to the deck. If you hit something with a blade, the impact is taken up by the belt and bearings instead of bending the motor shaft, much like the drive system on a snowblower. This also allows Billy Goat to use a floating deck design on some models so the blade can closely follow uneven terrain.

Brushcutting takes place on all kinds of terrain, so the drive system is built to cope with extreme conditions. This includes a low center of gravity and wide platform to handle steel slopes, multiple drive gears, and even hydrostatic drives to get the right travel speed, and, in some models, an electronic locking differential to prevent wheel slip.

All that power makes brushcutters heavy with Billy Goat’s latest models weighing in at around 350 lbs. To make steering more manageable, the handles use a plow design for more leverage.

Before Mowing

Before you cut, walk through the area and remove any obstacles including rocks, tools, branches and loose fence wire. You probably won’t get everything, but a little preparation can make a big difference both for the protection of the brushcutter and for your own safety.

While you’re less likely to be hit by debris using a walk-behind brushcutter than a hand-held unit, it’s still a good idea to wear clothing and eye protection. Non-slip shoes are also important since wet, freshly cut stems can be extremely slippery, especially on inclines.

Deck Height

Brushcutters are intended for mowing of rough ground cover, leaving finish mowing to a traditional mower as needed. If you’re mowing in an area you’ve never cut before, start with a pass at a high deck height so you can avoid most hidden obstacles. Inspect the ground again and remove these obstacles before making a closer pass.

Blade Care

Like a regular mower blade, the blade on your brushcutter needs to be kept sharp for maximum cutting performance. While you might not care if the tips of grass get ripped by a dull blade, it takes more energy to tear grass than to cut it, hampering the mower’s performance.

Striking rocks is almost inevitable, and these impacts can take chunks out of the blade surface. While it’s possible to sharpen the blade while still mounted on the deck, it’s better to remove the blade so it can be balanced before being put back into use. Never use a blade that is cracked, bent or out of balance. It’s a good idea to have a spare blade on hand in case a major impact damages your current blade.

A Fully Functioning Brushcutter is a Safe, Effective Brushcutter

When you need parts for your Billy Goat brushcutter, visit www.billygoatparts.com. We’re a certified dealer for Billy Goat as well as Briggs & Stratton and Honda Small Engines so we can provide you with all the parts you need to keep your equipment in top condition. Our site makes finding the right part easy by integrating factory parts diagrams and descriptions, and we can ship your order anywhere in the U.S. and Canada.

Posted in Uncategorized | Tagged , , | Leave a comment