Setting Up and Maintaining the PL2501 Hydro-Drive Aerator

PL2501 Hydro-Drive Aerator
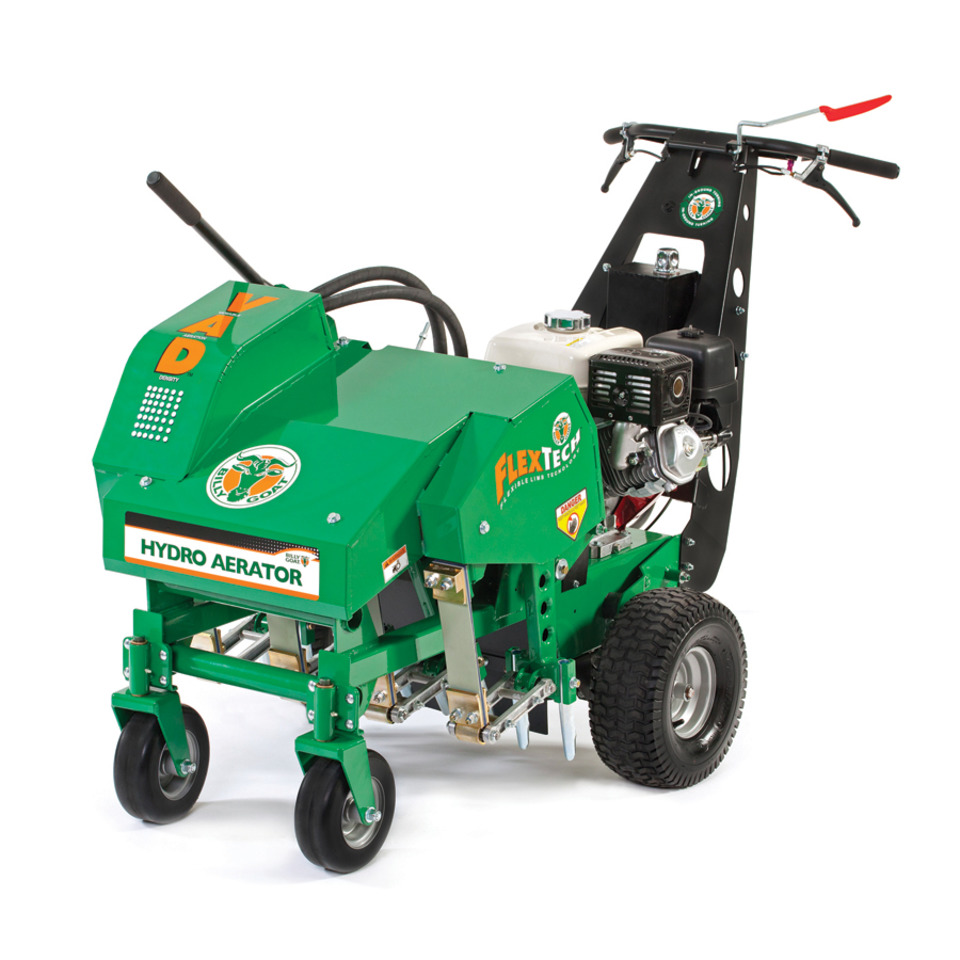
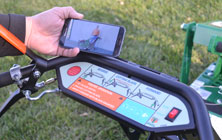
The PL2501 PLUGR may be Billy Goat’s most advanced aerator, but like everything else from the company, it’s designed to be easy to work on. Here’s everything you need to know to set up your machine and keep it running.

Set Up

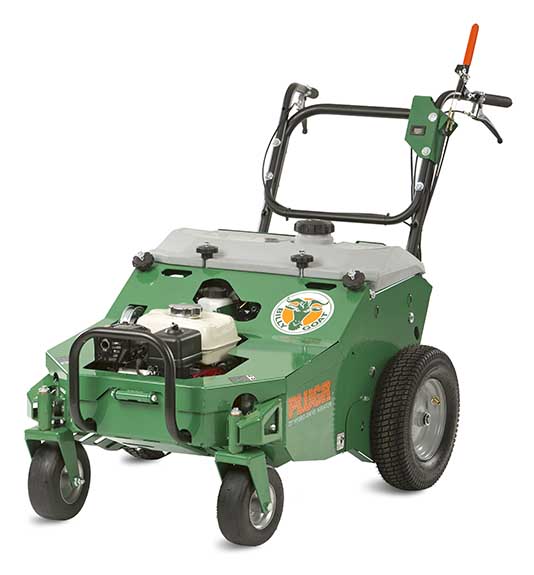
The PL2501 comes fully assembled. Before using your aerator, be sure to add oil to the engine.

Tine Replacement

1. Loosen the jam nut and unscrew the tine.
2. Replace the tine, threading it in as much as possible.
3. Tighten the jam nut, torqueing it to 100 ft-lbs.

Drive Belt Tension

If the belt slips during use, twist the cable adjuster next to the controls to take up slack on the clutch cable. Overtightening will increase belt wear.

Drive Belt Replacement

1. Slide the tine drive belt off of the engine pulley. Push the loose end toward the engine to keep it out of the way.
2. Insert a 3/8 inch socket extension into the square hole in the idler arm. Use a ratchet or breaker bar to turn the arm counter-clockwise. Once the tension is off of the belt, slide it off of the idler pulley.
3. Disconnect the idler spring from the eye bolt and tilt the idler arm toward the engine.
4. Remove the belt, taking note of how it’s routed.
5. Install the new belt. The angled side of the belt should seat into each pulley.
6. Put the end of the idler spring back through the eye bolt.
7. Turn the idler arm clockwise to reset the tension.
8. Slide the tine drive belt onto the engine pulley.

Tine Plate and Swing Arm Busing Replacement

Use an impact wrench to remove and tighten the bolts.

1. Remove the bolt connecting the lift link and swing arm support bar.
2. Unscrew the four bolts on the ends of the bar. Remove the swing arm support bar.
3. Unscrew the four bolts that hold on the tine plate. Remove the plate.

At this point, ff you are replacing the plate, you can fit the new tine plate and put the aerator back together following the previous instructions in reverse order. Continue if you’re replacing the swing arm bushing:

4. The swing arms are located next to the wheels. Remove the bolts holding the swing arms onto the machine, then remove the arms.
5. Use a ½ inch pin or shoulder bolt to push the new bushings into the swing arms.

Reinstall in reverse order.

Chain Tension

Each rear wheel is driven by its own chain. Both chains should be adjusted at the same time. If possible, lift up the rear of the machine for easier access.

1. Use an impact wrench to remove the three bolts holding the shield in place. One bolt is on the side of the aerator just in front of the wheel, one is on the underside in front of the wheel, and one is on the back corner of the machine. Slide the shield down and toward the center of the aerator to remove it.
2. Use a pair of ¾ inch wrenches on the idler slot bolt to adjust the tension. Loosen the bolt, then push it up to increase tension or down to decrease it. Tighten the bolt.
3. Reinstall the cover.

Repeat the process for the other chain.

Purging Air from the Transmission

If the aerator isn’t moving as fast as it should, there may be air in the hydraulic system. Here’s how to remove it:

1. Lift the rear of the aerator off the ground and support it with jack stands.
2. Remove the cap on the expansion tank. Add 10W30 or 20W50 oil to the “Full Cold” line.
3. Move the bypass lever next to the tank to “Free Wheel” and start the engine.
4. Engage the forward level for 5 seconds and release, then do the same with the reverse lever. Repeat four or five times.
5. Set the bypass lever to “Drive Enabled.” Add oil to the transmission tank if needed, then repeat the previous step.
6. Repeat this entire process until there are no bubbles in the oil tank, and the wheels move full speed in forward and reverse when the levers are engaged. Set the bypass lever to “Drive Enabled.”

Cable Adjustment

The clutch cable and auto-engage cable are located on the left handle. The cable closest to the handle is the auto-engage cable. Adjust the clutch cable if the clutch doesn’t want to engage or won’t disengage. Adjust the auto-engage cable if the tines don’t drop easily.

To adjust either cable, loosen the two lock nuts, then slide the cable up or down to adjust tension. Tighten the nuts.

Need Something for Your PLUGR?

Billygoatparts.com is a certified dealer for Billy Goat and their manufacturing partners, so we carry everything you need for your PL2501 aerator. Our site can show you factory diagrams and parts descriptions, making it easy to find exactly what you need, and we can ship your order to any address in the U.S. or Canada.

Posted in Uncategorized | Tagged , , | Leave a comment

Setting Up and Maintaining the AE1300H Aerator

AE1300H AeratorThe AE1300H PLUGR’s hydrostatic drive may make it seem complex, but this aerator is easy to care for. Here’s what you need to get your new aerator up and running as well as maintaining the tines and drive system.

Assembly

The AE1300H come fully assembled from the factory, but there are a couple of things that need to be done before it will be ready to use:

– Add oil to the engine.
– Connect the spark plug wire.
– Turn on the ignition switch on the engine. The aerator has a separate start/stop switch on the controls that should be used from now on.

Maintenance

Daily: Check the oil level, inspect the machine for loose or damaged parts and clean off any debris. Keeping the tines clean will help them last longer.
Every 10 hours: Change the engine oil and lubricate the aerator’s cables and linkages.
Every 25 hours: Check hydraulic oil level and front casters.
Every 50 hours: Check tire pressure and belt wear.

Hydraulic System

Let the aerator cool down before servicing this system and disconnect the spark plug wire to prevent accidental starts. Hydraulic fluid can spray out at high pressure, injecting itself into your body and causing serious injury. When testing for leaks, place a piece of paper in the path of the spray instead of using your hand.

To check the fluid level, remove the breather cap from the oil tank. The oil should come up to the bottom of the strainer in the filler neck. Billy Goat recommends using 20W50 motor oil for most operating temperatures. 15W40 or 10W40 synthetic can be used in colder climates.

To change the filter, first clamp down the hose between the tank and filter to keep it from flinging out and spilling hydraulic oil. Unscrew the filter. Apply a thin layer of fresh oil to the gasket on the new filter and attach it to the hose. Once the filter seats, turn it another 2/3 turn to get a tight seal.

Tine Replacement

Billy Goat recommends replacing tines in pairs on the tine arm to keep wear and cutting force even.

1. Remove the 3/8 inch bolt that passes through the tine assembly. Slide the tines out of the tine arm.
2. Inspect the bolt for wear, bending and other damage. Replace the bolt with a Grade 8 fastener if any damage is found.
3. Place a washer on the tine holder. Slide the tine onto the bolt. Slide the bolt onto the tine arm with the open ends facing the rear of the machine. Slide a second tine onto the bolt facing the same direction, followed by a tine holder, washer and nylock nut. Tighten the nut and bolt.

Belt Tension and Replacement

The belt can be accessed by removing the belt cover on the side of the machine. It’s held on by four screws.

When the drive bail is closed, the length of the coiled part of the clutch cable spring should be 1 ¾ inches. Here’s how to adjust the cable:

1. Disconnect the spark plug to prevent an accidental start.
2. Loosen the jam nuts holding the cable onto the handle. Move the clutch cable, retighten the nuts and test the bail.
3. Once the clutch spring stretches the right distance, test the cable by reconnecting the spark plug and running the machine. The hydraulic pump and transaxle should fully disengage with the bail open and engage with no sign of belt slippage when the bail is engaged.

If the belt is cracked, the edges are worn or it has stretched too far to get the right tension, it should be replaced. Simply slide the old belt off of the pulleys and slide the new belt into its place.

Chain Tension and Lubrication

To access the chains, remove the hood. It’s held on by 7 bolts, washers and lock washers around its perimeter. The chains should be lubricated with SAE 30 non-detergent motor oil or chain lubricant. The chains should be lubricated immediately if the aerator was cleaned with a pressure washer.

The AE1300 has two drive chains, one on each side of the tine reel. When properly tensioned, these chains should have 3/8 to ½ inch of slack. Do the following to adjust the tension:

1. Locate the bolt and nut that holds each idler sprocket in place on the inner sides of the machine.
2. Loosen the bolt. Move the sprocket up to increase tension and down to decrease tension.
3. Once the tension is correct, reinstall the hood.

Get Everything You Need for Your Billy Goat

Billygoatparts.com is an authorized dealer for Billy Goat and their manufacturing partners including Honda Engines. This lets us ship anything you need for your aerator straight to your door whether you live in the U.S. or Canada. Need help finding the right part? Our search engine can show you factory diagrams and descriptions specific to your model, taking the guesswork out of ordering.

Posted in Uncategorized | Tagged , | Leave a comment

Setting Up and Maintaining the AE400 Aerator

ae400Billy Goat’s AE400 is tough enough for professional use, but even the best machine will break down after hours of punching through the soil, hitting the occasional rock or pavement edge. Here’s how you can get your new AE400 ready to use and keep it cutting through the toughest soil.

Assembly

1. Assemble the handle. On Honda-powered aerators, tilt the upper handle into position and slide the lock loops into place. On Briggs & Stratton models, remove the bolts and nuts attached to the upper handle joint. Tilt the upper handle into place and install the nuts and bolts in the upper handle and hinge joint. Leave the bolts loose enough that the handle can be folded for storage.
2. Slide the ends of the lift rods into the lift handle, then push lynchpins into the rod ends.
3. Fill the water tank.
4. Move the tine engagement lever down so the aerator sits level. Check the engine oil and gear reduction oil levels.
5. Connect the spark plug wire. Set the engine stop switch to “ON.” From now on, you’ll use the stop switch on the handle to shut off the engine.

Tine Row Removal

1. Remove the four nuts holding the top guard on the frame. Set the guard aside.
3. Release the tension on the chain by loosening the nut and bolt on the tensioner sprocket and pushing the sprocket forward.
4. Remove the pairs of bolts and nuts on the ends of the tine reel bearings.
5. Lift the reel and slide the chain off of the end sprocket.

To reinstall, follow the previous steps in reverse.

Tine Row Replacement

1. Remove the tine reel (see above.)
2. Remove the nut at the end of the reel shaft.
3. Remove the tine rows and spacers to reach the parts you want to replace, keeping everything in order for reassembly.
4. Swap out the damaged parts for new ones.
5. Reassemble the tine reel, keeping the parts in the same order they were removed.
5. Tighten the nut at the end of the reel shaft to 100 ft. lbs. Try moving the tine rows by hand. There should be no movement if the reel was reassembled correctly.
6. Reinstall the tine reel and set the chain tension.

Billy Goat recommends coating the tines with a rust-preventing lubricant. This increases tine life and makes the tines easier to replace.

Single Tine Replacement

If you need to replace a few tines, they can be removed without taking out the tine reel.

1. Loosen the outer nut and carriage bolt that secure the tine, followed by the inner nut and carriage bolt. Remove the inner nut and bolt, but leave the outer parts in their place
2. Using a small pry bar, push the tine plates apart. The tine should slide out.
3. Slide the new tine in place and secure with the inner nut and carriage bolt.
4. Tighten the nuts and bolts.

Belt Tension

1. Remove the four nuts holding the top guard on the frame. Set the guard aside.
2. Find where the clutch cable attaches to the belt idler assembly. When the clutch bail is engaged, the spring connected to the idler pulley should move ¼-3/8 of an inch.
3. Use a 1/2″ wrench loosen the two nuts that secure the clutch cable.
4. To increase belt tension, turn these two nuts until an added ¼ inch of adjuster thread is sticking out of the assembly. To decrease tension, turn the nuts until there’s a ¼ inch less adjuster thread sticking out of the assembly.
5. Reassemble the aerator and perform a test run. If the tension is correct, the belt will pull the aerator up a 15-degree slope without slipping, but will still stop the aerator when the clutch bail is released.

Chain Tension

1. Remove the four nuts holding the top guard on the frame. Set the guard aside.
2. Locate the bolt and nut that hold each idler sprocket to the frame of the unit. One sprocket sets
tension on the wheel drive chain and the other sets tension on the tine drive chain.
3. Loosen the bolt and nut. Sliding the sprocket toward the rear of the machine increases tension while sliding it toward the front decreases tension. Each chain should have 1/4-3/8 inches of slack.
4. Tighten the bolt and nut.
5. Reinstall the cover.

Lubrication

Use a grease gun to apply lithium grease to the bearings. Apply SAE 30 machine oil or penetrating chain oil on the chains.

Get Everything You Need for Your Equipment from One Source

As an authorized Billy Goat, Briggs & Stratton and Honda Engines dealer, www.billygoatparts.com is able to offer all the parts you need for your aerator under one roof. Our site makes it easy to find parts by showing you listings and factory diagrams specific to your model. We ship across the United States and Canada.

Posted in Uncategorized | Tagged , , | Leave a comment

Debris Loader Set-Up and Maintenance: DL39 and DL37

New Billy Goat DL3700V Debris LoaderWith a 12:1 reduction ratio, up to 5,000 CFM, giant clog-resistant hoses, and the most powerful engines in the industry, Billy Goat’s DL29 and DL37 are the perfect debris loaders for contractors and municipal departments who deal with leaf cleanup on a massive scale. However, the size of these machines shouldn’t be intimidating: they’re just as easy to set up and maintain as anything made by Billy Goat. Here’s how.

Mounting the DL29 and DL37

The base of the loader has 6 holes designed for 3/8 inch bolts. Two of these are located at the front of the loader near the engine airbox, while the other four are on the sides of the base. The bolts need to be paired with washer and locking nuts. These parts are not included with the loader. When mounting the loader on the optional trailer, the front of the loader should face the trailer tongue.

Setting Up the Debris Loader

The loader needs to be secured to a truck bed or trailer before assembly.

1. Slide the hose boom through the rings on top of the impeller housing.
2. Attach the hose to the housing intake using the T-bolt hose clamp, making sure to clamp the safety switch against the intake.
3. Attach the handle to the nozzle intake, using the short screws, eye bolts, small washers, and small lock nuts.
4. Attach the nozzle to hose using the standard hose clamp. Before tightening the clamp, stretch out the hose and position the handle so it’s facing upward. This prevents twisting during use.
6. Wrap the hose band around the hose, Connect the chain to the band’s flanges using the
cap screws and large lock nuts. Connect the chain to the boom. Check the chain position: with the hose and boom extending straight out from the loader, the band should be level with the intake. Unlike other Billy Goat loaders, the chain may need to be at a slight angle to get this hose position.
7. Apply grease to the end of the exhaust elbow and the two flanges. Attach the exhaust elbow by stacking the thin flange, elbow and thick flange on top of the exhaust housing. Line up the holes in the housing and flanges, and make sure the teeth on the elbow mesh with the crank. Place the 6 carriage bolts in the holes from the top of the thick flange and tighten them down using the large lock nuts.
8. Install a U1 series 12-volt lawn and garden battery. This battery should be rated at least 240 cold cranking amps and have at least a 40 amp hour rating. Use the included battery bracket, hold down rods, washers and remaining medium-sized lock nuts.

Impeller Removal

The impeller bolt is only designed for one use. Have a new bolt, washer and lock washer on hand when reinstalling the impeller.

1. Disconnect the negative battery terminal and the spark plugs.
2. Disconnect the hose from the intake and the boom. Set it aside.
3. Using a 9/16 inch socket, remove the bolts holding the intake plate onto the housing. The wiring for the safety switch can be left connected: just be careful not to pull on the wires when moving the plate out of the way.
4. Use an impact wrench to remove the impeller bolt.
5. Slide the impeller out of the housing.

To reinstall, follow the previous steps in reverse order. Be sure to torque the impeller bolt to 175-180 ft-lbs.

Battery

The charging system on the engine is powerful enough to top up a healthy battery in about 45 minutes. Once leaf season ends, charge the battery every couple of months. Billy Goat recommends using a one or two amp trickle charger, as these are less likely to overcharge the battery than a high amperage car charger. These chargers should only be connected for one to two days at a time.

Need Something for Your Debris Loader?

No matter what you need for your Billy Goat, you can get it from www.billygoatparts.com. We’re not just an authorized Billy Goat dealer, we’re also a certified dealer for Billy Goat’s manufacturing partners including Briggs & Stratton Vanguard. Our site can show you factory information for your model including exploded parts diagrams, making it easy to find what you need, and we can ship your order to any address in the US or Canada.

Posted in Uncategorized | Tagged , , | Leave a comment

Debris Loader Set-Up and Maintenance: DL25 and DL35

DL2500_534x575Most people think peak landscaping business is in the spring and summer, but you can be just as busy in the fall picking up leaves to protect lawns from sun and drainage problems. Billy Goat’s DL25 and DL35 are two of the biggest debris loaders on the market, letting you cut job times to keep your customers happy. Here’s what you need to know to get these machines running and keep them running.

Mounting the Loader

The debris loader should be permanently mounted before assembly or operation. These loaders are designed to be mounted using four 3/8 inch diameter bolts, along with a matching set of washers and lock nuts. The mounting holes are located on the sides of the base next to the access holes in the side plates.

Debris Loader Assembly

1. Attach the hose to the impeller housing intake using the quick release hose clamp. Make sure the clamp goes over the intake and the black safety switch.
2. Using the included screws, eye bolts, washers and lock nuts, attach the handle to the nozzle.
3. Stretch out the hose straight ahead of the intake. Attach the nozzle to hose using the other hose clamp, being sure to position the handle directly above the hose. This prevents twisting during use.
4. Slide the hose boom through the two rings on the top of the housing.
5. Slide the hose band over the hose. Use a cap screw and lock nut to attach the band to the chain. Connect the other end of the chain to the boom. Check the position of the chain and band: with the boom pointed straight back from the impeller intake and the hose stretched out, the chain should be straight up and down, and the band should hold the hose level with the intake.
6. Apply grease to both sides of the toothed plate at the end of the exhaust elbow, the top of the housing and the bottoms of the clamp plates.
7. Have someone on hand to help you maneuver the exhaust elbow into place. Place the small bottom plates, exhaust elbow and top plates on top of the housing. Line up the holes in the clamp plates and elbow, and position the elbow mesh so that its teeth with the worm gear.
8. Use 6 one-inch carriage bolts and 6 lock nuts to bolt the elbow to the impeller chamber.
9. Mount the battery using the included hold down rods, washers and lock nuts. Attach the red battery cable to the positive terminal, then the black cable to the negative terminal.

Maintenance Schedule

Before each use: Check the impeller liner, engine oil, and air filter. Clean the hose and remove any debris around the engine.
Every 5 hours of operation or daily: Inspect the machine for unusual vibration and loose or damaged parts.
Every 10 hours: Check the battery.
Every 25 hours: Check the battery terminals for corrosion.

Impeller Removal

The impeller needs to be inspected and possibly removed if you experience the following problems:
– The loader is vibrating.
– There is a major clog inside the housing.
– The wear plate is due for replacement.
– The engine is locked up.

Wait until the engine is cool. Always use a new bolt and lock washer when reinstalling the impeller.

1. Disconnect the spark plugs and the negative battery terminal.
2. Disconnect the intake hose from the impeller inlet and boom.
3. Using a 9/16 inch socket or wrench, remove the 12 bolts holding the intake plate. Once the plate is loose, move it to the side without putting strain on the safety switch wire.
4. Use an impact wrench to remove the impeller bolt.
5. Once lined up with the opening, the impeller should slide out. If it doesn’t, get a 3/4″-16 x 3″ bolt. Slowly screw it into the nut welded to the impeller. This will push the impeller off of the drive shaft.
6. Reinstall in reverse order. On the DL25, tighten the impeller bolt to 60 ft-lbs. On the DL35, tighten the bolt to 175-180 ft-lbs.

Battery

Billy Goat recommends using a U1-size battery with at least 240 cold cranking amps.

With regular use, the engine’s charging system provides enough power to keep the battery in good condition. During storage, the battery should be recharged every 4-6 weeks. The safest way to do this is with a trickle charger. A two amp charger can fully recharge a battery in one day, while a one amp charger will take two days. Once fully-charged, check the voltage output of the terminals with a multimeter. It should fall between 12-13 volts.

Get Everything You Need for Your Equipment from Your Browser

When you need anything for your debris loader, visit www.billygoatparts.com. We’re a certified dealer for Billy Goat and engine partners including Briggs & Stratton and Subaru Power, so we’re able to offer a full selection of OEM parts for your equipment. We can ship what you need to any address in the United States or Canada.

Posted in Uncategorized | Tagged , , , | Leave a comment

Debris Loader Set-Up and Maintenance: DL14 and DL18

Debris Loader Set-Up and Maintenance: DL14 and DL18

It may be fall, and if you’re a professional landscaper, it’s also leaf cleanup season. Here’s what you need to know to get a new Billy Goat DL14 or DL18 loader up and running as well as dealing with maintenance and repair issues that can slow down you down during this seasonal rush.

Attaching the Hose

The hose and boom will need to be attached during initial assembly. The hose should be disconnected when transporting the loader.

1. Slide the hose band over the hose.
2. Use a quick clamp to attach the hose over the impeller intake and the shut-off switch. When tightened, the switch will fit flush with the intake. The hose should be disconnected when transporting the loader.
3. Attach the handle to the nozzle using the included screws and 5/16 inch fender washers. Use the included hose clamp to attach the hose to the nozzle.
4. Slide the short end of the hose boom into the ring at the top of the housing and down into the cup next to the housing and impeller outlet.
5. Stretch the hose straight out from the impeller inlet. Rotate the boom, placing it directly above the hose. Line up the hose band so it’s directly below the end of the boom. Use the included ¼ by 2 ¾ inch cap screws, lock nuts and ¼ inch washers to attach the band to the boom chain. Attach the other end of the chain to the boom. The chain is the right length if the band is holding up the hose so that it’s parallel to the intake.

Installing the Exhaust Elbow

Have someone on hand to help you lift and position the exhaust elbow over the impeller outlet. Run the carriage bolts up from the bottom of the holes in the outlet, then install the 2 ¼ inch washers and knobs on the bolts.

Maintenance Schedule

Before each use: Check the engine oil, air filter and wear liner. Clean the hose and remove any debris around the engine.
Every 5 hours of use or daily: Inspect the loader for damage, excessive vibration, and loose parts.
Every 25 hours: Check the battery terminals for corrosion (electric start models only.)

Information on engine maintenance can be found in the engine owner’s manual included with your machine. Keep in mind that loaders are exposed to high levels of airborne dust so the air filter will need to be cleaned frequently. Wear and tear on other parts will vary depending on your working conditions, so they don’t have a set replacement schedule.

Battery (Electric Start Models)

Due to the proximity of the battery to the exhaust system, using the wrong size battery could lead to overheating and premature failure. Billy Goat recommends using an EXT12 size battery on the DL14 and an EXT 16 size battery on the DL18. Hold downs for the battery are included in the hardware bag.

Operating the loader for 45 minutes is enough to recharge a battery in good condition. If the loader isn’t being used, recharge the battery every 4-6 weeks.

If the battery loses its charge, it can usually be revived with a trickle charger. This charger should have an output of 12 volts and up to two amps. Using a two amp charger should recharge the battery in about 24 hours, while a one amp charger will take 48 hours. After charging, the battery output should be between 12 and 13.2 volts.

Impeller Removal

The impeller may need to be removed to fix major clogs or to replace the wear liner. When reinstalling the impeller, use a new impeller bolt, washer and lock washer. These parts deform when torqued down and can’t be reused.

1. Let the engine cool down and disconnect the spark plug.
2. Disconnect the hose from the impeller intake.
3. Remove the 6 lock nuts holding the intake housing onto the impeller housing. Set the housing aside, being careful not to stretch the wire for the safety switch.
4. Use an impact wrench with a 5/8 inch socket to unscrew the impeller bolt. Slide off the bolt, washer and lock washer.
5. Pull the impeller off of the shaft. If it won’t budge, apply penetrating oil and use a pry bar on the impeller hub to free it up. Using a pry bar on the impeller plates can bend them.

Reinstall in reverse order using the new parts. Torque the impeller bolt to 33-38 ft-lbs.

Get the Parts You Need for Your Billy Goat Equipment

Do you need new fasteners or a wear liner for your loader? Do you want to add an extension to the discharge chute? Billygoatparts.com can ship the OEM parts and accessories you need to any address in the United States or Canada. Our site makes finding the right part easy by breaking down entries into models and serial numbers complete with factory parts diagrams and descriptions.

Posted in Uncategorized | Tagged , , , | Leave a comment

Setting Up and Using the DL 13 Debris Loader

dl1301_534x575

Did you just pick up a Billy Goat DL 13 debris loader? Do you feel like you aren’t getting the best use out of your machine? This guide will help you get your new loader ready to use out of the box and avoid problems with clogging and performance.

Mounting the Loader

This loader must be mounted before assembly to keep it stable. The DL 13 has 6 holes in its skid mount designed to be used with 3/8 inch diameter bolts with washers and lock nuts. These holes are on the left and right sides of the mount. The loader can be bolted down directly to a trailer or truck bed, or it can be used with Billy Goat’s kits to attach the loader on a hitch receiver or tailgate.

Setting Up the DL 13

All hardware needed to install the boom, exhaust elbow and hose can be found packed in a bag with the owner’s manual.

1. Attach the hose to the housing intake using a quick clamp. The hose and clamp need to go around the intake and the shut-off switch.

2. Use screws and fender washers to attach the handle to the nozzle. Attach the nozzle to the hose using a hose clamp.

3. Attach the hose boom by sliding it through the ring on the top of the housing. The end of the boom should rest in the cup below this ring.

4. Slide the hose band around the hose, then use cap screws, washers and lock nuts to attach the chain to the band. Connect the other end of the chain to the boom.

5. Attach the exhaust elbow. This part is heavy, so it helps to have a second person on hand to hold the elbow while you install the bolts. Place the elbow on top of the housing chute. Slide the carriage bolts up from the bottom flange through the holes on the top of the housing and the base of the chute. Place washers and knobs on the ends of the carriage bolts, Screw down the lock nuts until the nylock layer splits.

Adjusting the Hose Boom

The chain connecting the boom and hose strap should run straight up and down, and the hose between the strap and the intake housing should be parallel to the ground. This gives debris a straight shot to the impeller, reducing the chance of a clog. To adjust the height, connect the attachment links on the boom and strap to a different part of the chain.

Adjusting the Chute

Aim the chute so that debris drops into the rear of the bed or container. To rotate the chute, loosen the knobs on top of the outlet and rotate the chute until it’s at the desired angle. Due to the weight of the chute, this is best done with two people.

Getting More Life Out of the Hose

Rotate the hose occasionally so that the opening is in a different position over the intake and shut off switch. When using the loader, keep the hose as straight as possible, and avoid scraping the nozzle against the ground. This will reduce wear and help prevent clogs.

Clearing Clogs

In most cases, stretching out the hose to give debris a straight shot to the impeller is enough to clear a clog. Shut off the engine before clearing hose clogs by hand.

If there is a clog inside the impeller, shut off the engine and disconnect the spark plug before removing the intake cover. If the motor seems jammed, there may be a major clog inside the impeller housing.

Troubleshooting

Excessive vibration: Either the impeller or engine are out of balance. Inspect the impeller for damage or clogged debris.

Poor vacuum performance: Keep the nozzle slightly above debris, not in them. This lets the loader draw in air with the debris, maintaining flow. Check the loader for clogs.

Engine won’t start: Make sure the hose is clamped down over the shut-off switch. Check the engine start/stop switch. Make sure there’s plenty of fresh fuel inside the gas tank and check the spark plug connection. A dirty air filter can also cause starting problems.

Engine is locked: Check the impeller for damage or clogs.

Get the Parts and Accessories You Need for Your Loader

Need to add an extension to the chute or replace a worn hose? Billygoatparts.com has everything you need. We’re a certified dealer for Billy Goat and their engine partners, letting us offer OEM replacements for everything on our equipment. We can ship whatever you need to any address in the United States or Canada.

Posted in Uncategorized | Tagged , , | Leave a comment

Getting the Most from Your Debris Loader

Billy Goat Debris Loader

Using a piece of power equipment just to move leaves a few feet sounds crazy, but it can save you a lot of time and money on fall lawn care jobs. These tips will help you get the best use from your Billy Goat debris loader so you can pick up leaves for disposal quickly and effectively.

Why Use a Loader?

When you have workers to pay, time is money. Raking up leaves and dropping them into a trailer is back-breaking and labor intensive, making fall cleanup time-consuming. Even if you have access to a front loader, the last of the leaves will always need to be picked up by hand. A debris loader vacuums leaves and lawn clippings, picking up everything whether you have a big pile or a few leftover leaves keeping the lawn from being spotless.

The cost savings don’t stop there. Billy Goat’s Piranha blades have serrated edges that tear and break up debris as they first pass into the loader, where they’re broken down further by more serrated edges on the impeller. This compacts lawn waste, letting you carry more, spend less on disposal fees or use debris directly in compost piles.

Mounting

All Billy Goat debris loaders have a skid mount that can be attached to a variety of mounting equipment.

DL 12, 13 15 and 18 models can be used with a hitch mount. This is perfect for dumping leaves into the back of a light-duty pickup. When it’s time to dump the load, a hinge lets the loader swing out of the way. If you still want to tow a trailer, Billy Goat also makes a mount that fits over the tailgate, keeping the hitch free. The loader’s skid mount can also be mounted directly to a trailer, letting you bring it along with your equipment. This can be done with any loader model.

DL 25 and 35 loaders can be fitted to a DOT-approved trailer. This is great for using with both light and heavy-duty trucks.

Billy goat offers horizontal and vertical extensions and both deflector and hose attachments for the end of the chute to get the leaves exactly where you want them. A 360-degree swiveling mount lets you move the chute out of the way when you need to access the trailer or bed.

When setting up your loader’s chute, the debris should fall at the end of the container that’s furthest from the loader. As the space fills up, the debris will gradually fall closer to the loader, filling up the container with minimal intervention.

Using the Intake

Use a sweeping motion to pick up debris. For the best performance, air needs to be drawn in with the leaves. Keep the end of the nozzle a little above the area you’re cleaning.

To avoid clogs, adjust the chain connecting the hose band to the boom so that the hose is running parallel to the ground.

Removing Clogs

If the clog is inside the intake hose, pull the hose out in a straight line. The suction from the impeller will usually dislodge the clogged material. More problematic clogs can be removed by hand after shutting off the engine and waiting for the impeller to stop spinning.

If the clog is somewhere else in the loader, shut off the engine and let the impeller come to a complete stop. Disconnect the spark plug wires. If your loader has an electric starter, disconnect the battery. At this point, the intake housing can be unbolted from the loader to clean out the impeller, or the chute can be unbolted to remove trapped debris. Keep in mind that both parts are very heavy and will require at least two people to move.

Using the Interlock System

Billy Goat’s loaders have a large black switch on the top of the intake that will ground the engine’s electrical system when open. This shuts off the engine if the intake hose falls off of the intake housing. When installing the hose, make sure the clamp goes over the switch.

Get the Parts and Accessories You Need for Your Debris Loader

When you need something for your Billy Goat equipment, visit www.billygoatparts.com. We’re an authorized dealer for Billy Goat and their engine partners, so we’re able to offer OEM replacements for everything on your loader as well as the accessories you need to use it with your truck or trailer. We can ship your order to any address in the USA or Canada.

Posted in Uncategorized | Tagged , | Leave a comment

Tips for Fall Lawn Care

Tips for Fall Lawn Care

Your grass may not be growing as fast as it was in the spring and summer, but it’s still important to take care of it. These tips will help you keep your lawn green longer, get the grass in shape to survive the winter and prevent common problems with weeds and mold.

Keep Watering and Mowing

In most parts of the country, precipitation and humidity decrease through the fall, requiring more water to keep your lawn healthy. Continue watering until temperatures dip below 40ºF or there’s snow coverage.

Grass growth will slow as temperatures drop, but it still needs to be kept at a healthy height. By late fall, your lawn may only need to be mowed once every two or three weeks with the final mow. At the end of the season, mow your lawn as short as possible without cutting into crowns. This keeps moisture from collecting after snowfalls that can lead to root damage and snow mold.

Stop Broadleaf Weeds

Broadleaf varieties like dandelions and white clover are some of the hardest weeds to tackle, and they can take up water and sunlight that can be better used to prepare your grass for winter. Early fall is a perfect time to apply herbicides with most formulas working best when temperatures are consistently above 60ºF. To find the right herbicide for your lawn, contact your local extension office: they’ll know what works best for weeds in your area, and what chemicals are legal for use. Be sure to treat weeds at least two to three weeks before overseeding to keep the herbicide from affecting grass growth.

Dethatch

Thatch can provide useful ground cover, but too much can choke your lawn and cause problems with the root system. Thatch should be removed if it’s over a half-inch thick. For the best results, use a power rake to lift the thatch out of the grass, then pick it up with a lawn vacuum. This process is hard on grass, so expect your lawn to look scraggly for a week or two as it recovers.

If you have buildup issues, it can probably be resolved by changing your lawn care strategy. Thatch is caused by too much nitrogen in the soil, too much watering, soil compaction and excessive use of fungicides. Mulching grass seems like it would add to the problem, but it actually decreases thatch by providing microorganisms with easy-to-digest food. This boosts their population, letting them eat woodier plant parts faster.

Aerate

Aerating breaks up surface soil, relieving compaction. This lets water and air penetrate the soil, keeping your grass healthy. Aerating is a must after construction projects, and is a good idea every couple of years if you have heavy foot traffic on your lawn. Clay soils are more susceptible to compaction and may require more frequent aerating. Good drainage won’t just help your lawn grow, it will help snow melt drain off, preventing snow mold.

Core tines will deliver the best results, but the cores left behind need to be dried out and broken up by a mower. Spike tines can compact the soil around the holes they create, but they won’t leave unsightly cores.

Fertilize

Grass growth may slow down, but the root system is just as active as it was in the spring. Applying fertilizer toward the end of fall will give your lawn the boost it needs to store nutrients for the winter.

Most fall fertilizer formulas have added nitrogen to boost growth, but you’ll get better results if you get a soil test a couple weeks beforehand and apply a fertilizer mixed to provide exactly what your lawn needs.

Plant Cool Season Grasses

Overseeding with cool season varieties like tall fescue and Kentucky bluegrass will keep your lawn growing longer. Ideally, the lawn should be seeded after dethatching and aerating to get maximum ground contact and before fertilizing to give the seeds maximum access to nutrients.

Remove Leaves

Leaf buildup blocks sunlight and causes moisture to build up, encouraging fungi growth. Frequent mowing with a mulching mower, but major accumulation needs to be removed. Billy Goat’s lawn vacuums and truck loaders shred leaves to compact them, helping turn them into mulch and saving money on disposal fees.

Keep Your Equipment Ready for Fall Lawn Care

No matter what Billy Goat equipment you end up using this season, you can get the parts you need to maintain it from www.billygoatparts.com. We’re an authorized dealer for Billy Goat and their manufacturing partners including Honda Engines and Briggs & Stratton, making us your one-stop for everything on your aerator, overseeder, loader or power rake. We ship across the US and Canada.

Posted in Uncategorized | Tagged , , | Leave a comment

Billy Goat’s New Text to Video Program

Billy Goat’s New Text to Video Program

Rental equipment sees hard use no matter the user, but a lot of problems can be traced to operator error. Billy Goat is trying to change that with their new Text to Video program. By texting a keyword to a number clearly printed on the machine, the operator will be sent a short video detailing everything they need to know to get started. This makes equipment easier to use for inexperienced renters and helps avoid misuse that can shorten the life of equipment.

How Does it Work?

The instructions and the keyword for the specific piece of equipment are clearly printed either on the operator’s position or at the controls. The user texts this word to 33988. They are then sent a link to a short instructional video for the equipment.

What’s Covered in the Video?

All videos touch on three main topics:

1. Starting the engine
2. Operating the machine
3. Tips for using the machine

For example, if the user has a NextGen Sod Cutter in front of them, they’ll see a tag that instructs the operator to text “SOD” to Billy Goat’s T2V number. When they text the number, the system replies with a link to a YouTube video hosted by Billy Goat’s communications manager, Gail Trudeau. In the video, Trudeau goes over the following topics:

The safety equipment needed — Gloves and safety glasses

-How to start the engine — Pointing out the location of the run switch, choke, and starter handle, as well as when to use the choke

-How to adjust cutting depth — Pointing out diagram for depth settings on the cutter, and how to set the pin that determines depth

-How to engage the cutting blades

-Using the levers on the handle to engage the hydrostatic drive in forward and reverse

-Locking and unlocking the rear caster wheel for straight and curved cuts

All of this is covered in about 90 seconds. There’s no intro or graphics, just the basic information the operator needs to get started. While by no means comprehensive, this is enough for a novice to start using a piece of equipment. It also shows exactly where on the machine the operator can find easy-to-miss items like the choke and caster wheel lock. For 95% of rental users, this gives them everything they need to know.

Who Can Use this Tool?

The user doesn’t have to download a separate Billy Goat app, and the video can be viewed on any smartphone using the YouTube app or any modern HTML5-compatible web browser. That means it will work with virtually every smartphone on the market.

What isn’t Covered?

Troubleshooting and in-depth use information are left out. Users will still need to refer to a manual if the equipment isn’t delivering the results they expect, or if the engine doesn’t want to run.

When Will T2V Be Available?

The first equipment to get this feature was the Next Gen Hydro-Drive 18” Sod Cutter in mid-2017. Success with this pilot program has led the company to start rolling it out onto other models this year. Currently, videos are available for several overseeder, dethatcher, aerator, blower, and vacuum models. Debris loaders and the Grazor crack cleaner are not yet covered.

Can I Get Parts for My Billy Goat Using My Smartphone?

Whether you’re on your phone or your computer, you can go to www.billygoatparts.com to get everything you need for your Billy Goat equipment. We’re a certified dealer for Billy Goat and their partners including Honda, Subaru, and Briggs & Stratton, so we’re able to have anything you may need delivered to your door. Our search engine can even narrow down parts choices based on your model and serial number, and it will show you factory diagrams and descriptions, making it easy to find what you need. We ship across the USA and Canada.

Posted in Uncategorized | Tagged , , | Leave a comment