
 With a 12:1 reduction ratio, up to 5,000 CFM, giant clog-resistant hoses, and the most powerful engines in the industry, Billy Goat’s DL29 and DL37 are the perfect debris loaders for contractors and municipal departments who deal with leaf cleanup on a massive scale. However, the size of these machines shouldn’t be intimidating: they’re just as easy to set up and maintain as anything made by Billy Goat. Here’s how.
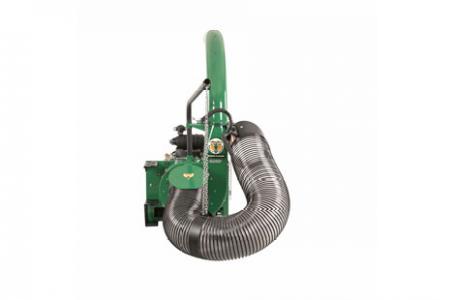
Mounting the DL29 and DL37
The base of the loader has 6 holes designed for 3/8 inch bolts. Two of these are located at the front of the loader near the engine airbox, while the other four are on the sides of the base. The bolts need to be paired with washer and locking nuts. These parts are not included with the loader. When mounting the loader on the optional trailer, the front of the loader should face the trailer tongue.
Setting Up the Debris Loader
The loader needs to be secured to a truck bed or trailer before assembly.
1. Slide the hose boom through the rings on top of the impeller housing.
2. Attach the hose to the housing intake using the T-bolt hose clamp, making sure to clamp the safety switch against the intake.
3. Attach the handle to the nozzle intake, using the short screws, eye bolts, small washers, and small lock nuts.
4. Attach the nozzle to hose using the standard hose clamp. Before tightening the clamp, stretch out the hose and position the handle so it’s facing upward. This prevents twisting during use.
6. Wrap the hose band around the hose, Connect the chain to the band’s flanges using the
cap screws and large lock nuts. Connect the chain to the boom. Check the chain position: with the hose and boom extending straight out from the loader, the band should be level with the intake. Unlike other Billy Goat loaders, the chain may need to be at a slight angle to get this hose position.
7. Apply grease to the end of the exhaust elbow and the two flanges. Attach the exhaust elbow by stacking the thin flange, elbow and thick flange on top of the exhaust housing. Line up the holes in the housing and flanges, and make sure the teeth on the elbow mesh with the crank. Place the 6 carriage bolts in the holes from the top of the thick flange and tighten them down using the large lock nuts.
8. Install a U1 series 12-volt lawn and garden battery. This battery should be rated at least 240 cold cranking amps and have at least a 40 amp hour rating. Use the included battery bracket, hold down rods, washers and remaining medium-sized lock nuts.
Impeller Removal
The impeller bolt is only designed for one use. Have a new bolt, washer and lock washer on hand when reinstalling the impeller.
1. Disconnect the negative battery terminal and the spark plugs.
2. Disconnect the hose from the intake and the boom. Set it aside.
3. Using a 9/16 inch socket, remove the bolts holding the intake plate onto the housing. The wiring for the safety switch can be left connected: just be careful not to pull on the wires when moving the plate out of the way.
4. Use an impact wrench to remove the impeller bolt.
5. Slide the impeller out of the housing.
To reinstall, follow the previous steps in reverse order. Be sure to torque the impeller bolt to 175-180 ft-lbs.
Battery
The charging system on the engine is powerful enough to top up a healthy battery in about 45 minutes. Once leaf season ends, charge the battery every couple of months. Billy Goat recommends using a one or two amp trickle charger, as these are less likely to overcharge the battery than a high amperage car charger. These chargers should only be connected for one to two days at a time.
Need Something for Your Debris Loader?
No matter what you need for your Billy Goat, you can get it from www.billygoatparts.com. We’re not just an authorized Billy Goat dealer, we’re also a certified dealer for Billy Goat’s manufacturing partners including Briggs & Stratton Vanguard. Our site can show you factory information for your model including exploded parts diagrams, making it easy to find what you need, and we can ship your order to any address in the US or Canada.
