Sod Cutter Maintenance and Troubleshooting

Sod Cutter Maintenance and Troubleshooting

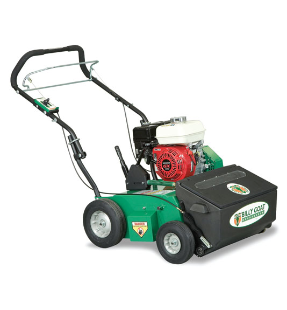
Spring will be here before too long, and that means it will be time to start laying down sod, whether it’s to establish a new lawn or repair damage from snow and ice. Here’s what you need to know to keep your Billy Goat sod cutter running and fix common problems as they crop up.

Maintenance Schedule

Before every use or daily: Inspect the sod cutter for loose, worn or damaged parts.
Every 5 hours or daily: Check for excessive vibration.
First 20 hours of use: Replace transmission oil (geared transmissions only.)
Every 25 hours: Sharpen the blades and check the tire pressure.
Every 50 hours or yearly: Inspect the drive belt and grease the pivot points.
Every 100 hours: Replace transmission oil (geared transmissions only.)
Every 150 hours: Replace the blade and traction belts

Blades and belts are prone to wear and tear, so they should be checked periodically and may need to be replaced more frequently than recommended depending on use conditions. Blades can be chipped if they strike a rock, and they wear faster when cutting through dry, sandy soil.

Belt and cable tension should be checked after the first few hours of use as they can stretch during break-in.

Geared Transmission Service

The oil should be replaced after the first 20 hours of use, then every 100 hours thereafter. SAE 90 gear oil is recommended.

To check the fluid, remove the relative oil screw on the back side of the transmission case. If oil doesn’t leak out, add more fluid.

Fluid can be added through the filling cap on top of the transmission. Make sure the washer is fitted to the cap before screwing it back in.

To drain the transmission, remove the drain plug located directly below the left axle.

Hydrostatic Transmission Service

The Hydro-Gear RT-310 hydrostatic transmission used in these sod cutters is maintenance free.

Belt Replacement

Shut off the engine and disconnect the spark plug to prevent an accidental start. Remove all metal guards to access the belts. Geared models have a single cover next to the engine, while hydrostatic models have a rear, left and right side covers.

To access the forward control belt on the SC121, remove the blade. To access the blade belt, remove the connecting rod running between the bottom pulley and a bracket on the side of the frame.

To access the blade belt on hydrostatic drive models, the chain must first be removed by taking out the master link.

The forward control belt will slide off without any further work. All other belts can be removed by loosening the bolt on the idler pulley and walking the belt off of the other pulleys. Do not completely remove the idler pulley.

Replace the belt by following the removal directions in reverse order. The cable operating the clutch pulley may need to be adjusted.

Blade Inspection

To check the blades, shut off the engine and disconnect the spark plug. Move the blade height to the highest position.

The blade fixing screws and nuts are subject to wear just like the blades and should be replaced as a set. When replacing the blade on hydrostatic models, torque the bolts to 30 ft-lbs. (40.6 N-m.)

Pivot Points

Greasable pivot points include the height adjustment mechanism for the blade and the rods that hold the clutch pulleys. Billy Goat recommends an NLGI Grade 2 multipurpose lithium-based grease.

Cable Adjustment

Cable tightness can be adjusted by turning the nut on the adjuster. The adjuster for the shifter cable on hydrostatic models is located beneath the back cover. Adjusters for all other control cables are located on the handle.

The service brake cable on geared models is connected to the forward control lever. When the lever is released and the brake is engaged, there should be 2-3 mm of play between the adjustment screw and the brake cable. If the cable is tight, the brake won’t engage.

Troubleshooting Common Problems

Abnormal vibration: Check the engine mounting bolts for tightness and inspect the blades for damage.

Poor cutting performance: The blades are dull, the engine is running too slow or the sod is too dry.

Blade belt is slipping: The belt needs to be replaced.

Drive not disengaging: The drive cable tension is too tight.

Engine is locked: Debris is locking the blades or the engine is damaged.

Getting Parts for Your Billy Goat Sod Cutter

Whether you have a Next Gen Hydro-Drive, a Golf Hydro-Drive, an SC131H or one of Billy Goat’s older models, you can get everything you need for it at www.billygoatparts.com. We’re a certified dealer for Billy Goat and their manufacturing partners so we can supply you with everything you need for your equipment. We ship across the United States and Canada.

Posted in Uncategorized | Tagged , , | Leave a comment

Blower Maintenance

Blower Maintenance

As we head into winter, now is a good time to look over your Billy Goat wheeled blower to make sure it’s ready for the next leaf clearing season. Here’s what you need to know to store your blower, maintain it and fix common problems.

Engine

For detailed information on maintaining your blower’s engine, check the engine manual included with your equipment. Moving leaves and debris is dusty work, so instructions should be followed for maintaining the engine in these conditions. This includes more frequent cleaning of the air filter and, in some models, more frequent oil changes.

In rare cases, vibration can be caused by a loose engine. Check the tightness of the bolts around the engine base to ensure it’s fixed to the blower.

When putting the blower into long-term storage, Billy Goat recommends draining the fuel system regardless of the engine model or manufacturer. For storage under three months, the fuel can be left in the tank if it has been treated with a stabilizer. Run the engine for 10 minutes to ensure that the treated gas has reached the carburetor.

Loosening Debris

Debris build-up inside the impeller housing can cause turbulence and balance issues that can lead to vibrations, while build-up around the nozzle cone can prevent the Aim-N-Shoot lever from moving. Debris can be cleaned out by directing high-pressure air toward the cone or intake screen using either a backpack blower or a compressed air line.

Impeller Removal

Billy Goat recommends inspecting the impeller every 100 to 150 hours of use, and it should be inspected if there is an abnormal amount of vibration that is not being caused by debris build-up.

1. Let the engine cool completely and disconnect the spark plug wires to prevent an accidental start.

2. Remove the front cover. On metal housing models, there will be 5 or six sheet metal screws that need to be removed to take off the cover and screen. On plastic housing models, there are 10 or more nuts and bolts along the perimeter of the housing that need to be removed.

3. Remove the impeller bolt, lock washer, and washer. Slide the impeller off of the drive shaft.

If you have a plastic impeller and it doesn’t want to slide off, do not pry on it. Instead, apply some penetrating oil onto the shaft and get a ¾ by 16×3 inch or longer bolt. Screw this bolt into the impeller nut by hand until the bolt is against the shaft, then use a wrench to slowly tighten the bolt. This should separate the impeller from the shaft.

4. Reinstall in reverse order. Tighten the impeller bolt to the torque specified in your owner’s manual, typically 50 or 60-inch pounds.

Aim-N-Shoot Lever

If the lever is sticking and any debris have been cleared out around the nozzle, check the manual adjustment knob and nut, making sure they aren’t over tightened. Apply a silicone lubricant to the pivot points in the system including the area around the nozzle cone, the cable and the lever.

Tires

Rear tires should be aired up to 20 PSI. If your model has a pneumatic front tire, it should be aired up to 24 PSI.

Getting Parts for Your Blower

Whether you have the latest Force composite blower or one of Billy Goat’s older metal impeller models, you can get everything you need to keep it running from www.billygoatparts.com. We’re not just a Billy Goat dealer, we’re also a certified dealer for Honda, Subaru, and Briggs & Stratton, letting us provide you with both equipment and engine parts. We ship to the U.S. and Canada.

Posted in Uncategorized | Tagged , , | Leave a comment

Maintaining Your Pressure Washer’s Pump

Maintaining Your Pressure Washer’s Pump

Having problems with your Billy Goat pressure washer? Need to prepare it for winter storage? Here’s what you need to care for the pump on your equipment.

Identifying Your Pump

The new 4,000 PSI commercial grade gas pressure washer, model PW40S0H, uses a triplex pump from CAT Pumps, while all other Billy Goat models use a triplex pump from Annovi Reverberi (AR.) Both companies place a tag with the model information on the top of the pump that will be next to the brass plunger body or the base.

Before you start working on internal components, download a parts breakdown from the manufacturer’s site: these are complicated pieces of equipment with lots of small parts that need to be fitted correctly to produce pressure and prevent internal damage.

Caring for AR Pumps

These pumps are not rated for hot water, but this shouldn’t be an issue since these pressure washers are designed to be hooked up to a garden hose.

When storing, run a 50% solution of water and RV antifreeze or non-toxic, biodegradable antifreeze through the pump. This will protect it from freezing while keeping the seals and O-rings inside lubricated.

Caring for CAT Pumps

The crankcase of the pump needs to be filled with CAT Pump hydraulic oil. This oil should be replaced after the first 50 hours of operation, then every three months or 500 hours of use thereafter.

When storing, the pump should be flushed with a solution of 50% water and 50% antifreeze. CAT Pumps recommends hooking a four-foot length of hose to the inlet and starting the pump. Shut the pump off once the hose is empty. When it’s time to get the pressure washer out of storage, set the regulator to the lowest pressure point and hook up a hose. Let water flow through the pump for two or three minutes to flush out the antifreeze. Turn the crankshaft by hand to make sure it will spin freely before starting the engine. Gradually open up the regulator in small increments until it reaches the pressure you need instead of opening the valve all at once.

These pumps can handle hot water (over 130ºF,) but pumping performance will decrease.

Addressing Common Issues

Most low pressure and pulsation issues are due to problems outside of the pump. Before opening the pump for inspection, try the following:

— Clean the debris filters on the water inlet and chemical inlet.
— Remove any kinks in the supply hose.
— Check the outlet hose and spray wand for leaks.
— Check the nozzle for wear and damage.
— Make sure air isn’t getting mixed in with the water supply.
— Use a shorter supply hose to reduce flow resistance. Linking together several hoses to work in remote areas can result in flow rates below what the pump needs to operate.

Inspection and Repair

Most problems inside the pump stem from piston issues. Valve plugs on AR pumps are designed to be removed with a 22mm wrench while CAT pumps use an M24 hex tool. Inspect the O-rings and lift the pistons out of the pump using a pair of needle nose pliers. With the pistons out, push up and down on the poppet valve. It should move freely. Clean out any debris that has gathered on the valve.

CAT recommends using Loctite 242 on the plugs when fitting them back to the pump case. This threadlocker is formulated to prevent the plugs from unscrewing when subject to vibration while still allowing the plugs to be removed down the line.

If everything looks fine on the piston end, the issue will usually involve failed seals around the plungers. Before you attempt inspection or repair, you should have a rebuild kit on hand: both companies recommend replacing the O-rings and washers inside the plunger housings whenever they’re opened. The pump will need to be unbolted from the engine before these parts can be accessed. The plungers themselves are ceramic, making them brittle and prone to damage if not handled gently; they are designed to be twisted out by hand, not pulled out with tools.

Getting Parts for Triplex Pumps

www.billygoatparts.com is a certified Billy Goat dealer which means we have OEM parts from Billy Goat and their manufacturing partners including AR and CAT. Our site has built-in parts diagrams so you can find the parts you need, and we also offer full rebuild kits if you need to overhaul your pump. We ship across the U.S. and Canada.

Posted in Uncategorized | Tagged , , | Leave a comment

Servicing the Briggs & Stratton Vanguard V-Twin

Briggs & Stratton Vanguard V-Twin

When you need big power in outdoor equipment, there’s little that can match Briggs & Stratton’s Vanguard V-Twin. Although mostly found in riding mowers, this engine is used by Billy Goat to power several of their largest equipment models including truck loaders and wheeled blowers. Here’s what you need to know to keep this engine running reliably.

Maintenance Schedule

First 5 hours of operation: Change the oil. The filter does not need to be replaced.

Every 8 hours or daily: Check the engine oil level and clean the muffler and controls.

Every 100 hours or annually: Clean the air filter and pre-cleaner. Change the oil and filter and replace the spark plug. Check the muffler and spark arrester.

Every 400 hours or annually: Replace the air filter and fuel filter. Clean the cooling system and oil cooler fins.

If the engine is used in dusty areas, the cooling system and oil cooler should be cleaned more frequently.

If the engine doesn’t seem to be performing well by the time it’s due for 100 hour/yearly maintenance, the valve clearance should be checked by a professional.

Fuel

This engine is designed to use regular automotive gas that contains no more than 10% ethanol or 15% MTBE. 87 Octane is recommended, but 85 Octane can be used at altitudes over 5,000 feet (1,524 meters.) Never fill the tank above the base of the filler neck: that air space is needed to compensate for fuel expansion.

If the fuel isn’t going to be used within the first 30 days of purchase, it should be treated with a stabilizer. Treated fuel can be kept in the fuel tank for up to 60 days. For longer storage periods, drain the fuel and run the engine to burn off any residual fuel left in the carburetor.

Oil

5W30 synthetic and 10W30 conventional or synthetic oil can be used in all weather conditions. Oil consumption will increase with 10W30 above 80 degrees F (27 degrees C;) if you regularly operate at these temperatures, check the oil level more often or switch to SAE 30. Using SAE 30 at temperatures below 40 degrees F (4 degrees C) may cause hard starting.

If the engine is equipped with an oil pressure sensor, it will shut off the ignition if the pressure is too low and turn on a warning light. Check the oil. If it’s low, add more oil until it reaches the full mark on the dipstick before restarting it. If there’s already plenty of oil in the crankcase, the engine should be taken to a dealer for diagnosis. Starting the engine or shorting out the sensor could lead to engine damage.

The oil fill cap can be found on the top of the left cylinder head. The dipstick is just behind this cap. The oil filter is mounted directly below this cylinder head, while the oil drain plug can be found on the base of the engine below that. The oil cooler is directly to the right of the filter.

These engines hold 46-48 ounces (1.36-1.42 L) of oil. Briggs recommends changing the oil while the engine is still warm so that the old oil flows out faster.

Air Cleaner

The cleaner is below a cover on top of the fuel tank. To access it, turn the knobs on top of the cover and lift it up. Remove the nut on top of the air filter assembly and slide out the retainer and air filter elements.

The foam pre-filter should be washed with soap and water and allowed to dry before reinstalling. Do not oil the filter. The inner paper element should be tapped against a hard surface to remove any loose dirt.

Reinstall the cleaner in reverse order.

Fuel Filter

Before removing the filter, drain the fuel tank or close the fuel valve (if equipped.)

Use pliers to squeeze the tabs on the clamps holding the fuel filter to the fuel lines and slide the clamps away from the filter. Twist the filter to remove it from the lines. Slide the lines over the new filter so that they meet with the filter housing, then slide the clamps back over the ends of the lines.

Spark Plug

The plugs are located directly below the valve covers. The spark plug gap should be set to 0.030 inches (0.76 mm.) When installing the plug, torque it to 180 lb-in. (20 Nm.) Replace the plug if it shows signs of electrode or insulator damage.

Getting Parts for Billy Goat Equipment and the Engines that Power Them

Billygoatparts.com is a certified dealer for Billy Goat and their manufacturing partners, which means we can provide you with everything you need including parts for Briggs & Stratton Vanguard engines. We ship across the U.S. and Canada.

Posted in Uncategorized | Tagged , , | 2 Comments

Servicing the Subaru EX-Series

Subaru

The Subaru EX-Series, also sold under the Robin and Subaru-Robin brands, has been used in several of Billy Goat’s models over the years including the current F902S Force wheeled blower. If you want to get the reliability expected from this top-rated industrial motor, you need to maintain it properly. Here’s what you need to know from pre-use checks to long-term storage.

Maintenance Schedule

Every day or 8 hours of use: Clean the engine, check the nuts and bolts for tightness and check the engine oil. On models with an oil bath air cleaner, top up the air box oil pan.

First 20 hours, then every 100 hours thereafter: Change the engine oil.

Every 50 hours: Clean the air filter.

Every 50 hours or weekly (EX13, 17, 21 and 27) or 100 hours (EX 35 and 40:) Clean the spark plug.

Every 100 hours, if equipped: Clean spark arrester.

Every 200 hours: Replace the air filter, clean the fuel cup and clean and check the spark plug gap.

Every 500 hours: Replace the spark plug.

Every year or 1,000 hours: Replace the fuel lines.

Subaru also recommends taking the engine in for professional service every 500 hours to have the carburetor cleaned and adjusted and every 1,000 hours for an overhaul.

Oil and Oil Bath Air Filters

Some models come with an oil sensor that will shut off the engine if the level is too low. Adding the oil to the crankcase will re-enable the ignition system, letting you restart the engine.

To check the oil, place the equipment on a level surface and remove the dipstick from the oil filler neck. Wipe off the dipstick and put it back into the neck without screwing it to get an accurate reading.

10W30 is recommended for most operating conditions. SAE 30 can be used for temperatures above 50°F (10°C) and 5W30 at temperatures below 25°F (-5°C.) The amount of oil your engine holds depends on the model:

EX13, 17 and 21: 0.6 quarts (0.6 liters)
EX27 1.1 quarts (1 liter)
EX35 and 40 1.2 quarts (1.2 liters)

To drain oil from the engine, remove the drain plug, located below and to the right of the filler neck.

Some versions of the EX13, 17 and 21 have an oil bath air cleaner. Add oil to the filter box up to the level marked on the side; if it’s empty, it should take about 3.5 tablespoons (55 ml.)

Spark Plug

Carbon deposits should be cleaned off of the spark plug using a plug cleaner or a wire brush. The electrode gap should be between 0.02 and 0.03 inches (0.6-0.7 mm.)

Fuel Cup

The cup is located at the base of the carburetor, directly below the air filter box. Close the fuel valve before removing. Once any collected water or dirt has been dumped out, it should be rinsed with gasoline or kerosene.

Air Filter

Oil bath air cleaners have a single foam element. Wash the filter with kerosene or diesel fuel, then saturate it with a mix of three parts kerosene or diesel fuel and one part clean engine oil. Squeeze out the filter to remove any excess fluid.

All other engines use a dual element cleaner. Wash the foam element with water and a mild detergent and let it dry before reinstalling. Do not oil the element. Tap the paper element against a hard surface to knock out any loose dirt.

Spark Arrester (EX 35 and 40)

To access the spark arrester, remove the muffler cover, which is held on by three screws near the deflector. The spark arrester is held in by a single screw next to the muffler opening. Use a wire brush to clean off any carbon deposits. If there are splits or holes in the arrester, it should be replaced.

Storage

Subaru recommends following this storage procedure if the engine won’t be used for over one month.

To drain the fuel, close the fuel petcock and remove the fuel cup. Place a suitable container below the carburetor and open the petcock. Remove the drain screw on the side of the carburetor to get the remaining fuel out of the float bowl.

Change the engine oil before storage. Remove the spark plug and pour in about a teaspoon (5 ccs) of oil into the cylinder. Slowly pull the starter handle two or three times to circulate the oil, then reinstall the plug.

Slowly pull the recoil starter until resistance is felt. This positions the valvetrain so that both valves are closed, sealing the inside of the cylinder.

Clean the engine with an oiled rag. Store the engine in a well-ventilated, low humidity area.

Getting Parts for Your Engine

Billygoatparts.com is a certified dealer for Billy Goat and their manufacturing partners including Subaru Industrial Power, which lets us provide the full line of OEM parts for these engines. We can ship anything you need to any address in the U.S. or Canada.

Posted in Uncategorized | Tagged , | Leave a comment

Servicing Your Billy Goat Overseeder

Servicing Your Billy Goat Overseeder

Now that the fall rush to plant cold weather grasses is ending, it’s a good time to look over your Billy Goat power rake or overseeder and make sure it’s ready for the spring. This guide will walk you through inspecting and replacing the belts and reels on your equipment.

Maintenance Schedule and Access

Every 25 hours of operation, the reel bearings should be greased and the reel blades and all belts should be inspected. Belts should be replaced when they show signs of cracking or stretch to a point that they can’t be engaged by the clutch.

To access these components, tilt the rake back onto its handle or prop it up on blocks. If the blades are going to be rotated or replaced, the reel height should be at its lowest setting.

Reels

The minimum length for a flail blade is three inches on the CR550HC and 3.25 inches on the PR550, while minimum length on all slicing blades is three inches. If any blade is under this length, all blades should be replaced. Billy Goat recommends replacing the flail shafts and flails at the same time. Blades that are cracked or bent should be replaced immediately and can be done individually.

Flail blades have two cutting surfaces and can be flipped to spread out wear. This can be done using a pair of ½ inch socket wrenches:

1. Remove the 6 lock nuts holding the belt and shaft guards in place, then remove the guards.
2. Slide the drive belt off of the reel pulley.
3. Remove the four lock nuts and washers holding the bearings to the frame. The reel can now be removed from the rake.
4. Remove the capscrew, lockwasher, reel pulley, key and finally the spacer from the end of the reel.
5. Rotate the reel end to end, and re-install the items removed in step 4.
6. Re-install the reel, belt, and guards in the reverse order of removal.

Drive Belt Replacement (All Models)

1. Remove the screws holding the belt guard in place. Slide the guard off of the rake.
2. Pull the old belt off of the drive pulley and remove it from the rake. Slide the new belt onto the pulleys in its place.
3. Engage the bail and check the length of the idler spring: on the CR550HC, it should stretch between 1 and 1 ¼ inches. On other models, the idler pulley just needs to put tension on the cable. Adjust the clutch cable so that it falls within this range.
4. Reinstall the belt guard.

Jackshaft and Mule Belt Replacement (OS 500)

1. Place the overseeder on blocks and remove the rear right tire and the spring holding the housing to the frame.
2. Remove the screws holding on the belt guard, followed by the four screws holding the mule drive in place beneath the guard.
3. Slide the mule belt off of the pulley.

At this point, the old mule belt can be removed and replaced with a new belt. If you’re replacing the jackshaft belt, do the following:

4. Remove the mule assembly, leaving the mule belt on the transmission.
5. Remove the carriage bolt and nuts holding the right-side bearing on the jackshaft, leaving the bearing and pulley in place.
6. Unscrew and remove the jackshaft belt guard.
7. Slide the old belt off of the crankshaft pulley, then down the jackshaft and over the mule pulley. Slide on the new belt.
8. Reattach the mule drive and belt. Check the idler tension on the belt when the drive lever is engaged. If it’s too loose, the spring holding the idler arm should be replaced.
9. Reassemble the overseeder.

Getting Parts for Your Overseeder

If you need new blades, belts or anything else for your Billy Goat, you can find it at www.billygoatparts.com. We’re not just an online parts warehouse, we’re a certified dealer, which lets us offer the full line of Billy Goat factory parts. We even have their factory diagrams built into our search system so you can locate the exact part you need on your equipment. We ship across the U.S. and Canada.

Posted in Uncategorized | Tagged , , | Leave a comment

Maintaining Your Billy Goat’s Control Cables

360119-S

Clutches, throttles, adjusters and kill switches are all linked to the hand controls using cables, which makes maintaining these easy-to-overlook parts critical to keeping your Billy Goat equipment working correctly. Whether you have a Grazor with a single clutch lever or a Hydro Aerator with multiple levers for height and speed control, the same methods can be applied to clean and lubricate any cable found on your equipment.

How Cables Work

The cable connects the controls on the handle of your equipment to components on the base including the engine throttle, clutches and height adjusters. At least part of this cable is covered by a casing. No matter how the casing bends, it has a fixed length, letting the cable move around while maintaining the distance needed to actuate the device at the other end. Usually, only a section of the cable is covered in a casing to compensate for movement of the handle and base, while cable near fixed areas at the ends of the handle and the device being controlled are left exposed. Metal ferrules at the ends of the cable support the soft casing and help keep it in the mounting slots on the equipment.

Keeping Your Cables from Freezing

While it is possible to stretch a cable out over time, most failures are the result of rust or physical damage that can keep the cable from moving.

Rust is caused by water collecting on the cable. Along with direct exposure, dirt can draw in moisture from the air and keep it in contact with the cable. To keep this from happening, wipe the exposed areas of the cable clean after use.

Most physical damage is the result of crimping. Make sure all the cables are clear before folding the handle for storage or transport.

Lubricating the Cable

Billy Goat recommends lubricating cables after every 25 hours of use. There are two ways to apply lubricant:

Expose as much cable as possible on each end and soak these ends in lubricant. Move the cable back and forth to spread it across the cable.

Detach the top of the cable from the equipment. Clamp on a cable lubrication tool, or make one using a short piece of hose and a hose clamp. If you choose the latter method, make sure the clamp isn’t so tight that it damages the ferrule or casing. Fill the tool or hose with lubricant. After a couple of minutes, the lubricant should drip out of the other end of the casing. Remove the tool, reinstall the cable, and move the lever back and forth to ensure an even coating across the exposed parts of the cable.

Picking a Lubricant

Billy Goat doesn’t specify a specific lubricant for their cables, leaving plenty of options. Some of these will work fine, while others can cause problems down the line.

Penetrating oils like WD-40, PB B’laster and Liquid Wrench are designed to remove grease and water from components, not lubricate them. While they may seem to work at first, they won’t stick to the cable, leaving it dry and exposed to water damage.

Some oils have detergents in them which can gum up over time, holding dirt onto the cable and making it stick to the casing. This includes modern multi-weight motor oils and household multi-purpose oils like 3-in-1. While they may make the cable move smoother at first, it’s common for the detergent to cause the cable to stick or freeze while the equipment is in storage.

What should you use, then? Any of these products will work:

– Cable or cable and chain lubricant for motorcycles
– Light oil lubricant
– Silicone lubricant
– Air tool oil
– Non-detergent SAE 30
– Electric motor oil, which may be SAE 30 or a paraffin base oil
– Graphite lubricant

When in doubt, check the label: it should say “non-gumming.”

While there is some debate over whether graphite is the best choice since it doesn’t let dirt adhere to cables like oil-based lubricants, this should be a non-issue as long as you clean the cables.

Getting a Replacement Cable

While you may be able to free a stuck or damaged cable, the next time it gets stuck, it could keep you from shutting off a clutch or shifting out of gear, which presents a major safety hazard. Getting a replacement is simple: just visit www.billygoatparts.com. We carry everything you need to keep your Billy Goat equipment running, including cables, and we can ship your order to any location in the U.S. and Canada.

Posted in Uncategorized | Tagged , , | Leave a comment

Billy Goat SC121H Sod Cutter

Billy Goat SC121H Sod CutterCutting sod usually means using a big, heavy machine that can push down on the soil to remove the turf, but with the SC 121, Billy Goat has managed to reduce weight significantly while maintaining performance on landscaped lawns, making it less of a hassle to use and transport.

Keeping Weight and Size Low Without Compromising Performance

The SC 121h weighs 161 lbs, which is about half that of similar models, and the entire cutter measures just 16.5 x 30.75 inches. This makes it much less of a headache to turn and to transport between job sites. This equipment is designed for landscaped turf that has been pre-moistened and isn’t powerful or heavy enough to handle cutting on unbroken ground. Unless you’re reclaiming wilderness areas, this shouldn’t be an issue.

The blade can cut strips of sod that are 12 inches wide and up to 1.38 inches deep. Cutting depth can be adjusted using the center-mounted lever to ensure complete removal of the root system. From there, the blade can be engaged by closing the handle-mounted lever, letting you turn cutting on and off when changing direction or going across gravel, sidewalks and other obstacles.

Power

This sod cutter is fitted with a two speed geared transmission that sends power the rear wheels. The gear is set using a lever next to the height adjuster, and the drive is engaged by closing the second handle-mounted lever. The transmission is sealed for reduced maintenance and wear from debris.

Since the engine is only needed to push the sod cutter across the turf, Billy Goat fits it with a 118 cc Honda GX-Series engine. Although small, it still has all the features that have made this engine series a staple of the industry including a design with proven reliability, easy starting, high fuel efficiency and low noise.

Comfort and Stability

While most compact sod cutters use three wheels, the SC 121 is mounted on four wheels for increased stability. It comes with tractor tread tires to help push the device through freshly cut soil, while the front uses standard turf tread tires to keep from damaging the surface of the turf before it’s removed. To keep bumps and vibrations at bay, 6 rubber mounts isolate the frame from the rest of the sod cutter, while all of the tires are pneumatic.

Maintenance

As with everything else made by Billy Goat, maintenance requirements are minor and the machine is designed to make working on it as easy as possible, requiring only common hand tools. The blade and drive belt only need to be replaced every 150 hours, while the blade needs sharpening every 25 hours, grease applied every 50 hours and transmission fluid replaced every 100 hours. The engine is positioned on the top of the frame to provide uninterrupted access to service points.

Warranty

Billy Goat guarantees the SC 121H for one year, while Honda guarantees the engine for three years.

Getting Parts for Your Billy Goat Sod Cutter

Billygoatparts.com is a certified dealer for Billy Goat and Honda Engines, letting us provide factory replacements for everything on your sod cutter. Our website makes it easy to find parts based on your equipment model, and it can show you factory parts diagrams and descriptions so you can be sure you’re ordering exactly what you need. We can have your order delivered to any address in the U.S. or Canada.

Posted in Uncategorized | Tagged , , , | Leave a comment

PR550 Power Rake

PR550 Power Rake

A power rake takes the work out of dethatching a lawn, and with Billy Goat’s PR 550, making the switch from manual to motorized lawn care doesn’t mean adding a lot of hassle. By using some clever design features, they’ve created a rake that can be set up in a variety of configurations to do everything from overseed to improve drainage while remaining mechanically simple and easy to maintain.

Commercial Quality in a Compact Package

The PR 550 uses a 20-inch wide reel to lift and pull thatch off of soil, exposing the soil and root system to air and water for increased growth while preventing issues with shallow roots. Weighing 160 lbs. and measuring 26.5 x 45.5 inches, this compact rake is ideal for use on residential lawns where the dethatcher needs to work around trees, sidewalks, and other landscaping features.

The flails on this reel rotate in a downward sweeping motion, pushing the rake along the ground as it cuts without needing a separate self-propulsion drive. Power to the flail is engaged by closing a bale form-fitted to the curved handle for operator comfort. Let go, and the machine can be easily repositioned for the next pass.

When the work is done, the handles can be folded down by moving a couple clips: there are no bolts to mess with, so the handle is always tightened correctly when it’s tilted back into its operating position.

The reel uses heat treated and tempered blades, and the shaft rides on cast iron pillow block bearings with grease zerks for maximum durability. Height is infinitely adjustable to spread wear over the entire length of the reel blades, further increasing its usable life.

This attention to reliability extends to the rest of the unit with all steel pulleys and steel wheels that ride on roller bearings. Idler pulley adjustment and belt changes are easy: the drive system is mounted on the side of the unit, covered by a plate held on by a couple of bolts for quick access.

Engines

Billy Goat offers the PR 550 with a choice of two engines: a Briggs & Stratton Vanguard displacing 205 cc and a Honda GX displacing 162 cc. Brand preferences aside, the Vanguard has the most power, while the GX uses a little less fuel and is easier to turn over when starting. Both motors have a three-year commercial warranty from their manufacturers.

Doing Multiple Jobs with One Machine

Along with the flail reel that comes with this power rake, Billy Goat also offers a vertislicing reel and a spring tine reel. The vertislicing reel cuts straight down, making it a great choice for thinning running grasses, improving drainage and working seeds into the soil. The spring tine reel uses a gentler lifting action than the flail reel, allowing it to pass over sprinklers and other objects without damaging them.

The PR 550 can also be used to lay down grass seed with the overseeder kit. This kit includes a seed box and a vertislicing reel, dropping and working the seeds into the turf with one pass.

No matter how it’s configured, the PR 550 can cover around 13,000 square feet per hour.

Getting Parts and Accessories for the PR550 Power Rake

Whether you want to turn your power rake into an overseeder or just need to do some maintenance, www.billygoatparts.com has everything you need. We’re a certified dealer for Billy Goat as well as their manufacturing partners, which lets us offer factory parts for your Billy Goat equipment and its engine. We ship across the U.S. and Canada.

Posted in Uncategorized | Tagged , , | Leave a comment

OS500 Overseeder

OS500 Overseeder

Overseeding keeps turf full of young grass, providing better coverage for a thicker looking lawn. However, most models are designed for maximum speed, making them hard to get into tight spaces. This leaves areas around landscape features and fences covered in thin, mature grass. The OS 500 is designed to cover these areas by putting seed dropping, turf cutting, and dethatching tools on a platform the size of a push mower.

Cutting, Seeding and Dethatching

Seeds are held in front-mounted polycarbonate box that won’t rust and won’t dent up if you get a little too close to trees and buildings. With a 25 lb. Capacity, it can hold enough grass seed to cover between 1/8 and ¼ of an acre before reloading. There are even instructions on the inside of the lid to help you set the correct drop rate. To get the most out of your seeds, the OS 500 comes with Billy Goat’s Auto Drop system, letting you turn on seed release and blade engagement by moving a bale so you only put down seed where you need it.

The OS 500 uses a 20-inch slicing reel to ensuring contact between the seeds and soil. Depth adjustment is infinite, letting you get the just the right height while spreading wear over the entire length of the tines to increase the time between replacements.

This overseeder can also be used as a power rake by swapping in a set of flail or spring tines, letting you dethatch and seed with one piece of equipment. Flail blades offer the best performance and can be flipped, giving them two cutting surfaces for increased wear. Spring tines can’t match the pulling power of flails, but they also won’t damage sprinkler heads and other objects on the surface of the turf.

Power

Despite its compact footprint, the OS500 overseeder is available with a choice of two commercial grade engines: a 205 cc Briggs & Stratton Vanguard or a 162 cc Honda GX. The Vanguard has a slight edge in power, while the Honda has automatic decompression, making it easier to start. Both engines are guaranteed by their manufacturers for three years of commercial use.

Performance

This power rake is surprisingly light at around 178 lbs. with either engine and at 26.5 inches wide and 54 inches long, it’s not much bigger than a push mower. Riding on steel wheels mounted on roller bearings, this seeder is easy to maneuver around landscape features to get complete coverage. Operated at walking speed, the OS 500 can cover up to 13,200 square feet per hour.

Maintenance and Storage

It takes a few common hand tools to work on this machine, and most maintenance tasks can be done in under 20 minutes. Outside of the motor, this model only requires occasional adjustment of the idler pulley and replacement of the drive belt and cutting blades.

When it’s time to store the OS 500, the handle can be folded down, taking up less space in sheds and on trailers.

Parts

www.billygoatparts.com is a certified dealer for Billy Goat, Briggs & Stratton and Honda Engines, letting us provide you with everything you need for your overseeder including OEM replacement parts and accessories like the spring tine reel. Finding the right part is simple: just put in your model and serial number, and our site will show you factory parts diagrams and descriptions so you can find exactly what you need. Our massive warehouse lets us ship most items immediately, and we can send your order to any address in the U.S. and Canada.

Posted in Uncategorized | Tagged , , , | Leave a comment