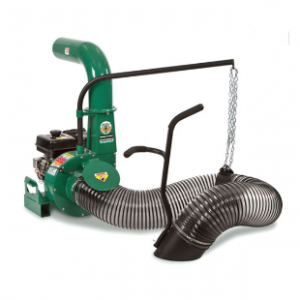
When and How to Replace a Debris Loader Impeller

Debris Loader Set-Up and Maintenance: DL14 and DL18Your debris loader’s impeller goes through a lot to pick up lawn waste and turn it into easily compostable, disposable material. If your machine performs poorly, wants to stall, or vibrates violently, the impeller might be damaged. Here’s how you can inspect and repair this important part of your Billy Goat truck loader.

Safety

The impellers used in these loaders are made from thick steel and have serrated edges to chop up leaves. That means they’re sharp and heavy. Always wear thick gloves when working on your debris loader.

Before working on your equipment, disconnect the spark plugs. The impeller connects directly to the crankshaft, so turning it may be enough to start the engine.

What Does This Part Do?

The impeller has two roles in your debris loader.

Fan: The blades spin at high speeds, moving air and debris. Suction at the front of the chamber pulls debris through the hose, while pressure on the chamber edges pushes debris up through the chute. The plates’ flat shape may not be the best for airflow, but this lets them physically push debris through the system.

Shredder: Breaking apart and compacting leaves saves space, letting you haul more debris and pay less for disposal costs. Smaller pieces are also easier to compost, which is better for recycling and on-site reclamation. To shred material as much as possible, Billy Goat separates their impellers into two sections. The star-shaped Piranha Blade has 5 serrated edges that break apart leaves as soon as they enter the chamber. The plates on the main impeller have less aggressive blades to finish the job. Together, these parts can reduce debris up to 12:1.

Accessing the Impeller

Billy Goat truck loaders have a bolt-on plate that covers the front side of the impeller housing. After shutting off the engine and disconnecting the plugs, disconnect the hose, then remove the bolts or lock nut holding the intake plate onto the housing. Be careful moving the plate: the safety kill switch for the hose has a wire leading to the engine. Either set the plate to the side, keeping some slack on the wire, or disconnect the switch from the wiring harness.

Addressing Poor Performance

Most clogs happen inside the hose. However, sticks, rocks, and other debris can make their way into the impeller chamber, wedging between components or blocking airflow. Clean out the chamber, then check the front and back sides of the crankshaft for wound up grass, cutting it away as needed.

Larger models have a wear plate surrounding the sides of the chamber. As it wears down, this plate increases the gap between the impeller and housing. This reduces the vacuum.

Damaged teeth on the Piranha Blade or the impeller will keep the machine from effectively breaking down debris. These teeth should not be sharpened, as this can throw the impeller out of balance.

Bent and cracked parts will throw the machine out of balance, causing poor suction and vibrations that are hard on the engine and bearings. Replace these parts as needed.

Can I Weld a Cracked Impeller?

No. When the engine is on, the impeller is spinning at 2,000 to 3,000 RPM. That means the impeller needs to be carefully balanced to prevent engine damage or contact with the housing. Using a welded impeller risks major damage to your equipment and injury to those using it.

Removing and Installing the Impeller

Always use a new bolt and washer when fitting the impeller. These parts stretch when tightened down, and reuse may lead to failure. Replacement fasteners are included with new impellers, or they can be ordered separately.

To remove the bolt, you’ll need an impact wrench. The hammering action loosens the bolt without spinning the unit. With the bolt removed, the impeller should slide off of the driveshaft. If it doesn’t, apply penetrating oil to the shaft and pry against the hub. Prying against the plates can bend them, ruining the impeller.

When fitting the impeller, be sure to tighten down the bolt with a torque wrench. The recommended torque varies depending on your model:
DL14 and DL18 – 33-38 ft-lbs.
DL25 – 60 ft-lbs.
DL35, DL37 and DL39 – 175-180 ft-lbs.

Get Everything You Need Without Leaving Your Computer

Do you need parts for your Billy Goat equipment? Visit www.billygoatparts.com. We’re not just an online retailer: we’re an authorized dealer for Billy Goat and their partners including Honda Engines and Briggs & Stratton. That means we carry OEM replacements for everything on your equipment. We have a section of our website dedicated to impeller parts, or you can search by looking at factory diagrams for your equipment. We ship across the United States and Canada.

Posted in Uncategorized | Tagged , , | Leave a comment

Feeding Your Lawn in the Summer

Building a lawn from scratchIs your lawn looking bad despite careful watering and mowing? Maybe it needs to be fertilized. Fertilizer application can boost grass growth and help your lawn survive summer heat when applied correctly. However, done haphazardly, the application can do more harm than good, resulting in burnt, brown patches. Here’s how you can feed your lawn effectively to keep it growing all summer.

When Should I Fertilize My Lawn?

Your first application should be in late spring and early summer. After that, the next application depends on your local weather conditions and the type of grass you’re growing.

If you live in the far north or at a high altitude where temperatures rarely go above 80°F, you can fertilize your lawn at any time in the summer. Otherwise, you shouldn’t fertilize within 30 days of peak summer temperatures. High heat stresses grass, making it easier to burn.

Longer growing seasons in the southern U.S. require more nutrients to keep plants fueled. If your lawn is in poor shape despite proper mowing and watering practices, you may need to apply another application of fertilizer in the late summer. As a general rule, apply fertilizer every 6-8 weeks of active growth. For most lawns, that means applying in April or May, then June or July and finally in late August or early September.

Lawns struggle once temperatures reach the 80s, with cool-season grasses fading first, followed by warm season grasses. When this happens, the leaves will turn brown, but the root system is still active. When this happens, it’s best to leave your lawn alone. The grass is more susceptible to fertilizer burn, and it will deplete nutrients quickly if it’s brought out of hibernation with watering. Cool season grasses should not be fertilized until October or November when they spring back to life.

Which Fertilizer Should I Use?

Fertilizer contains salts that can dry out foliage, hampering growth and turning grass brown. Unlike hibernating grass, burnt grass will be dry and browning will start at the tips.

The faster the fertilizer acts, the more likely it will cause fertilizer burn. Organic fertilizers release nutrients slower than inorganic fertilizer, making it less likely to cause burn. Compost is even slower, but it should only be used in the summer for ground cover after aeration. Both options are pricey, but you can get similar results with controlled release and time released inorganic fertilizers.

For the best results, get a soil test a couple weeks before fertilizing so you can see exactly what your lawn needs. If you don’t have time for a test, go for a balanced mix, like 10-10-10.

Tips for Application

If your lawn has compacted soil, aerate it before applying fertilizer. The holes left behind help water and lawn chemicals penetrate the soil.

Water the ground one or two days before fertilizer application, then the day following application. This helps the fertilizer absorb into the soil, and washes off any fertilizer that landed on the grass blades.

If you’re using your Billy Goat overseeder to drop pelletized fertilizer, set the hopper to half the recommended drop rate. Go over your lawn with one pass, then again at a 90-degree angle. This gets the evenest spread, reducing the chance of over or under-fertilizing.

Grass clippings are a valuable source of nutrients, they boost thatch digestion, and they help shield grass from the heat. If you switch from bagging to mulching clippings, you should be able to reduce fertilizer use by 1/3.

Keep Your Equipment Ready for Summer

If you have a Billy Goat overseeder, dethatcher, aerator or anything else from their lineup, you can get the parts you need for it at www.billygoatparts.com. Billy Goat Parts gives you several ways to find the right part for your machine: type in the part number, check out our sections for popular parts or use our search engine to match up parts to your equipment. We can ship whatever you need for your Billy Goat or its engine to any location in the U.S. or Canada.

Posted in Uncategorized | Tagged , , | Leave a comment

Using the AGR1300H Landscape Auger

AGR1300H Landscape AugerThe AGR1300H landscape auger isn’t just a new piece of Billy Goat equipment, it’s the first in a new category of augers. The AGR’s linkage-supported auger and hydrostatic drive make it faster, easier and more accurate than any other post hole digger on the market. Here’s what you need to know to get the best performance out of this machine.

Staying Safe While Using Your Auger

For your safety, Billy Goat recommends wearing gloves, eye protection, and closed-toe shoes when using the AGR1300H.

Whether you’re in the U.S. or Canada, dial 811 before you dig. This will connect you to a state or province office that handles underground utilities. They will arrange for utility companies to come to your digging site and mark off buried lines, so can avoid hitting them with your auger.

Selecting an Auger Bit

The AGR1200H has enough power to handle bits from 2 to 18 inches in width. A 7/8 square bit adapter comes standard. Billy Goat also offers 1 ¼ square and 1 3/8 hex adapters.

When using Billy Goat bits, you have a choice of three pilot bit and tooth materials: carbide, hardface, and dirt. Carbide is the hardest material, but it’s brittle and wears the fastest. Hardface is strong enough to handle striking most underground objects. Dirt teeth and bits are the softest, but last the longest cutting through soil.

Starting

Push the throttle lever, located on the right side next to the handle, all the way forward to “fast.” Pull out the choke lever, located on the front of the engine. Finally, pull the engine’s starter handle. Once the engine is running, push in the choke lever.

Using the Hydrostatic Drive

Check the drive bypass lever on the side of the machine. This lever should be to the left with the washer inside the frame to shut off the pump bypass. If you want to move the auger with the engine off, pull the lever out and to the right. This disengages the drive, letting the wheels roll freely.

The control levers are mounted below the operator handle. Move the right lever to roll forward, and the left lever to roll back. The farther you close each lever, the faster the auger will move.

Positioning and Setup

The linkage and strut system on the AGR1300H keeps the bit plumb when digging, requiring minimal repositioning.

To position the bit, first push down on the operator handle. This releases the transport lock. If you need to drill at an angle, pull out the quick release pin on the right side of the auger bit arm and put it in the hole on top of the arm. Move the bit left or right to the correct angle, then twist the T lever on the arm to lock the bit in place.

If you’re drilling on a hill or on rough terrain, engage the parking brakes. There is one for each rear wheel. Pushing the lower pedal engages the brake, and pushing the upper handle disengages it.

Drilling

Pull the bit release pin, located between the operator handle and throttle control.

Push down on the operator handle to lower the bit.

When the end of the bit is touching the ground, use the auger control lever to engage the auger drive. Pulling the right side of the lever spins the bit clockwise, digging the bit into the soil. Keep some pressure on the operator handle while holding the auger control lever to dig a hole.

Occasionally, you will need to lift the bit to clear dirt out of the hole. With each foot of depth, lift up on the operator handle while keeping the auger control engaged.

If the auger gets stuck on a rock or other obstruction, pull the left side of the auger control handle to spin the bit counter-clockwise.

When you’re done drilling, release the pressure on the operator handle and let the struts lift the bit out of the hole.

Transport

The AGR1300H can be moved with the auger swinging freely for short distances. If you’re done drilling, put the bit in the transport position. Push the handle down, then push the transport lock lever, located on the right next to the linkage.

To stop the engine, move the throttle lever to “stop.”

Get Everything You Need for Your Billy Goat Straight from Your Browser

Billygoatparts.com is an authorized dealer for Billy Goat and Honda Engines, so you can get everything you need for your AGR1300H from one place. Our newly upgraded site is more mobile friendly while still giving you access to factory parts diagrams and information. This makes it easy to exactly what you need for your machine. We can ship whatever you need, big or small, to any address in the United States or Canada.

Posted in Uncategorized | Tagged , , | Leave a comment

Stopping Lawn Moss

stopping lawn mossWhile some people build their landscaping around moss, its presence on turf lawns is an eyesore. It’s also an indication that your soil isn’t providing the conditions your grass needs to thrive. These tips will help you get at the root of the problem.

Where Does Moss Grow?

Moss is much easier to get rid of than most weeds. Here’s why:

– The plant does not directly hamper the growth of grass, but it thrives in conditions that are poor for growing turf grasses.

– Moss has difficulty on sandy soils, but it grows fine on all other soils from loam to hard clay. It also has a hard time gathering on pebbles, hardscaping and tree roots.

– Moss spreads through rhizomes that move across the soil surface, following the path of runoff.

– These primitive plants don’t have a vascular system, so they can’t store food. Changing growing conditions even slightly can stop growth.

Soil Acidity

The most common cause of moss growth is soil acidity. Grass thrives in soil with a pH between 6 and 7. Moss grows on the surface, making pH less of an issue. However, it grows best at a pH between 5.0-5.5, both by increasing growth and hampering the growth of competing grass. You can check your soil pH using test kits available at any garden or home improvement store.

You can increase soil pH by adding lime or potassium carbonate. The best amendment will depend on the needs of your lawn.

There are several types of lime available with wildly varying strengths. For easy comparison, these adjuncts are labeled with a Calcium Carbon Equivalent (CCE) number. Pure calcium carbonate has a CCE of 100, while stronger alkaline materials have a higher number and weaker ones have a lower number. CCE ranges from 86 for slag to 179 for quicklime. Fine liming material will mix more easily with soil, making it more effective. Lime isn’t soluble, so it needs to be mixed thoroughly with the topsoil.

Potassium carbonate adds potassium (K) to the soil. It can be used to fertilize the lawn, but it shouldn’t be used if your soil already has a good nutritional balance. Unlike lime, it’s permeable, so it can be applied directly to the surface, soaking into the soil during irrigation.

Soil Compaction and Thatch

Moss thrives in wet soil, and that soil will stay wet if it’s compacted or covered in a thick layer of thatch. Heavy rainfall on compacted soil also washes away alkaline components from soil, raising pH.

As a general rule, thatch should be no more than ½ inch thick. A Billy Goat overseeder or power rake can lift the thatch layer. After removing the thatch, use an aerator to break up the surface soil and relieve the compaction.

Shade

Moss loves to grow in shade, but so do some grass varieties. Planting shade-loving grasses like St. Augustine, perennial ryegrass, poa bluegrass or tall fescue in shaded areas will increase ground cover. Don’t want to mess with spot applications of seed? Use a sun/shade seed blend when you overseed.

Water

Too much water creates the moist conditions that moss needs to thrive, while too little will stress grass, opening up areas for moss to take root. Water enough to keep the soil moist through the growing season, and keep track of precipitation with a rain gauge so you can just enough water to keep the grass healthy.

Killing Moss

Moss leaves behind spores that can establish a new foothold after you’ve killed off growths. For this reason, it’s best to address issues that encourage growth before trying to remove moss from your lawn.

The easiest method to destroy moss is to use your overseeder or power rake to scarify the surface of moss-infested areas.

Moss can be killed by applying ferrous sulfate or potassium soap. These chemicals kill moss by drying it out. Keep in mind that ferrous sulfate will stain anything it gets on, including pavement, wood and patio furniture.

Your Billy Goat Equipment Protects You Lawn. We Can Help You Protect Your Equipment

When you need to work on your Billy Goat equipment, visit www.billygoatparts.com. We’re more than an online parts warehouse: we’re an authorized dealer for Billy Goat and their partners including Honda Engines and Vanguard. Our site has factory diagrams and descriptions built into our search engine, so you can be sure you’re ordering exactly what you need. We ship to any address in the U.S. or Canada.

Posted in Uncategorized | Leave a comment

Which Billy Goat Blower is Right for You?

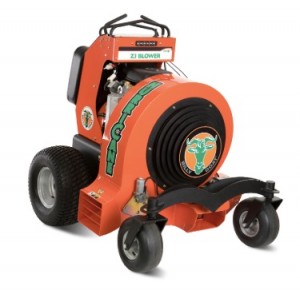
Billy Goat Hurricane Stand-On BlowersDo you need a stander or a walk-behind blower? Is it worth buying a self-propelled model? What’s the difference between CFM and MPH? Here’s what you need to know to pick the right Billy Goat debris blower for your needs.

Power: Volume, Force and Speed

Picking the right blower isn’t just a matter of getting the most power you can afford. Several factors affect performance.

Cubic Feet per Minute: CFM is a measurement of air volume. The higher the volume, the more leaves the machine will clear with each pass.

Velocity: The faster the air exits the blower, the more force it will have. The higher the airspeed, the better the blower will be at moving heavy material like wet, matted leaves.

Speed: The faster the blower moves across the grass, the faster it can move leaves. The average walking speed is 1-2 MPH while pushing a blower, increasing to 2-3 MPH with the help of self-propulsion. The Hurricane stander blowers have a transport speed of 11 MPH, but operating speeds peak at around 5-6 MPH.

Air Direction

Hurricane blowers have three discharge chutes, letting you redirect air around the machine. Once you reach the end of the yard, you can turn around, switch to the chute on the opposite side, and make another pass. Walk behind blowers have a single chute on the left side, so you need to back up for each pass, increasing job time.

All blowers have chutes that adjust up and down. This lets you skim the surface to pull up matted leaves or push against piles to gather them in one spot.

The front vent on stander blowers and discharge elbow on walk behind blowers pushes leaves forward and away from buildings. The elbow is optional on the F6 and comes standard with all other walk behind models.

The F6 is compatible with a 10-foot hose kit. This lets you direct air around bushes and other landscape features to remove hard to reach leaves. This makes it a great compliment to large blowers like the Hurricane standers.

Noise

Billy Goat’s walk behind blowers use a cast composite housing and fan. This reduces turbulence inside the fan chamber, reducing noise. At the operator’s position, noise ranges from 87 dB for the F9 to 97 dB for the F18. This is quiet enough to be well below the 70 dB at 20 feet noise limit mandated by many neighborhoods.

The Z3000 may be more powerful than the X3000, but it also keeps the engine running 800 RPM slower, decreasing noise.

Power

Dealing with thick buildup? Air exits Billy Goat’s walk-behind blowers at speeds nearing 200 MPH, making them the best choice for clearing heavy debris. However, maximum output tops out at only 2,900 CFM for the F18.

Need maximum clearing power? The Hurricane Z3000 moves air at a rate of 8,500 CFM, but the airspeed is only a little over 165 MPH. This makes it the best option for clearing wide areas.

Self-Propulsion

Billy goat offers self-propulsion versions of all of their walk-behind models except the F6. They use a direct drive system, so speed is determined by engine RPM.

Both the X3000 and Z3000 use dual hydraulic motors for maximum maneuverability and fine speed control.

Comfort

The composite housing and fan used in F-series walk behinds reduces weight by 30% compared to steel housing blowers, making them easy to push. The handle has thick padding to limit vibration, and it’s tilted to the left, positioning the operator behind the nozzle for a clear view.

If you’ve ever used a stander mower, you know what to expect from the Hurricane blowers. The operator stands on an isolated, non-skid platform, and can lean against a thick knee pad for stability. The Quad Control handle has two fixed bars surrounding the drive controls, giving the operator several hand position options for reduced fatigue.

Models

F-series walk-behind blowers are named after their approximate engine horsepower.

F6
F601V: 205cc Vanguard Engine
F601X: Briggs & Stratton XR950 Professional engine

F9
F902H: Honda engine
F902S: Subaru engine
F902SPS: Subaru engine, self-propelled
The F902S and F902SPS are being phased out, as Subaru has ended small engine production.

F10
F1002SPV: Vanguard engine
F1002SPV: Vanguard engine, self-propelled

F13
F1302H: Honda engine
F1302SPH: Honda engine, self-propelled

F18
F1802V: Vanguard engine
F1802SPV: Vanguard engine, self-propelled

Hurricane
X3000: 6,500 CFM at 3,200 RPM
Z3000: 8,500 CFM at 2,600 RPM
Both models are powered by a Vanguard V-twin.

Parts Support for Billy Goat Blowers

Picking the right blower can be confusing, but keeping it running is easy. Billygoatparts.com can ship anything you need for your equipment straight to your door, whether you live in the U.S. or Canada. We’re an authorized dealer for Billy Goat and their manufacturing partners including Honda, Vanguard and Hydro-Gear. Our site even has factory diagrams and descriptions so you can see exactly what you’re ordering for your machine.

Posted in Uncategorized | Tagged , , | Leave a comment

Staying Safe When Using Your Equipment

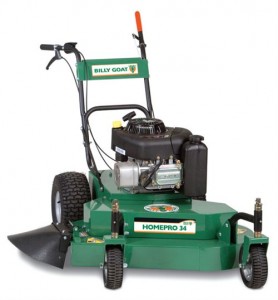
Billy Goat Home Pro MowerPersonal protective equipment (PPE) and best practices aren’t fun subjects, but it’s a necessary part of using outdoor equipment. No one wants to think about being injured on the job, and some workers will avoid equipment and safety precautions because they think it just slows them down. However, consistently using preventative safety measures can prevent long term health problems and reduce your liability.

Inspecting the Work Area

Striking obstacles can be dangerous and costly. Before you use a vacuum, aerator, sod cutter or overseeder, take some time to inspect the lawn. Remove rocks, chains, toys and other obstacles from the areas. Mark fixed obstacles, like sprinklers so you can keep your equipment away from them.

If you think your vacuum has something hard rattling around inside the impeller case, shut it down immediately. The object will either damage the machine or turn into a projectile once it leaves the chamber.

Hearing Protection

Even as outdoor equipment and small engine manufacturers work to reduce the noise of their machines, they’re still loud enough to cause hearing damage. Exposure to sounds over 85 dB for 8 hours is considered hazardous, with Billy Goat’s loudest equipment reaching 97 dB at the operator’s position. The decibel scale is logarithmic, so loudness doubles every 10 dB. At 97 dB, a machine can cause serious permanent hearing damage in just 8 hours of exposure.

The best choice for hearing protection is the type you can live with. Some people prefer muffs, while others like earplugs. Either will work as long as you use them consistently.

Eye Protection

On average, over 2,000 people injure their eyes at work each day in the U.S, and one in ten of these injuries results in the loss of at least one work day. Using the right eye protection could eliminate or reduce the severity of at least 90% of these injuries. Eye protection is part of OSHA-required personal protective equipment, but it should be part of any operator’s equipment, whether they’re a professional or homeowner.

Make sure your glasses or goggles meet the latest ANSI Z87.1 standard, currently 2015. This will be stamped somewhere near the lenses. If you see an earlier year, it’s time to get a replacement.

Vibration

Vibration damage isn’t as well researched as hearing and eye damage. However, we’re starting to understand how it affects the body, and what we need to do to reduce exposure.

Hand-arm vibration (HAV) exposure leads to carpal tunnel syndrome and other hand and finger-related injuries. Vibration limits blood flow, starving cells of nutrients and oxygen over long periods. This first shows up as hand-arm vibration syndrome (HAVS.) Nerve damage limits feeling in the hands and fingertips, and fingertips turn white from lack of blood circulation.

Billy Goat includes vibration test data in their owner’s manuals based on the ANSI S2.70-2006 measuring standard. We don’t have any vibration regulations in this country yet, but the EU requires protection for workers exposed to0.5 g of vibration force during their work shift. Wearing anti-vibration gloves reduces the transfer of vibration, preventing nerve damage and reducing operator fatigue.

Dust

Dust is more of an annoyance than a danger unless you work on construction. Cement leaves behind silica dust, which can cause permanent lung damage if inhaled. The QV Quietvac can vacuum this dust, but only if it’s dry and if the dust sock is installed.

Maintenance Safety

When working on your equipment, don’t just shut off the engine. Unplug the spark plug wires. There’s always the possibility that turning something connected to the crankshaft will turn over the engine, starting it.

Never put your hand inside a vacuum or debris loader. A jammed impeller can snap forward when it is freed, damaging or slicing off fingers. Instead, use a piece of wood to push away debris. Still stuck? Shut off the engine and disconnect the spark plugs. Unbolt the impeller housing and use tools to remove the blockage.

Debris loader chutes are heavy, and their placement almost always requires reaching overhead to get them in position. If you’re fitting a chute or extension to your loader, have someone on hand to help you move it and keep it still while bolting it down.

Maintained Equipment is Safe Equipment

Do you need to do some work on your Billy Goat Equipment? You can get everything you need from www.billygoatparts.com. We’re not just an online store: we’re an authorized dealer for Billy Goat and their manufacturing partners including Honda Engines, Tuff Torq, Briggs & Stratton and AR Pumps. Our site has built-in diagrams for machines and engines so you can see what you’re ordering. We also have sections for popular items, making it easy to order tines, air filters, and other common replacement parts. We ship across the United States or Canada.

Posted in Uncategorized | Tagged , , | Leave a comment

Controlling Weeds on Your Lawn

controlling weeds on your lawnAre you looking for a better way to combat weeds? Maybe it’s time to take a step back and consider what you can do to get your lawn to do the work for you. Your Billy Goat equipment can improve the health of the grass, increasing coverage and pushing out spaces for weeds. That means less time and expense applying herbicides and pulling out unwanted plants.

Soil Nutrition and pH

A soil test should be a regular part of your lawn care routine. It tells you exactly what your lawn lacks in nutrients and its acidity. This lets you add nutrients and amendments that will help grass thrive, and make it harder for some types of weeds to grow.

Some weeds thrive in conditions that aren’t ideal for grass. You can get some idea of what your soil needs based on the types of weeds growing in your lawn.

Poor quality soil: Dandelions, ragweed, crabgrass or clover
Fertile soil: Foxtail, chickweed, chicory, horehound, and lambsquarter
Acidic soil: Moss and hawkweed
Alkaline soil: Chicory, chickweed, and spotted spurge

Overseeding

Even the best soil won’t stop weeds if you don’t have a good ground cover. As grass matures, the blades thin out, opening up spaces for weeds to grow. Overseeding fills in these gaps by establishing new, more active grass. A well-kept lawn will need to be overseeded every three or four years to keep up with maturing grass.

There’s more to getting good coverage than just filling the hopper on your overseeder and covering your lawn. If you live in a temperate zone, you can plant both warm and cool season grasses to extend the growing season, keeping weeds out through the year. Changing up varieties also helps get solid coverage. Go for shade-loving varieties under trees and next to buildings, and sun-loving varieties out in the open.

Thatch and Soil Compaction

As with soil nutrition, some weeds thrive in areas with physical soil issues. Horsenettle, pennycress, morning glory, Bermuda grass and knotweed thrive in compacted soil. Knotweed, moss, bindweed, sedge, chickweed and creeping charlie show up in soil with poor drainage due to compaction or excess thatch. Compaction and thatch also reduce water and root penetration, thinning out grass coverage.
Leaving clippings on your lawn decreases thatch build-up. Mulched grass is easily digested by the microorganisms living in the soil. This boosts their populations, helping them break down the woody components that make up thatch. A thin layer of thatch is healthy, but if it’s over a half inch thick, it’s time to get out the dethatcher.

To get the best results when aerating, use core tines with your aerator. Unlike spiked tines, they don’t compact the soil around the hole. Cores may be unsightly, but they can be ground up by your mower after they’ve had a chance to dry out.

Stopping Seeds from Germinating

Both annual and perennial weeds release seeds, but annual weeds like crabgrass rely entirely on this strategy to spread. That means a single plant can release thousands of seeds on your lawn. You can stop this spread by picking up grass clippings when these plants go to seed. For the best results, use a lawn vacuum. It will handle wet and thick grass more effectively than your mower.

Instead of throwing out clippings, consider building a mulch pile. This will kill the seeds and let you return nutrients back to the soil, reducing the need for fertilizer.

Heat-loving microbes start taking over at 113°F and can reach as high as 170°F in two or three days. A well-managed compost pile can reach temperatures above 140°F, breaking down all organic matter. This temperature will kill black nightshade in about three hours, and most other weed seeds in about an hour. Here’s how you can get the best results:

– Alternate layers of brown (dry) material and green (wet) material.
– Adjust the mixture if it smells like rotten eggs. A good mix will smell like soil.
– Keep the pile moist, but don’t add so much water that it runs out of the pile.
– Mix the pile occasionally to break up clumps and add oxygen.

Keep Your Equipment Ready to Protect Your Lawn

Whether you live in the United States or Canada, billygoatparts.com has everything you need for your Billy Goat equipment. We have parts to repair everything from classic finish mowers to the latest equipment including stand-on blowers and augers. Looking for accessories? We ship those, too.

Posted in Uncategorized | Tagged , | Leave a comment

How Do I Find the Model Information for My Billy Goat Equipment?

Billy Goat model informationOur advanced search engine makes it easy to find the right parts: When you select the model and serial number, our site will show you parts listings and diagrams specifically for your equipment. Here’s where you can find the model and serial number on your Billy Goat equipment, as well as major components like engines and transmissions.

Identifying Your Billy Goat Equipment

Billy Goat puts the model, serial number and other important information together on a plate. The location of this plate varies depending on the type of equipment.

Lawn and Construction Vacuums
BG Series: On the left side of the frame, below the engine
KV Series: On the left side next to the bag attachment
MV Series: On the left side height-adjustment plate
VQ Series: On the rear left of the impeller housing
Blowers
F6, F9, F13 and F18: On the right side of the frame directly below the engine
FZ: On the rear right side of the impeller housing
Hurricane: On the left side of the engine deck, close to the impeller.

Mowers and Brushcutters
FM and HP Finish mowers: Behind the right rear tire
HW High Weed: Next to the left drive wheel, directly below the engine
BC Outback Brushcutter: On the lower right corner of the frame

Lawn Care Equipment
Aerators and OS Series Overseeders: Rear left of the frame
PR and CR Power Rakes: Rear right of the frame

Sod Cutters
SC: On the left side of the frame, next to the engine
All other models: On the frame below the handles

Aerators
AE: On the rear left of the frame
All other models: On the left side of the housing
Truck Loaders
TR and HTR: To the right of the engine
QL: Below and in front of the engine
DL12, DL13, DL18: On the rear right side below the engine
DL25: On the rear of the housing to the left of the engine

Auger
AGR1300H: On the left side of the frame near the front of the auger.

Identifying Engines

Honda
The model name is printed on the engine cover or the recoil starter cover. It always starts with the letter “G.” The serial number is stamped into the side of the engine. The serial number always has a 4-5 letter prefix followed by a dash and a 7 digit number.

Briggs & Stratton and Vanguard
The model, type and code are always etched in that order on a metal part of the engine. Depending on the model, these numbers are either next to the muffler, on a valve cover, or on the top front of the engine. You may need to remove the engine cover to see them.

Subaru
The model and serial number are printed on the side of the flywheel housing, just opposite of the dipstick.

Kohler

The model and serial number can be found on a large silver label on the engine cover.

Identifying Other Components

Hydro-Gear Hydrostatic Transmissions
The model information is printed on a label located on the transaxle case. The top left number is the model, the bottom left number is the serial, and the top right number is used for cross-referencing.

CAT Pumps
The model number is printed on the metal tag on top of the pump. The serial number is printed on the bottom of the case.

AR Pumps
The model label is on the top of the pump. Look for a number next to “Nr.” on the model tag. The first three numbers are the pump series. The rest of the numbers make up the serial number. The following four numbers are the week and year of production. The next four numbers make up the progressive number, the production number for that week. On newer models, there are 5 more numbers for the manufacturing code.

We Make It Easy to Fix Your Equipment

Billygoatparts.com is an authorized dealer for Billy Goat and their manufacturing partners, which means you can get everything for your equipment from one place. We give you three easy ways to find the right part: by the part number, the model series or the equipment model and serial number. We can ship whatever you need to any address in the USA or Canada.

Posted in Uncategorized | Tagged , , | Leave a comment

Using the AET 48/72” Towable Aerator

AET 48/72” Towable AeratorNo matter the size of lawn you’re aerating, the AET 48/72 has you covered. Its modular design allows sections to be bolted together to get a working width ranging from 24 and 72 inches. Unlike drum aerators, it can make turns with the reel-mounted tines lowered without damaging the turf. Here’s what you need to know to set up one of these trailers and get the most from it.

Assembling Your Aerator

1. Attach the frames together with the 3/8 inch lock nuts, washers and cap screws included in the hardware bag. The aerator can be set up using a single frame for a total working width of 24 inches, both included frames for a total width of 48 inches or three frames with the AET expansion kit for a total width of 72 inches.
2. Grease the shafts on the wheel assemblies, then slide the assemblies onto the collars on the sides of the frames. Lock them in place using the snap rings.
3. Attach the hitch assembly and braces to the frame using 3/8 inch lock nuts, washers, spacers and cap screws.
4. Use the pin and hitch pin to connect the aerator to a tow vehicle.
5. Place water tanks or weights in the designated positions on top of the boxed sections of the frame and secure them with a tie-down strap. The water jugs hold 5 gallons of water for a total weight of 40 lbs. Two jugs can be placed on each frame section. Bricks can be used to add weight as long as the total weight on each frame section does not exceed 80 lbs.
6. Place the lift rod in the notches in the frame with the pin sitting between two frame sections.

Engaging the Tines and Adjusting Tine Height

Either push down on the wheel guard with your foot or slide the lift rod into the square slot and push to release the pressure on the pin. Pull the pin out, then move the wheel up or down. Reinstall the pin. Repeat these steps on the other wheel so that the height is the same on both sides. If one wheel is up and the other is down, it may damage the aerator.

To engage the tines, tow the aerator to the work area, then raise both wheels to push the tines into the soil. Tine penetration depends on the weight on the aerator, not the height of the tines.

This aerator can be turned with the tines lowered. When lining up for the next pass, move slowly and avoid tight turns. When you’re ready to transport the aerator, lower the wheels to lift the tines out of the soil.

Maintenance Schedule

Before each use: Clean the aerator. Clogged tines will have trouble penetrating the soil.
Every 25 hours: Check for loose, worn or damaged parts and repair or replace as needed.
Every 50 hours: Check the reel nut torque and grease the bearings.

Individual Tine Replacement

1. Raise the tines and chock the wheels.
2. Loosen the outermost nut and carriage bolt holding the tine to the reel, followed by the innermost nut and carriage bolt. Do not remove these parts.
3. Use a pry bar to push the tine plates apart. Remove the tine.
4. Slide in the new tine. Tighten down the innermost nut and carriage bolt, then the outermost nut and bolt.

Tine Reel Removal and Row Replacement

The tine reels are sharp. Always wear a pair of thick gloves when handling the reels.

1. Raise the tines and chock the wheels.
2. Support the tine reel and remove the four nuts and bolts holding down the tine reel bearings.
3. Lift the reel up and to the side to free it from the drive chain.
4. Remove the cotter pin and nut at the end of the tine reel shaft.
5. Remove the tine rows and spacers, keeping them in order for reassembly.
6. Replace any damaged parts, then reassemble the reel.
7. Tighten the nut at the end of the shaft to 100 ft-lbs. Push the tine rows with your hand to ensure they’re tight. Install a new cotter pin.
8. Slide the tine reel back into the frame and fit the chain. Reinstall the reel bearings.

Bearing Lubrication

With the tines lifted and the wheels chocked, go around the aerator and apply lithium grease to the bearings using a grease gun. Wipe off any excess grease that comes out of the grease fitting or the sides of the bearings.

Get the Quality Parts You Need for Your Billy Goat

When you need anything for your aerator, visit www.billygoatparts.com. As an authorized Billy Goat dealer, we’re able to ship OEM parts to your door whether you live in the U.S. or Canada. We make it easy to find the right part: just select your model and serial number, and our site will show you factory diagrams and descriptions for your machine.

Posted in Uncategorized | Tagged , , | Leave a comment

Using the AET Series 36/60” Towable Aerator

AET Series 36/60” Towable AeratorWith its folding wings, swiveling tine wheels and compatibility with ball and three-point hitches, the AET Series 36/60 is one of the most flexible towable aerators on the market. These tips will help you get the best performance from this aerator.

Tine Locking

The tine wheels on the AET 36/60 attach to swiveling arms. When these arms are unlocked, the trailer can turn with the tines lowered without tearing up the turf.

To unlock the tines, remove the lock pins from each arm. Once the trailer is lined up for the next pass, reinstall the pins to keep the tines tracking straight. The tines must be locked in place before towing.

Attaching the Aerator

Connecting to a Three-Point Hitch:
Slide the inner and outer tow bar sections together and swing the bar upright against the aerator. Insert a Clevis pin through the middle of the bar and through the bracket on the aerator, then lock it in place with a cotter pin. Install another Clevis pin and cotter pin on the hole directly behind the base of the tow bar.

Connect the hitch links using Clevis pins and cotter pins. The two lower links connect to the brackets on the lower corners of the aerator frame. The upper link connects to the bracket on the tow bar.

Connecting to a Single Hitch:

Remove the Clevis pins from the tow bar and lower the tow bar. Slide the outer section out until you have the right tow bar length for your equipment. Install Clevis pins and cotter pins through the back end of the hitch and in the middle through both the inner and outer tow bar sections.

Folding the Wings

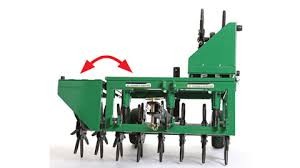
This aerator has three different working widths. Tilting down both wings gives the AET 36/60 a total width of 60 inches. Either wing can be folded up over the center of the trailer to decrease aerating width to 48 inches, and both can be flipped up for an aerating width of 36 inches. Having both wings raised increases the weight on the active tines for deeper penetration on hard soil.

If you need to use the aerator with one or both wings extended, you may need additional weight. To do this, place cinder blocks or water jugs on the top of the aerator.

Preparing the Soil for Aeration

1. Mow the grass to its normal height.

2. Thoroughly water the soil a day before it will be aerated. The soil should be moist, but not muddy.

3. Remove obstacles from the lawn including rocks, wire, chain, string and anything else that can catch on the tines. Mark any fixed objects like buried cables, sprinkler heads, and water valves, so you can steer around them.

Raising and Lowering the Tines

Tine penetration depends more on soil condition and weight, not the tine position. The tines won’t penetrate as well if the soil is dry, regardless of tine height.

To set the tine depth, tow the aerator to the area that will be aerated. Rotate the crank on the front of the trailer to drop the tines into the soil. Turn the crank on the back of the trailer to lower or raise the caster to match the height of the front wheels.

When parking, keep the tines raised. Never park this trailer on a slope.

Aerating Hills

Do not use the AET 36/60 on slopes steeper than 15 degrees. When crossing hills, towing the trailer at a 45-degree angle will make it more stable.

Maintenance

– Thoroughly clean the trailer after each use, paying close attention to the tines.
– Inspect the aerator for loose, worn or damaged parts after every 10 hours of use.
– Great the wheel bearings and tine hubs every 50 hours.

Tine Replacement

Tines can be replaced individually without causing problems with older, worn tines. To replace a tine, unscrew the nut and bolt holding it on, then fit a new tine, nut, and bolt in its place.

Billy Goat redesigned the tines for the AET 36/60 and issued a new part number for the updated kit. These new tines are compatible with all versions of this aerator.

Keep Your Aerator at Peak Performance

Do you need new tines for your AET 36/60? Did you lose a Clevis pin? Are the bearings wearing out? No matter what you need, www.billygoatparts.com can ship it to your door. Our site can show you factory parts diagrams and descriptions for your model so you can be sure you’re ordering exactly what you want. We ship across the United States and Canada.
Posted in Uncategorized | Tagged , , | Leave a comment