
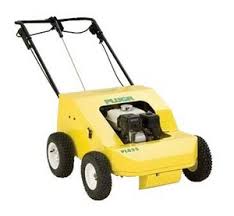
 Just because your equipment is getting older doesn’t mean it’s bound for the scrap heap. While the original yellow PLUGR aerators were replaced by NextGen models years ago, there are still plenty of these in commercial service today. How can you keep yours running? Here’s what you need to know to perform common repairs on PL410 and PL855 aerators.
PL410 Belt and Bearing Replacement
Tools:
Phillips head screwdriver
½ inch and 9/16 open-end wrenches
Ratcheting wrench with ½, 7/16 and 9/16 sockets
Allen wrenches
High strength thread locker
Pry bar
1. Loosen the straps and the screw on the top cover. Tilt the cover forward and remove.
2. Unbolt and remove the front and back covers.
3. Remove the 8 bolts that hold the crankshaft to the side plates. This also loosens the retractor bracket.
4. Slide the drive belt off of the idler pulley, engine pulley, and crankshaft pulley in that order. Lift the crankshaft out of the machine.
At this point, you can replace the belt. Reassemble your PLUGR by following the previous steps in reverse order.
5. Loosen the set screws with an Allen wrench. Use the pry bar to push between the crankshaft counterweight and bearing plate to slide the bearing off of the crankshaft.
6. Remove the cartridge bearing from the plate using an Allen wrench and a regular wrench.
7. Reassemble in reverse order. Apply thread locker to the bearing set screw, and make sure the zerks point up for easy servicing. Use the longest bolts for the holes that go through the retractor plate. Leave these bolts loose enough to let the plate move.
PL855 Belt Replacement
Tools:
½ and 9/16 inch wrenches
A ratchet wrench with ½ and 9/16 inch sockets
Have someone on hand to help you lift the crankshaft. During reassembly, a set of needle nose pliers can help hold nuts in place while you’re getting them started.
1. Remove the rubber latches on the sides of the machine. Remove the top cover.
2. Slide the front cover forward and remove it.
3. Remove the tensioner bracket on the top right of the machine.
4. Remove the four bolts holding the engine onto the base.
5. Loosen the self-tightener for the transaxle belt. This is the spring and bolt on the front of the machine.
6. Slide the engine to the side. Slide the belts off of the drive pulleys.
You can now remove the transaxle belt. If it’s the only belt that needs replacement, follow the previous steps in reverse order to put your PLUGR back together. Bolt down the engine before sliding the belt over all the pulleys. You may need to slide the idler pulley out, then over the belt to get the belt around the pulleys.
7. Remove the pin from the retractor rod.
8. Remove the 4 bolts that hold the crankshaft onto the sides of the machine. Leave one bolt in place until you’re ready to lift out the crankshaft.
9. With the crankshaft free, you can replace the belts. Reassemble the machine by following the previous steps in reverse order. Make sure the zerks on the tine rods are facing up. When positioning the engine, push it all the way forward. Position the large pulley so that it’s parallel with the slot in the base of the aerator.
PL855 Clutch and Throttle Cable Adjustment
Tools:
3/8 inch wrench
3/8 inch nut driver
1. Hold the adjustment screw while loosening the top nut.
2. Lift the cable slightly. Spin the spool to adjust the cable position.
3. Tighten the top nut.
The clutch cable adjustment is correct if engaging the clutch causes the tines to pull the machine forward without the hydrostatic drive engaged.
Tine Replacement (All Models)
Tools:
15/16 and 7/8 inch wrenches
Medium strength thread locker
Wood block
1. Lift up the rear of the machine and support it with the wood block.
2. Loosen the jam nut. Unscrew the tine.
3. Apply thread locker to the new tine’s threads.
4. Screw the new tine into the rod until it’s the same length as the other tines. Spinning the tine 4 times raises it by about ½ inch. If you’re installing a hollow tine, turn the open side of the tine toward the rear of the machine.
5. Tighten the jam nut.
Need Parts for Your Old Billy Goat?
Billy Goat Parts is an authorized dealer for Billy Goat and their manufacturing partners, including Honda Engines. That means we have everything to fix your aerator, whether you have the latest NextGen or an older model like the PL855. Our site has factory parts diagrams available, making it easy to find exactly what you need for your aerator. To order, visit www.billygoatparts.com. We can ship what you need to any address in the U.S. or Canada.
