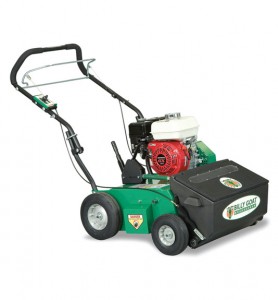
Is your overseeder not moving or cutting soil like it should? Whether you own an OS800 or the recently updated OS500, this guide will help you keep the belts and blades in top condition so you can get the performance you expect from your Billy Goat equipment.
Maintenance Schedule
Every Use: Check the oil and clean the air filter.
Every 25 hours of operation: Inspect the overseeder for loose or damaged parts, inspect the belt, grease the reel bearings and oil the height adjustment linkage
Before attempting any repairs, make sure the engine is cool and disconnect the spark plug wire to prevent accidental starts. If the engine has a fuel valve, make sure it’s closed.
Inspecting Flail and Slicing Blades
Lean the overseeder back onto its handles and secure it by tying the handles down or supporting the wheels. Inspect the blades for wear. Replace any bent or cracked blades immediately.
If a flail blade is less than 3.25 inches long or a slicing blade is less than three inches long on the OS500, it needs to be replaced. If a slicing blade on the OS900 is less than 6.75 inches long, it needs to be replaced. Billy Goat recommends replacing all blades at once.
Replacing the Drive Belt (OS500)
For this repair, you’ll need a ½ inch socket, a ratcheting wrench and a socket extension.
1. Lean the overseeder back onto its handles and secure it by tying the handles down or supporting the wheels.
2. Remove the 7 lock nuts holding the belt and shaft guards to the overseeder. The height adjust lever needs to be lowered to reach some of these nuts. Remove the guards.
3. Walk the old drive belt out of the groove on the reel pulley and pull it out. Slide the new belt over the pulleys.
4. To adjust the new belt, pull the bail to the engaged position and measure the extension of the idler pulley spring. Adjust the clutch cable until the spring stretches 3/4-1 inch when the bail is engaged.
5. Reinstall the belt guard.
Rotating the Flail Blade (OS500)
The flail blades have cutting surface on both the front and back. Rotating these blades periodically spreads out wear for a longer blade life. To do this, you’ll need ½ inch and 9/16 inch sockets, a ratcheting wrench and a socket extension.
1. Follow the directions in “Replacing the Drive Belt” to remove the guards and drive belt.
2. Remove the bearings by unscrewing the four lock nuts and washers holding them to the frame.
3. Slide the reel down and out of the machine.
4. Slide the capscrew, lock washer, reel pulley, key and spacer off of the reel. Flip the reel around and install these parts on the other reel end.
5. Reassemble the reel and belts by following the previous instructions in reverse order.
Reel Belt Replacement (OS900 Series)
1. Remove the two screws holding the belt guard in place.
2. Walk the old belt out of the pulley while rotating the reel to push it out.
3. Walk the new belt over the pulley while rotating the reel to draw it on.
4. Push the reel drive lever and make sure the idler pulley puts enough tension on the belt to fully engage the blades and keep the belt tight against the other pulleys. If it’s loose, adjust the drive lever cable.
5. Reinstall the belt cover.
Replacing the Engine and Mule Belts (OS900)
1. Lift up the overseeder so that the wheels are off of the ground.
2. Remove the rear right tire followed by the spring connecting the housing and the frame.
3. Remove the belt guard by taking out the three screws holding it onto the overseeder.
4. Remove the mule guard by taking out the four screws holding it onto the overseeder.
5. Pull the mule belt away from the drive pulley, down the mule shaft and around the mule pulley.
You can follow steps 1-5 to install a new mule belt. If you’re replacing the engine belt, follow steps 6-11:
6. Move the mule assembly away from the overseeder.
7. Unscrew the carriage bolt holding the right bearing holding up the jackshaft.
8. Remove the three screws holding on the jackshaft belt guard. Remove the guard.
9. Slide the old belt away from the crankshaft pulley, then over the jackshaft and mule drive pulley. Install the new belt, sliding it over the mule drive pulley, jackshaft and crankshaft pulley.
10. Reinstall the mule drive and belt. Engage the drive lever and check the drive belt tension. If it’s loose, the idler arm spring needs to be replaced.
11. Reassemble by following the previous instructions in reverse order.
Get the Parts You Need to Keep Your Equipment Running
Billygoatparts.com is an authorized dealer for Billy Goat, Honda Engines and Subaru Power, so you can get parts for your entire overseeder from one place. We ship across the USA and Canada.

