Servicing Your Overseeder

Billy Goat Overseeder

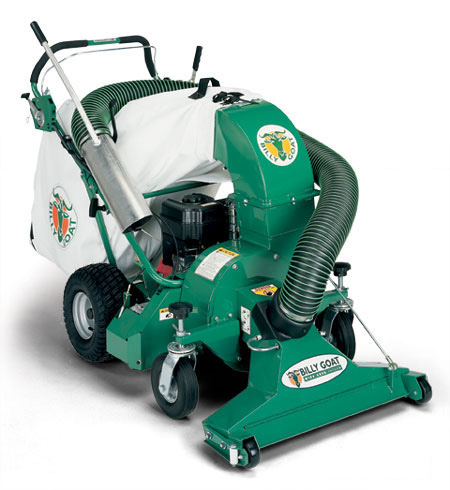
Is your overseeder not moving or cutting soil like it should? Whether you own an OS800 or the recently updated OS500, this guide will help you keep the belts and blades in top condition so you can get the performance you expect from your Billy Goat equipment.

Maintenance Schedule

Every Use: Check the oil and clean the air filter.
Every 25 hours of operation: Inspect the overseeder for loose or damaged parts, inspect the belt, grease the reel bearings and oil the height adjustment linkage

Before attempting any repairs, make sure the engine is cool and disconnect the spark plug wire to prevent accidental starts. If the engine has a fuel valve, make sure it’s closed.

Inspecting Flail and Slicing Blades

Lean the overseeder back onto its handles and secure it by tying the handles down or supporting the wheels. Inspect the blades for wear. Replace any bent or cracked blades immediately.

If a flail blade is less than 3.25 inches long or a slicing blade is less than three inches long on the OS500, it needs to be replaced. If a slicing blade on the OS900 is less than 6.75 inches long, it needs to be replaced. Billy Goat recommends replacing all blades at once.

Replacing the Drive Belt (OS500)

For this repair, you’ll need a ½ inch socket, a ratcheting wrench and a socket extension.

1. Lean the overseeder back onto its handles and secure it by tying the handles down or supporting the wheels.
2. Remove the 7 lock nuts holding the belt and shaft guards to the overseeder. The height adjust lever needs to be lowered to reach some of these nuts. Remove the guards.
3. Walk the old drive belt out of the groove on the reel pulley and pull it out. Slide the new belt over the pulleys.
4. To adjust the new belt, pull the bail to the engaged position and measure the extension of the idler pulley spring. Adjust the clutch cable until the spring stretches 3/4-1 inch when the bail is engaged.
5. Reinstall the belt guard.

Rotating the Flail Blade (OS500)

The flail blades have cutting surface on both the front and back. Rotating these blades periodically spreads out wear for a longer blade life. To do this, you’ll need ½ inch and 9/16 inch sockets, a ratcheting wrench and a socket extension.

1. Follow the directions in “Replacing the Drive Belt” to remove the guards and drive belt.
2. Remove the bearings by unscrewing the four lock nuts and washers holding them to the frame.
3. Slide the reel down and out of the machine.
4. Slide the capscrew, lock washer, reel pulley, key and spacer off of the reel. Flip the reel around and install these parts on the other reel end.
5. Reassemble the reel and belts by following the previous instructions in reverse order.

Reel Belt Replacement (OS900 Series)

1. Remove the two screws holding the belt guard in place.
2. Walk the old belt out of the pulley while rotating the reel to push it out.
3. Walk the new belt over the pulley while rotating the reel to draw it on.
4. Push the reel drive lever and make sure the idler pulley puts enough tension on the belt to fully engage the blades and keep the belt tight against the other pulleys. If it’s loose, adjust the drive lever cable.
5. Reinstall the belt cover.

Replacing the Engine and Mule Belts (OS900)

1. Lift up the overseeder so that the wheels are off of the ground.
2. Remove the rear right tire followed by the spring connecting the housing and the frame.
3. Remove the belt guard by taking out the three screws holding it onto the overseeder.
4. Remove the mule guard by taking out the four screws holding it onto the overseeder.
5. Pull the mule belt away from the drive pulley, down the mule shaft and around the mule pulley.

You can follow steps 1-5 to install a new mule belt. If you’re replacing the engine belt, follow steps 6-11:

6. Move the mule assembly away from the overseeder.
7. Unscrew the carriage bolt holding the right bearing holding up the jackshaft.
8. Remove the three screws holding on the jackshaft belt guard. Remove the guard.
9. Slide the old belt away from the crankshaft pulley, then over the jackshaft and mule drive pulley. Install the new belt, sliding it over the mule drive pulley, jackshaft and crankshaft pulley.
10. Reinstall the mule drive and belt. Engage the drive lever and check the drive belt tension. If it’s loose, the idler arm spring needs to be replaced.
11. Reassemble by following the previous instructions in reverse order.

Get the Parts You Need to Keep Your Equipment Running

Billygoatparts.com is an authorized dealer for Billy Goat, Honda Engines and Subaru Power, so you can get parts for your entire overseeder from one place. We ship across the USA and Canada.

Posted in Uncategorized | Tagged , , | Leave a comment

Billy Goat Overseeders

Preparing Your Overseeder For Spring

With fall underway, it’s time to lay down cool season grasses to keep lawns looking lush. Whether you’re a homeowner, professional landscaper or equipment renter, Billy Goat has an overseeder to help you get the job done.

OS552

Built for landscapers and rental customers, the OS500 series is lightweight and simple to operate. Billy Goat’s Auto Drop system engages the seeder and the blades together, so it only lays down seed when the machine is being used. Instructions are printed on the lid of the seed box for setting drop rates, making it easy for owners and renters to lay down the right amount of seed. Its 25 lb. capacity is enough to seed ¼ to ½ an acre of bare soil or overseed about one acre of turf.

The wheels have large pneumatic tires and are mounted on ball bearings, reducing the shocks that reach the handle and making this machine easier to push. When it’s time to store or transport this overseeder, the handle can be folded down without having to use tools or unscrew wing nuts. Maintenance is easy, too. The steel drive pulleys and belt are mounted on the side of the machine under a single steel guard, making them easy to access, and the depth adjustment is infinite to spread wear across the blades for a longer service life. Total reel width is 20 inches.

Unless you’re seeding bare soil, the lawn needs to be dethatched to get maximum contact between the dirt and the seeds. Instead of buying a separate dethatcher, a spring tine reel can be added, letting you do every step of overseeding with one machine.

Billy Goat offers this overseeder with a choice of either a Briggs & Stratton Vanguard or Honda GX engine.

PR550

This model is listed as a power rake, but for all intents and purposes, it’s an OS500 without the seed box. Kits are available to turn it into an overseeder or a dethatcher. Without these add-ons, this rake only weighs around 100 lbs. This makes it a great compliment to an overseeder, allowing landscapers to clear thatch ahead of seeding.

OS901

Need to cover a lot of ground with less effort? The OS900 series comes with a hydrostatic drive, increasing the amount of turf that can be seeded per hour while being comfortable enough to use all day long.

The OS 900 has been around a while, but new features make this model easier to use than before. This starts with a new blade design that lasts longer thanks to an improved coating process, and a new blade profile that reduces thatch pickup. Like the OS552, it has infinite height adjustment, which is now set using a foot-actuated adjuster for quick changes when transitioning between turf areas. The slicing reel is built into floating mounts for maximum soil contact on lawn contours. This reel is 22 inches wide, so letting the OS900 cut and seed a slightly wider area than the OS552 with each pass.

The agitator at the bottom of the 30 lb. seed box is driven by the front axle, keeping it separate from the drive system while removing the maintenance and slippage issues of belt and tire-on-tire drive systems. Like the OS500 series, it has an auto drop system that starts and stops with reel engagement. Dual belts increase drive efficiency and belt life.

The OS900 is currently available with a Honda GX or a Subaru EX engine. The Subaru version may be pulled from production soon as Subaru has shut down their small engine division, but parts and support have already been transferred to an outside company.

Warranty

Billy Goat covers their overseeders for one year of commercial use. Honda and Vanguard engines are covered by their manufacturers for three years, while Industrial Power Products guarantees the Subaru EX engine for 5 years.

Getting Parts and Accessories for Billy Goat Overseeders

Billygoatparts.com is an authorized dealer for Billy Goat as well as Honda Engines and Subaru Power, so we’re able to carry everything you need to maintain or upgrade your overseeder. Select your model and serial number, and our site will show you parts compatible with your equipment listed with both factory descriptions and parts diagrams. We ship across the U.S. and Canada.

Posted in Uncategorized | Tagged , , | Leave a comment

Installing a Hose Kit on Your Lawn Vacuum

Vacuum

A lawn vacuum can make quick work of leaf cleanup on lawns, but it can also be handy for cleaning out landscape features, fences and bushes by using a hose attachment. Billy Goat includes a hose with KV, MV and QV vacuums, but you can also add one to your LB or TKV vacuum using their kit. Here’s what you need to do to install it.

Before You Begin

Disconnect the spark plug to prevent an accidental start, and chock the wheels to keep the vacuum from rolling.

You will need three tools needed to install this kit:

— A 5/16 inch nut driver or socket and ratchet
— Two 7/16 inch wrenches

Make sure your kit includes the following:

— A hose with a handle and metal nozzle attached to one end
— Two hose clamps
— A plastic coupler
— A hose holder
— A blocking plate
— A hose nozzle bracket

This kit may seem light on fasteners, but that’s because it’s designed to reuse hardware already installed on your vacuum.

Installing the Nozzle Wear Guards

Raise the nozzle to its highest position.

The left and right sides of the nozzle each have a pair of bolts, nuts, and washers holding on the reinforcement bracket. Remove these parts.

Push the included wear guards into place on the sides of the nozzle with the bolt holes going inside the nozzle lip. Reinstall the bolts, nuts, and washers.

Installing the Hose Nozzle Bracket

The bracket is universal, but its position will vary depending on your model and engine. Billy Goat builds the top of the vacuum with two extra long screws designed to clamp down on the deck while holding the bracket. These screws are always on the muffler side of the engine. Here’s where you’ll find them.

All TKV vacuums: One screw is directly to the left of the engine, while the other is behind and to the left of the engine.

Honda: One screw is directly to the left of the engine, while the second screw is behind the first screw.

Briggs & Stratton: One screw is directly to the right of the engine, while the other is behind and to the right of the engine.

To install, remove these screws, set the bracket over the holes, and put the screws back into the vacuum.

Installing the Hose Holder

The ends of this bracket fit into a pair of holes mid-way up the handle. Insert one side of the bracket into one of the holes, then pull the bracket over until the other end slides into the handle. The top edge of the bracket should face away from the bag.

Installing the Hose

Slide the two hose clamps onto the end of the hose. Slide the hose over the side of the coupler that doesn’t have any pins. Tighten down the hose clamps over the hose and coupler using the nut driver.

Remove the screw on the top of the hose opening plug, located on the front of the vacuum nozzle. Slide off the plug. Slide the coupler into the hose opening at an angle, lining up the outer pin with the slot. Once the front of the coupler is in, rotate it to line up the second pin with the slot and push it in. Once the coupler sits flush with the opening, it’s secure.

Wrapping the Hose

Run the hose around the intake side of the engine and over the hose holder. Slide the metal nozzle onto the hose nozzle bracket. If everything is in the right place, the hose should not come in contact with the exhaust, which can melt the hose liner.

Using the Blocker Plate

This plate slides into the slots on the nozzle wear guards, blocking the vacuum inlet. This redirects air through the hose. Never install or remove this plate with the engine on. The plate can be snapped onto the hose holding bar when not in use.

Get Everything You Need for Your Billy Goat Straight From Your Browser

Billygoatparts.com is a certified Billy Goat dealer, so we carry the OEM parts and accessories you need for your equipment including hose kits for their vacuums. Browse our accessories section to find what you need, or use our search engine to find parts and accessories designed to fit your specific model. We can ship your order anywhere in the U.S. or Canada.

Posted in Uncategorized | Tagged , , | Leave a comment

Fixing the Tires and Wheels on Your Equipment

New Billy Goat F10 Force II Wheeled Blower

Between flats, flat spots and squeaks, there’s a lot that can happen to your Billy Goat’s wheels and tires to keep you from getting your work done. How can you solve these problems, and what can you do to prevent them?

Protecting Your Wheels and Tires

When storing your equipment, place it on top of a sheet of cardboard. This reduces heat transfer between the tire and the cement that can damage the rubber.

Check the tire pressure at least once a week and air up tires monthly while your equipment is in storage. The recommended pressure printed on the sidewall.

Keep bearings and axles lubricated with quality waterproof grease. Even if the wheel rolls smoothly, replacing the grease each season will force out dirt that can wear down contact surfaces.

Maintenance on Solid, Semi-Pneumatic and Foam-Filled Tires

These tires are maintenance free. Both foam-filled and semi-pneumatic tires have air in them, but this air is in sealed chambers, so they can’t leak unless they’re damaged. Hate airing up your pneumatic tires? Billy Goat offers foam-filled replacements for some small tires, including those used on the front of their Force blowers.

Finding a Leak

Air up the tire and spray some soapy water on it. The leak will form soap bubbles.

If there’s a small leak is in the tire tread, it can be repaired using a flat kit. Remove any debris stuck in the leak, then use the reamer tool to create a smooth opening. Insert the plug using the included tool and cut off the end so it sits flush with the tire. Some kits include a glue that needs to be applied before inserting the plug.

If the leak is in the sidewall or it’s too big to be sealed with a patch, the tire should be replaced.

If the leak is coming from inside the valve stem, replace the core. Let the air out of the tire, then use a core tool to unscrew the old valve stem core and replace it with a new one. If the leak is coming from the outside of the valve stem, the stem needs to be replaced. Separate the tire from the bead, then cut away the back side of the old stem to remove it from the rim. Lubricate the new stem with some soapy water and use a four-way valve tool to pull the stem through the rim.

Removing Drive Wheels

Start by lifting your equipment high enough to raise the tire off of the ground.

Caster and non-drive wheels are usually held on with a bolt and nut. Pay attention to the placement of any washers when reinstalling the wheel.

Most drive wheels are held on using a cotter pin. Bend the ends of the pin down and pull the pin out. The wheel should now slide off of the axle. If the wheel doesn’t want to budge, apply a penetrating oil and rock the wheel left and right as you pull. When reinstalling the wheel, make sure the key on the inside of the rim lines up with the keyway on the axle. To make removal and installation easier in the future, apply some anti-seize to the shaft.

Removing a Tire from the Rim

Remove the wheel from the equipment. Set the wheel on its side on a flat work surface and let the air out of the tire.

Push down hard on the sidewalls to separate the bead from the rim. Pull one of the beads up past the rim. You can use a pry bar or a flathead screwdriver, but it will be easier on yourself and the wheel if you use a set of tire levers. Hold part of the bead up with one lever while working on the rest of the bead with the other lever. Once you have about half of the bead above the rim, the rest should slide up off of the wheel.

Pull the tire up toward the bead you just pulled and force it off of the rim.

Installing a Pneumatic Tire

Rub some soapy water on the beads. This will help them slip over the rim and make it easier to find the leaks if they don’t want to seat. Work the beads over the rim so that the tire is on the wheel. Air up the tire to seat the beads against the rim. If you’re having trouble getting the bead to mate with the rim, wrap a ratchet strap around the tire tread and tighten it down. As it squeezes on the tire, the sidewalls will be pushed out.

Get the Parts You Need to Keep Your Equipment Moving

BillyGoatParts.com is a certified Billy Goat dealer, letting us ship OEM parts for your equipment to any address in the U.S. or Canada. Browse our Wheels & Wheel Parts section or use our search engine to see parts for your specific model, complete with factory diagrams and descriptions.

Posted in Uncategorized | Tagged , , | Leave a comment

Selecting the Right Detergent for Your Pressure Washer

Cleaning Buildings with a Pressure Washer Billy Goat

How can you get your Billy Goat power washer to clean effectively? By using the right cleaning chemicals. Which chemicals work best? That depends on what you’re cleaning and where. Here’s what you need to know to find the right soap or detergent for the job.

What Not to Use in Your Pressure Washer

CAT and AR pumps are not designed to handle strong acids and bases including muriatic acid and bleach.

Only use cleaning agents formulated specifically for pressure washers. Other cleaners may be too thick to be drawn through the detergent system, they may foam excessively, or they may be ineffective when applied under pressure.

How Do Cleaning Chemicals Work?

Soaps and detergents are molecules that have one end that attaches to dirt and another that attaches to water. When applied, they latch onto dirt, creating a structure called a “micelle.” The water-bonding ends are facing out from this micelle, allowing the dirt to be removed by being rinsed off.

What’s the Difference Between a Soap and a Detergent?

A soap is a natural product made by reacting fats and oils with a salt. Soaps are always biodegradable, but they can react with calcium in hard water. This creates calcium carbonate, which can leave a film on the surface being cleaned.

Detergents are purely chemical derived and can be formulated for specific types of dirt or to work with different surfaces. Due to their chemical makeup, they don’t react with hard water. These chemicals may or may not be biodegradable.

Most cleaning chemicals designed for pressure washers use some combination of soap and detergent.

What Else Goes into a Cleaner?

Along with soaps and detergents, other chemicals are added to improve performance:

— Vinegar is good for cleaning flat surfaces and acts as a chemical polish for brass and bronze.
— Ammonia cleans glass and stainless steel.
— Citric acid removes stains from concrete and wood.
— Surfactants and other chemicals let the detergent stick to the surface being cleaned so it can react with the dirt.

Do I Need a Specialty Cleaner?

If it’s available, it will do the job better. The active ingredients will bond better with the type of dirt being removed, while other ingredients help the cleaning chemicals reach the dirt, whether it’s on a slick surface or embedded in a porous material.

Should I Get a Residential or Professional Formula?

The main difference between residential and professional chemicals are how they’re packaged. Residential formulas are pre-diluted so they can be used directly by the pressure washer. Professional formulas are full strength and need to be mixed with water to get the right cleaning power and flow to work with the pressure washer.

All residential chemicals should be safe for plants and pets, but some professional chemicals may not
When in doubt, check the Material Safety Data Sheet (MSDS) and the product label.

Does it Need to Be Biodegradable?

Storm drains connect directly to waterways, so many cities and towns have laws restricting the use of non-biodegradable cleaning chemicals when they can reach these drains. Even if you aren’t required to use them, biodegradable cleaners are always a good choice for the environment.

Getting Better Performance from Your Detergent

If you aren’t using the low-pressure soap tip and the detergent inlet hose isn’t fully submerged in the detergent, your pressure washer will only spray water. Check these areas when your pressure washer doesn’t seem to be applying any detergent.

Pre-clean the surface you’re working on. By blasting away thick surface accumulation, you’ll let the detergent reach the stains directly.

Check the label for any mention of a dwell time. Most cleaning chemicals work best if they’re allowed to soak in for a few minutes.

Applying soap from the bottom up will reduce streaking.

Get the Parts You Need for Your Pressure Washer

Billygoatparts.com doesn’t sell cleaning chemicals, but we do have everything you need to maintain and repair your Billy Goat pressure washer. We’re a certified dealer for Billy Goat as well as the manufacturers they work with to build their pumps including AR, CAT, Honda and Briggs & Stratton. Our search engine can show you parts that fit your specific model as well as factory diagrams and descriptions so you can see exactly what you’re ordering. We ship across the U.S. and Canada.

Posted in Uncategorized | Tagged , , | Leave a comment

Maintaining the Briggs & Stratton 675 Series

Briggs & Stratton 675 Series

The Briggs & Stratton 675 Series bridges the gap between the company’s consumer-focused engines and their Vanguard professional line. Over the years, Billy Goat has offered this engine on several of their smaller models including the KV600SP and MV601SPE lawn vacuums. Here’s what you need to know to keep this engine running reliably.

Maintenance Schedule

First 5 hours of operation: Change the oil.
Each day or every 8 hours: Check the oil, and clean the air intake, controls and muffler.
Every 25 hours or annually: Clean the air filter.
Every 50 hours or annually: Change the oil and clean the exhaust.
Annually: Replace the spark plug, air filter, pre-cleaner and fuel filter (if equipped).

Briggs & Stratton recommends cleaning the engine at least yearly so the fins can keep the engine cool, but you may need to clean it more frequently if you work in dusty conditions.

Exhaust

Exhaust components can remain hot up to a half hour after the engine has been used. Make sure these components have cooled completely before working on the engine.

The end of the exhaust will be covered by either a deflector or spark arrester. Remove this part and clean off any carbon buildup with a brush. A spark arrester can be fitted to any 675 Series to meet local fire codes.

Spark Plug

The electrode gap should be 0.20 inches (0.51 mm). When installing the plug, thread it in by hand, then torque it to 180 in-lbs.

Oil

The manufacturer recommends changing the oil while the engine is still warm. The engine oil can be drained by removing a plug on the base of the engine, or by tilting the engine and letting the oil pour through the dipstick tube. If you drain the oil from the dipstick tube on this engine, drain the fuel tank first. When you tip your equipment over, fuel in the tank can leak out.

Start by disconnecting the spark plug and removing the dipstick/filler cap.

If you’re draining the oil from the top of the engine, tilt your equipment on its back side with the dipstick tube facing down, letting the used oil flow into a catch can. If you want to drain the oil through the plug, it can be found toward the rear of the engine. The 675-Series holds 18-20 ounces of 10W40 motor oil.

Air Filter

The air filter cover is held closed by a slide lock on top which can be moved left or right to unlatch.

Depending on the version of the engine installed in your equipment, the air filter box will hold either a paper or foam filter element, and it may have a plastic pre-cleaner sandwiched between this element and the airbox cover. Here’s how you clean each part:

Pre-cleaner — Wash in water and a mild detergent and let it dry.

Foam element — Wash in water and a mild detergent. Once dry, soak the foam in clean engine oil and squeeze out any excess.

Paper element – Tap the element against a hard surface to loosen any collected dirt. Do not use pressurized air. This will force dirt into the pores, clogging the filter.

Fuel Filter

If your engine has a fuel filter, it will be fitted to the fuel line between the gas tank and the carburetor. Even if your engine doesn’t have a filter, it’s still a good idea to check the lines from time to time. If cracks are starting to appear, the fuel line should be replaced.

If your engine has a fuel shut off valve, make sure it’s closed. If it doesn’t, drain the fuel tank.

Squeeze the clamps on the sides of the fuel filter to slide them down the fuel line. Pull the lines off of the fuel filter and slide the new filter onto these hoses. Move the clamps back onto the fuel lines over the filter ends.

Engine Cleaning

Use a brush to sweep off dirt accumulation. Never use water directly to clean the engine. Spray from a pressure washer or garden hose can force water inside, contaminating the oil or saturating the intake, leading to engine damage.

Get Everything You Need for Your Billy Goat

Billygoatparts.com isn’t just a dealer for Billy Goat, we’re also a certified dealer for their manufacturing partners including Briggs & Stratton and Honda, so we’re able to offer replacements for every part on your equipment. We have factory parts diagrams and descriptions for all of these brands built into our search engine, making it easy to find the part you need, and we can ship your order to any address in the United States or Canada.

Posted in Uncategorized | Tagged , , | Leave a comment

Building a Lawn from Scratch

Building a lawn from scratch

Sometimes, you need to start from scratch. Heavy construction and poor maintenance can destroy your lawn, making it easier to replace it with new sod instead of trying to rehabilitate the soil. Here’s what it takes to establish a new lawn with sod from cutting out the old turf to getting the new grass to take root.

Preparing for the Job

Before you start slicing up your lawn, there are a few things you need to do to prepare:

— Get a soil test. This will let you fertilize the underlying soil to give your new grass a fresh start. Expect the test results to take at least two weeks to arrive.

— Order the sod. You should get about 5% more than what you’ll need to cover the yard. Make sure it’s delivered within 24 hours of being cut. It needs to be installed the same day.

— Contact your utility companies to locate and mark underground pipes and lines. If you have a lawn irrigation system, it will also need to be marked.

— Find a place that will take your turf. Most garden centers and soil yards will accept old sod.

Remove Old Sod

A motorized sod cutter like Billy Goat’s SC121H or SC181H will make quick work of large areas, while shovels and garden can remove soil in places cutter can’t reach. Don’t forget that the 181 can use both 18 and 12-inch blades: switching to a narrow blade can get the cutter into more areas, saving a lot of back-breaking work.

The blade of the sod cutter should be just low enough to remove the grass, roots and all. Cut a couple feet and lift up the sod. If you see bare soil underneath, the blade is the right height.

Cut sod should roll, but loose soil can come out in chunks. Have a cart or wheelbarrow handy to pick up the sod as you work. Do not till the old turf into the soil. This makes it harder to grade the soil and will encourage weed and fungus growth.

Grading

Till the soil to a depth 4-6 inches, adding fertilizer and nutrients according to the results of the soil test. Adding some organic matter can help with water absorption and give the microbe population a boost, leading to healthier grass. If you have an overseeder, you can use it to drop granular fertilizer on the soil.

Use rakes to flatten soil. Now is a good time to backfill low areas with soil to get an even surface.

Use a rake to comb out rocks, clods and other debris. Aim for a uniform height about an inch below surrounding concrete and edging. Once the new sod is down, the lawn should be even with these features.

Water the soil, getting it moist but not muddy. The soil will need to sit exposed for one to two days before installing the sod.

Laying the Sod

Seams should be offset by at least a foot and a half to keep the sod from peeling up. To cut sod, use a carpet knife to cut from the soil side up into the grass. This will leave a flat edge.

Start by place a perimeter layer around buildings, curbs, sidewalks, and driveways. Fill in the yard, running sod across slopes. If the lawn is flat, lay down sod in the longest lengths possible. Butt seams together, pushing them tightly to remove any gap. You may need to lift and fold the ends in together.

Work toward the middle of the lawn, using small pieces for the center. The fewer seams you have near the edge of the lawn, the less likely the sod will dry out.

Once the yard is covered, fill in gaps with soil and use a lawn roller to push the underside of the sod against the underlying dirt.

Connecting the Sod to the Soil

Stop all lawn traffic for three weeks, including kids and pets. If possible, avoid any foot or vehicle traffic for 6 weeks to give the sod the best chance to take hold.

Give the lawn short, frequent watering to get roots started, transitioning to longer, heavier watering to encourage deep root growth. The top three to four inches of soil should remain moist over the next month or so.

Wait at least a month before mowing the yard. At this point, the grass should be at least three inches tall. Using a walk-behind mower will be easier on the sod.

Everything You Need for Your Billy Goat Turf Equipment in One Place

Billygoatparts.com is a certified dealer for Billy Goat and their manufacturing partners, so we’re able to ship anything you need for your equipment to any address in the U.S. or Canada. Our site has factory diagrams and descriptions built in, letting you find exactly what you need for your specific model.

Posted in Uncategorized | Tagged , , , | Leave a comment

How and When to Replace Aerator Tines

Billy-Goat-Aerator

The tines on your Billy Goat aerator cut into the soil to relieve compaction, so their condition determines how effectively you can aerate. How do you know when it’s time to replace the tines, and how do you do it?

When Should I Replace a Tine?

Tines are made from alloys that are self-scouring, so they always have a sharp edge. However, impacts with rocks can roll the edge inward, widening the area that makes contact with the soil. Hard impacts can bend the tine, so it can’t punch through turf effectively. Either way, the tine will be less effective. If you avoid these problems, metal wear will eventually decrease the tine length. As a general rule, tines should be replaced if they’re one inch shorter than they were when new.

For the best performance, check the condition of the tines before you put your aerator to work. To increase the life of your tines, clean them after every use.

Replacing a Single Tine on AE400 Series and AET Towable Aerators

Chock the wheels before working any towable aerator.

1. Raise the tines to the transport position.
2. Loosen the outermost nut and carriage bolt followed by the innermost nut and carriage bolt. Do not remove these parts.
3. Use a flathead screwdriver or small pry bar to push apart the tine plates.
4. Slide the tine out of the reel.
5. Slide in the new tine and tighten the innermost carriage bolt.
6. Tighten down the outermost carriage bolt.

Replacing Multiple Tines on AE400 Series and AET Towable Aerators

1. Support the tine reel and remove the two pairs of bolts and nuts holding the tine reel bearings. Remove the four bolts and nuts, two on each side, holding the tine reel bearings in place.
2. Lift the reel up and move it to the side to separate it from the drive chain.
3. Remove the cotter pin and nut at the end of the tine reel shaft.
4. Remove the tine rows and spacers to access and replace the worn tines, keeping track of the order the spacers go on the tine reel.
5. Reassemble the tine reel in the order it was assembled.
6. Tighten the nut that holds the tines and spacers on the shaft, torquing it to 100 lb-ft. Try to move the tine rows by hand to make sure they’re fixed in place.
7. Slide the tine reel back into the aerator, fitting the drive chain over the cog.
8. Reinstall the bolts and nuts that hold in the tine reel bearings.

Replacing Tines on the AE1300 Series

On this model, Billy Goat recommends replacing tines in pairs to keep the arms balanced.

1. Remove the 3/8 inch bolt that passes through the tine arm assembly.
2. Pull out the worn tines.
3. Inspect the bolt. If it’s damaged, replace it with a Grade 8 bolt with the same thread pitch.
4. Place a washer on the tine holder and the new tine on the bolt. Install these parts on the tine arm with the open side of the tine facing the back of the aerator. Once the bolt is through the tine arm, repeat the process, sliding on another tine and tine holder.
5. Once everything is in place, install the washer and lock nut. Over-tightening the nut can bend the tine holders.

Get the Parts You Need to Keep Your Equipment Running

Billygoatparts.com has everything you need for your aerator including tines, small parts, and major components, and we can ship those parts to any address in the US or Canada. Our search engine can find parts based on your aerator’s model and serial number, and it can show you where each part fits on your machine using factory diagrams. Need engine parts? We’re also a certified dealer for Honda, Subaru and Briggs & Stratton so we can provide you with replacements for everything on your Billy Goat equipment.

Posted in Uncategorized | Tagged , , , | Leave a comment

Aerating Pasture

Billy Goat Tow Behind Aerator

Aerating is a normal part of lawn care, but its use isn’t as clear for pastures. Mature grass, varying vehicle traffic and an emphasis on yields over appearance change the rate of compaction and the best strategies to deal with it. How do you know when your pasture should be aerated, and what problems can be mistaken for compacted soil?

Do I Need to Aerate?

In most cases, probably not. Lawns need frequent aeration because they’re often subject to heavy foot and vehicle traffic. Couple this with grass that has shallow roots and new growth from overseeding, and it doesn’t take much surface compaction to cause issues.

Pasture can also experience compaction from heavy vehicle traffic and cattle trampling. This creates a hardpan at the surface of the soil. However, long-established pasture grasses will have root systems that extend past this area and will be mostly unaffected. Compaction resistance varies between grass varieties, but Bahiagrass stands out for being nearly impervious to surface compaction. Remember that unlike a lawn, these grasses may have had decades to establish root systems. Aerating any pasture will cause a brief increase in growth by redistributing soil nutrients, but total yields may be lower than normal if compaction wasn’t an issue.

How can you tell if you have compacted soil? Results from penetrometers can vary significantly based on soil moisture, so it’s better to look for signs that the roots aren’t penetrating the soil and for soil conditions that can lead to compaction, particularly heavy clay soil.

Do I Have Clay Soil?

Unlike climate, soil makeup varies widely across the country. While you may be able to find your land on a soil map, you can be sure of your soil’s makeup by testing it directly.

The simplest test is to simply dig up some dry soil, wet it, and squeeze it in your hand. Lift up one end of the soil ball. If it stays together, it’s clay soil. If it crumbles, it’s sandy soil.

To get more information on soil composition, get a quart-size mason jar and add a half cup of dry soil and a tablespoon of salt. Add water until the jar is about two-thirds full, screw on the lid, and shake it for a minute or two. Let the jar sit overnight.

The soil should separate into three distinct layers: the bottom is sand, the middle is silt, and the top is clay. By measuring each layer, you can estimate the proportion of clay in your soil. If over half of the soil is clay, you have heavy clay soil.

Why does the soil settle this way? It has to do with weight: sand has the largest particles, while clay has the smallest. The smaller the particle size, the easier it is for the soil to collapse on itself, leading to compaction and drainage problems.

Problems that are Mistaken for Compaction

If your pasture has sandy soil, poor drainage is usually the result of two causes:

Dry summer weather can lead to soil aggregation. The soil is still permeable, but it’s hard because it’s dry. This problem should go away with rain or irrigation.

Thatch buildup can keep water from reaching the soil, causing the same issues as compacted soil. In extreme cases, roots can grow into the thatch, making the grass weaker and more susceptible to problems with hardpan.

Tips for Aerating

Using a towable AET Series trailer is a lot like using a walk-behind aerator: the ground needs to be moist for the best performance, and it takes two passes in opposing directions to get maximum relief.

If you have a folding model, no additional weight is needed if the wings are folded up. If the wings are folded down, add cinder blocks or sandbags to the top of the aerator to help push down the tines. Modular units come with jugs that should be loaded on top of the aerator and filled with water before use.

Have a unit with swiveling tines? Keep the tine stars locked once the trailer is lined up for a pass, then unlock the tines when it’s time to turn. If the tines are fixed, lift them out of the ground before turning. Otherwise, the tines will tear through the soil as they’re forced to spin faster than they need to match the ground speed.

Keep Your Equipment Working

Billygoatparts.com is a Billy Goat dealer, so we’re able to offer replacement parts for anything on their equipment from tines to major components. Our site can show you parts that fit your specific model along with factory parts diagrams and descriptions, making it easy to find exactly what you need. We ship across the US and Canada.

Posted in Uncategorized | Tagged , , | Leave a comment

Stopping Brown Grass

Stopping Brown GrassWhen trying to keep a well-manicured lawn, there’s nothing quite as frustrating as having brown grass. Unfortunately, this is merely a symptom that can be caused by anything from poor mowing practices to fungal infections. Here’s how you can find the root cause and fix it.

Dull Mower Blades

When a dull mower blade strikes the grass, it tears off the top instead of slicing it. This damages the grass and leaves it open to infection. If you see jagged edges on the tips of the grass, it’s time to sharpen your blades.

Scalping

If the mower is set too low, the blades will cut so much of grass that it will have a hard time recovering.
Low cutting will also slice into crowns, damaging the base of the plant and its connection to the root system.

Most turf grasses are healthiest if they’re kept to a length of 1.5-2 inches, while some varieties like tall fescue and St. Augustine need to be kept between 2-3 inches. When mowing, the grass will recover faster if you trim no more than 1/3 of the total height at one time.

Compacted Soil

If the soil is too hard for roots to penetrate, the grass won’t get the nutrients it needs. It’s common for pooling water on compacted soil to grow moss alongside brown grass. Compacted soil on slopes will let water slide off, causing erosion along the base of the hill that further damages the root system.

Thatch

If this surface layer of dead plant matter is over ½ inch thick, the amount of air and water that reaches the root system is reduced and those roots can grow up into the thatch.

Mulching grass will boost the growth of microorganisms, and in turn these tiny creates will eat the thatch, keeping it from getting too thick. Thicker growth will need to be removed with a dethatcher.

Dormancy

High heat and drought conditions will cause grass to go dormant, turning it brown but keeping it alive. If this happens, wait until temperatures drop before watering the grass. Trying to bring it out of hibernation too soon can leave the grass unprotected against heat. To prevent dormancy, keep the lawn watered and let the grass grow taller to act as a sunshade.

Fertilizer Burn

The nutrients in fertilizer come in the form of salts. Add too much, and these can suck the water out of plants, leaving them brown and dry. Burn can appear a day or two after fertilizing with standard fertilizers, or as long as two weeks later with slow release fertilizers.

To prevent burn, get a soil test so you can apply exactly what the plants need and nothing more. Slow-release formulas are less likely to cause burn than standard fertilizers.

To reverse the effects of burn, scoop up as much of the fertilizer as possible, and keep the soil moist to wash away excess nutrients.

Animal Waste

Dog urine, bird feces and anything else that comes out of the rear end of an animal is high in nitrogen, causing localized burn. You can reduce the effects from your pets by keeping them hydrated, having them pee in different parts of the yard and watering those areas to dilute the nitrogen.

Fungus

Brown spots not caused fertilizer burn are usually the result of mold. There are four types of mold that are common on lawns, each with its own symptoms:

  • Brown patch – Brown spots covering an area three to 16 feet in diameter
  • Take-all root rot – Brown-yellow spots with small black dots on the underside of grass blades
  • Dollar spot – Small brown spots under 6 inches in diameter
  • Snow mold – Grayish patches that show up in early spring

Managing soil compaction and thatch build-up will keep the soil from getting overly moist, preventing the spread of fungus.

Dead Sod

There’s not much you can do if your newly-laid sod dies off, but there are ways you can ensure its success. This starts by adding fertilizer to the soil before laying the sod. Once the sod is on the turf, water it daily for the first week to encourage shallow root growth, then slowly increase time between watering to encourage deeper root growth.

Avoid vehicle and foot traffic, and wait at least 48 hours between the last watering or rain before the first mow. If the ground is disturbed before the roots have worked their way into the soil, the sod can separate from the underlying soil.

Keep Your Equipment Ready to Manage Lawn Problems

If you own an aerator, sod cutter, dethatcher or anything else made by Billy Goat, you can get the parts and accessories you need from www.billygoatparts.com. We’re a certified dealer for Billy Goat as well as the engine and equipment manufacturers they work with, so we’re able to offer replacements for everything on your equipment. We ship to both the U.S. and Canada.

Posted in Uncategorized | Tagged , , , | Leave a comment