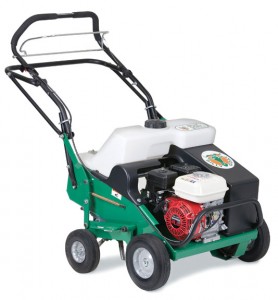
 Known for their tough construction and lifetime durability, even Billy Goat’s aerators occasionally suffer from minor problems that demand a thorough troubleshooting approach. Thanks to the company’s focus on easy equipment maintenance and repairs, most of these issues are easy to diagnose and repair at home without the assistance or service of an authorized technician. With an abundance of available OEM parts and common troubleshooting tips, assessing and solving common aerator problems should take only a few moments.
Safety Matters: What to Know Before Getting Started
Though it’s pretty simple to troubleshoot a Billy Goat aerator and solve any issue that arises, safety is still a top concern that should be considered before starting the process. If the aerator was in use when the problem surfaced, allow it to cool off for at least an hour prior to diagnosing any issues. Also make sure that the aerator’s spark plug is disconnected to prevent unwanted sparks or ignition. Use gloves when handling the tines or working in close proximity to them, as they could cause severe cuts to the hands and arms in the absence of suitable protection. With these considerations in mind, troubleshooting can proceed.
Common Troubleshooting Issues for Billy Goat Aerators
There are four common issues that affect Billy Goat’s lineup of aerators. All of these issues are easy to diagnose with a few troubleshooting steps. Better yet, each issue can typically be handled with a few replacement parts that restore like-new operability to the aerator in a matter of moments.
The Equipment Slips or Won’t Self-Propel
The self-propulsion feature is a major selling point of Billy Goat aerators but it can also be a major area of concern when maintenance issues arise. If the equipment slips during use, or won’t self-propel at all, the problem typically is the result of drive belt or drive cable issues. First, check the drive belt to make sure that it is fully seated in both pulleys that control its operation. Next, make sure that keys are installed on both sides of the aerator’s axles.
If the drive belt is not the source of self-propulsion problems, consider the drive cable as a second source of error. The cable’s tension may be below the recommended level for safe operation. Adjust the cable to the proper tension level as described in the operator’s manual. The equipment should now propel with ease.
The Aerator Creeps During Use or Does Not Stop Propelling Forward
An aerator that doesn’t stop moving, even when the drive system is disengaged, represents a serious safety risk. The most common cause of a problem like this is the drive cable. If the cable has an excessive amount of tension, it will be unable to fully disengage the drive mechanism. Adjust its tension in accordance with the operator’s manual and try again. Another component worth checking is the belt finger cab, which should be 1/8″. Before concluding the troubleshooting process, ensure that both the drive idler and bail stop have free range of movement. If not, make adjustments to these components so that safe operation can be resumed.
The Drive Belt Falls Off
The first thing to check in this instance is simply the size and length of the drive belt. If the belt has become stretched, no amount of repair will solve the issue until a new belt is installed in its place. If the belt’s size is not excessive, there are several other areas of concern worth looking into. Make sure that the idler pulleys are aligned with the drive shaft and ensure that the belt finger is rotated to the back of the engine pulley. Finally, double-check that all three washers are installed in each pulley located within the idler arm.
The Chain is Out of Alignment
A chain that has fallen out of alignment can easily derail aerating work around the home. The chain is kept in alignment by a spacer that sits on the left side of the tine reel between the equipment’s bearing and tine sprocket. Check to make sure this spacer is in place. If it is not, secure an OEM replacement spacer from Billy Goat to solve this problem.
Make Maintenance Easier with OEM Parts from BillyGoatParts.com
The best way to fix common problems with a lasting repair is to use OEM Billy Goat parts. These parts, made in the same factories as new Billy Goat aerators, are simply of a higher quality than generic replacements. They must meet Billy Goat’s tough quality control standards and inspections, and they are sold only by the company’s authorized retailers. For a full selection of OEM parts for Billy Goat’s aerators, look no further than BillyGoatParts.com. With intuitive parts search tools and parts for each aerator model, this site will make quick work of troubleshooting and common repairs.
