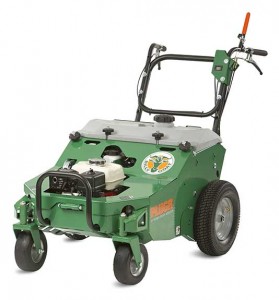
 The PL2501 PLUGR may be Billy Goat’s most advanced aerator, but like everything else from the company, it’s designed to be easy to work on. Here’s everything you need to know to set up your machine and keep it running.
Set Up
The PL2501 comes fully assembled. Before using your aerator, be sure to add oil to the engine.
Tine Replacement
1. Loosen the jam nut and unscrew the tine.
2. Replace the tine, threading it in as much as possible.
3. Tighten the jam nut, torqueing it to 100 ft-lbs.
Drive Belt Tension
If the belt slips during use, twist the cable adjuster next to the controls to take up slack on the clutch cable. Overtightening will increase belt wear.
Drive Belt Replacement
1. Slide the tine drive belt off of the engine pulley. Push the loose end toward the engine to keep it out of the way.
2. Insert a 3/8 inch socket extension into the square hole in the idler arm. Use a ratchet or breaker bar to turn the arm counter-clockwise. Once the tension is off of the belt, slide it off of the idler pulley.
3. Disconnect the idler spring from the eye bolt and tilt the idler arm toward the engine.
4. Remove the belt, taking note of how it’s routed.
5. Install the new belt. The angled side of the belt should seat into each pulley.
6. Put the end of the idler spring back through the eye bolt.
7. Turn the idler arm clockwise to reset the tension.
8. Slide the tine drive belt onto the engine pulley.
Tine Plate and Swing Arm Busing Replacement
Use an impact wrench to remove and tighten the bolts.
1. Remove the bolt connecting the lift link and swing arm support bar.
2. Unscrew the four bolts on the ends of the bar. Remove the swing arm support bar.
3. Unscrew the four bolts that hold on the tine plate. Remove the plate.
At this point, ff you are replacing the plate, you can fit the new tine plate and put the aerator back together following the previous instructions in reverse order. Continue if you’re replacing the swing arm bushing:
4. The swing arms are located next to the wheels. Remove the bolts holding the swing arms onto the machine, then remove the arms.
5. Use a ½ inch pin or shoulder bolt to push the new bushings into the swing arms.
Reinstall in reverse order.
Chain Tension
Each rear wheel is driven by its own chain. Both chains should be adjusted at the same time. If possible, lift up the rear of the machine for easier access.
1. Use an impact wrench to remove the three bolts holding the shield in place. One bolt is on the side of the aerator just in front of the wheel, one is on the underside in front of the wheel, and one is on the back corner of the machine. Slide the shield down and toward the center of the aerator to remove it.
2. Use a pair of ¾ inch wrenches on the idler slot bolt to adjust the tension. Loosen the bolt, then push it up to increase tension or down to decrease it. Tighten the bolt.
3. Reinstall the cover.
Repeat the process for the other chain.
Purging Air from the Transmission
If the aerator isn’t moving as fast as it should, there may be air in the hydraulic system. Here’s how to remove it:
1. Lift the rear of the aerator off the ground and support it with jack stands.
2. Remove the cap on the expansion tank. Add 10W30 or 20W50 oil to the “Full Cold” line.
3. Move the bypass lever next to the tank to “Free Wheel” and start the engine.
4. Engage the forward level for 5 seconds and release, then do the same with the reverse lever. Repeat four or five times.
5. Set the bypass lever to “Drive Enabled.” Add oil to the transmission tank if needed, then repeat the previous step.
6. Repeat this entire process until there are no bubbles in the oil tank, and the wheels move full speed in forward and reverse when the levers are engaged. Set the bypass lever to “Drive Enabled.”
Cable Adjustment
The clutch cable and auto-engage cable are located on the left handle. The cable closest to the handle is the auto-engage cable. Adjust the clutch cable if the clutch doesn’t want to engage or won’t disengage. Adjust the auto-engage cable if the tines don’t drop easily.
To adjust either cable, loosen the two lock nuts, then slide the cable up or down to adjust tension. Tighten the nuts.
Need Something for Your PLUGR?
Billygoatparts.com is a certified dealer for Billy Goat and their manufacturing partners, so we carry everything you need for your PL2501 aerator. Our site can show you factory diagrams and parts descriptions, making it easy to find exactly what you need, and we can ship your order to any address in the U.S. or Canada.
