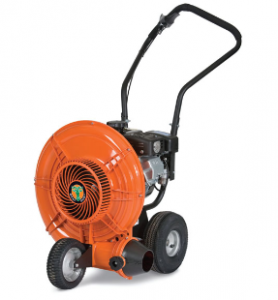
As we head into winter, now is a good time to look over your Billy Goat wheeled blower to make sure it’s ready for the next leaf clearing season. Here’s what you need to know to store your blower, maintain it and fix common problems.
Engine
For detailed information on maintaining your blower’s engine, check the engine manual included with your equipment. Moving leaves and debris is dusty work, so instructions should be followed for maintaining the engine in these conditions. This includes more frequent cleaning of the air filter and, in some models, more frequent oil changes.
In rare cases, vibration can be caused by a loose engine. Check the tightness of the bolts around the engine base to ensure it’s fixed to the blower.
When putting the blower into long-term storage, Billy Goat recommends draining the fuel system regardless of the engine model or manufacturer. For storage under three months, the fuel can be left in the tank if it has been treated with a stabilizer. Run the engine for 10 minutes to ensure that the treated gas has reached the carburetor.
Loosening Debris
Debris build-up inside the impeller housing can cause turbulence and balance issues that can lead to vibrations, while build-up around the nozzle cone can prevent the Aim-N-Shoot lever from moving. Debris can be cleaned out by directing high-pressure air toward the cone or intake screen using either a backpack blower or a compressed air line.
Impeller Removal
Billy Goat recommends inspecting the impeller every 100 to 150 hours of use, and it should be inspected if there is an abnormal amount of vibration that is not being caused by debris build-up.
1. Let the engine cool completely and disconnect the spark plug wires to prevent an accidental start.
2. Remove the front cover. On metal housing models, there will be 5 or six sheet metal screws that need to be removed to take off the cover and screen. On plastic housing models, there are 10 or more nuts and bolts along the perimeter of the housing that need to be removed.
3. Remove the impeller bolt, lock washer, and washer. Slide the impeller off of the drive shaft.
If you have a plastic impeller and it doesn’t want to slide off, do not pry on it. Instead, apply some penetrating oil onto the shaft and get a ¾ by 16×3 inch or longer bolt. Screw this bolt into the impeller nut by hand until the bolt is against the shaft, then use a wrench to slowly tighten the bolt. This should separate the impeller from the shaft.
4. Reinstall in reverse order. Tighten the impeller bolt to the torque specified in your owner’s manual, typically 50 or 60-inch pounds.
Aim-N-Shoot Lever
If the lever is sticking and any debris have been cleared out around the nozzle, check the manual adjustment knob and nut, making sure they aren’t over tightened. Apply a silicone lubricant to the pivot points in the system including the area around the nozzle cone, the cable and the lever.
Tires
Rear tires should be aired up to 20 PSI. If your model has a pneumatic front tire, it should be aired up to 24 PSI.
Getting Parts for Your Blower
Whether you have the latest Force composite blower or one of Billy Goat’s older metal impeller models, you can get everything you need to keep it running from www.billygoatparts.com. We’re not just a Billy Goat dealer, we’re also a certified dealer for Honda, Subaru, and Briggs & Stratton, letting us provide you with both equipment and engine parts. We ship to the U.S. and Canada.

